
Tutorials
Tutorial: A Wheel That Spins on an Axle
This tutorial builds a wheel that spins on an axle in the True Robotics Design Playground. You make an axle base in Basic mode, start a New Assembly, insert the base and the wheel hub, then add a Revolute mate from the axle to the hub's hole. Drag the wheel and it spins. It takes about ten minutes after the wheel hub tutorial.
Read what happens in this video
We click New Assembly, say Yes to autosave and name the file Spinning Wheel. Insert brings in Axle Base first, so it is fixed, then Wheel Hub. Shift and R starts a Revolute mate: we click the axle near its top, then inside the wheel hub's axle hole, click Flip so the hub points up, and click the check. Dragging the wheel spins it on the axle.
The steps in the video:
- Click New Assembly. It opens right away as My Assembly.
- Click Yes, autosave. Name the file Spinning Wheel and click Save.
- Click Insert in the toolbar.
- Click Axle Base first, then Wheel Hub.
- Click Insert 2 parts. Axle Base came in first, so it is fixed in place.
- Press Shift + R for a Revolute mate.
- Click the side of the axle, near its top.
- Click inside the axle hole of the wheel hub.
- Click Flip so the hub points up.
- Click the green check to finish the mate.
- Drag the wheel to spin it on the axle.
You will learn: starting a New Assembly, inserting parts you made, why the first part is fixed, the Revolute mate, Flip, and dragging a part to test how it moves. Time: about 10 minutes, after the wheel hub tutorial.
How do I make a wheel spin on an axle?#
Make the wheel hub Follow the robot wheel hub tutorial. When the app asks Would you like to autosave this project?, click Yes, autosave and name the file
Wheel Hub, so the part is saved for the assembly. Its axle hole is 1/4 inch wide.Start the axle base Back on the home screen, click New Project, then Basic. Click Yes, autosave and name it
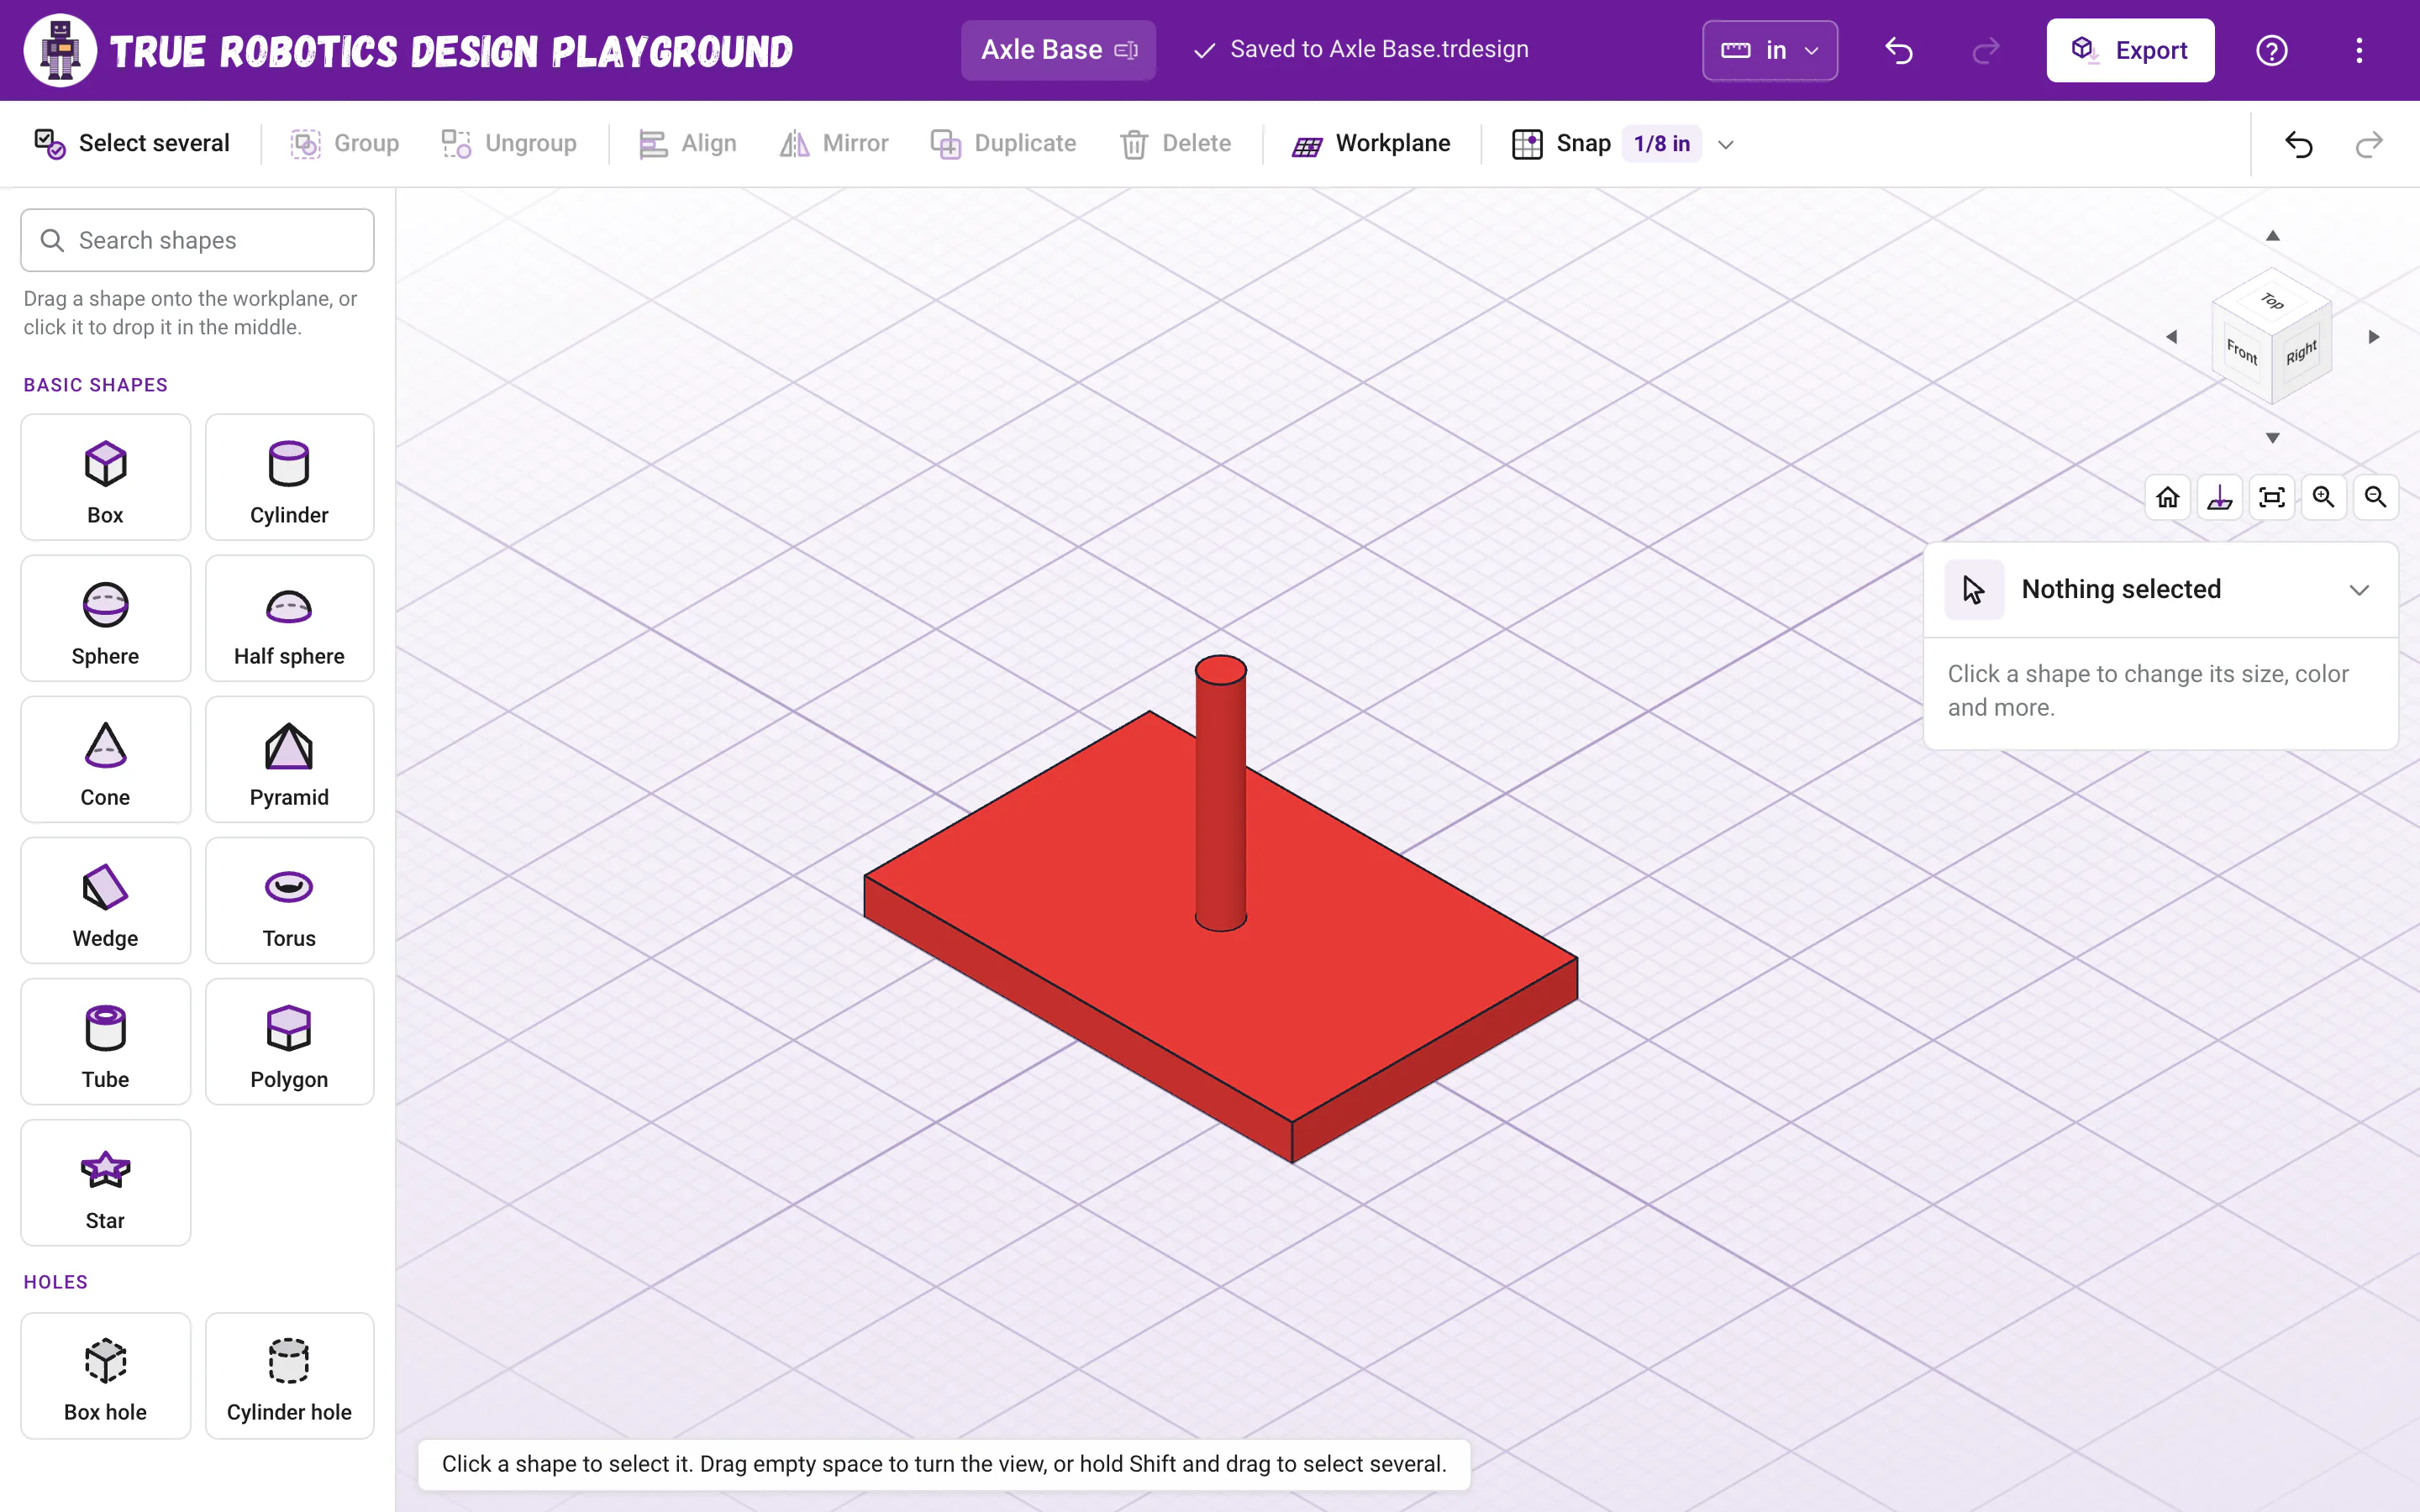
Axle Base.Make the base plate Drag a Box onto the middle of the workplane. In the settings panel, type W
3, D2and H1/4, pressing Enter after each one.Stand up the axle Drag a Cylinder onto an empty spot. Type W
1/4, D1/4and H1 1/2, then X0, Y0and Z1/4. The axle stands straight up in the middle of the plate.Group the axle base Click an empty spot in the view, press Ctrl+A, then Ctrl+G. The plate and the axle are now one part. Click the three dots in the purple bar and choose Back to projects.
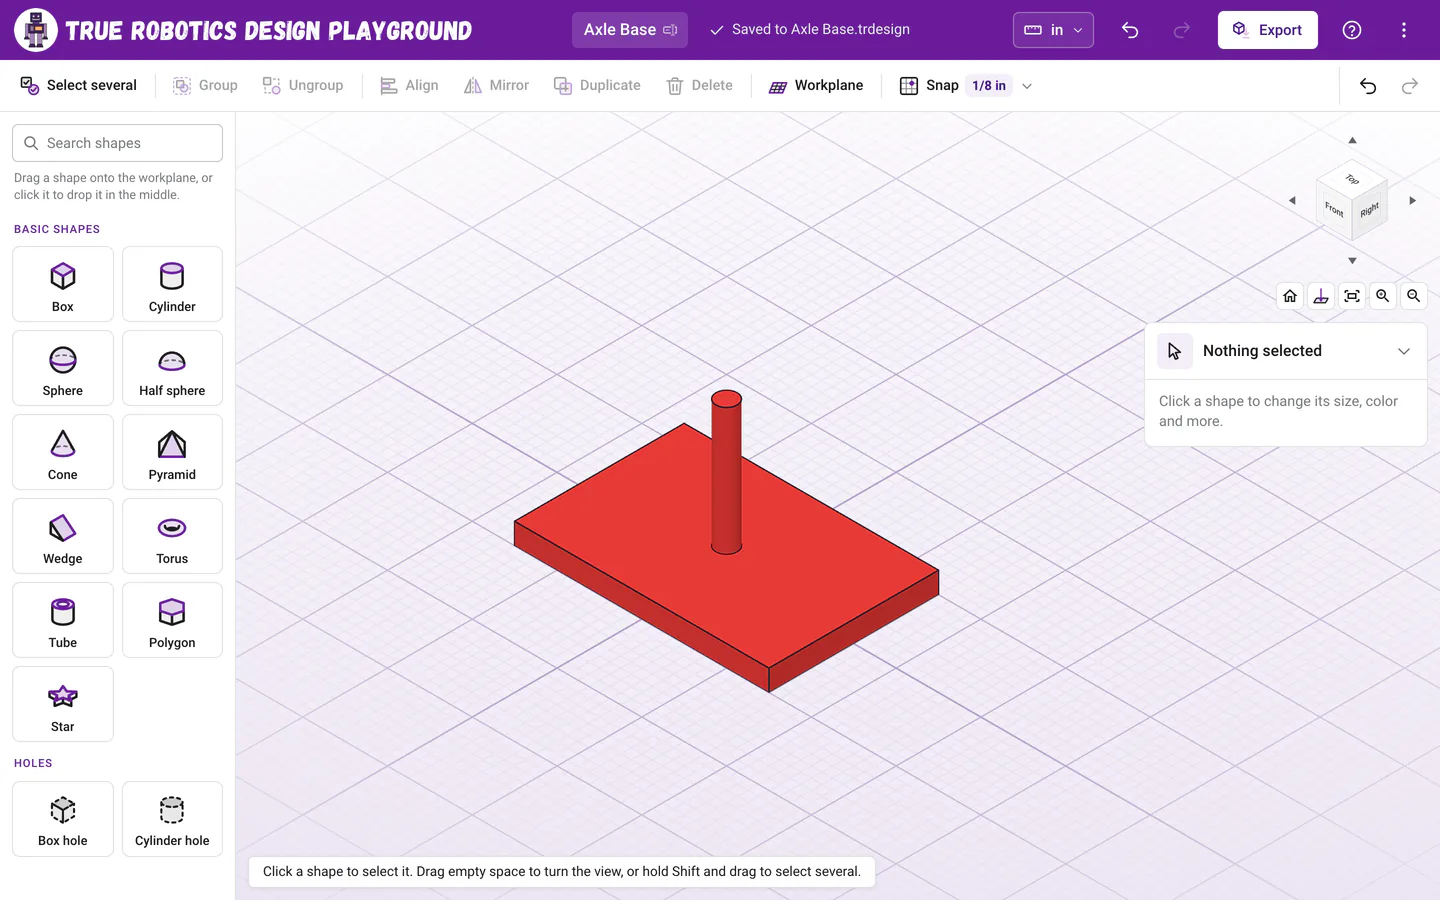
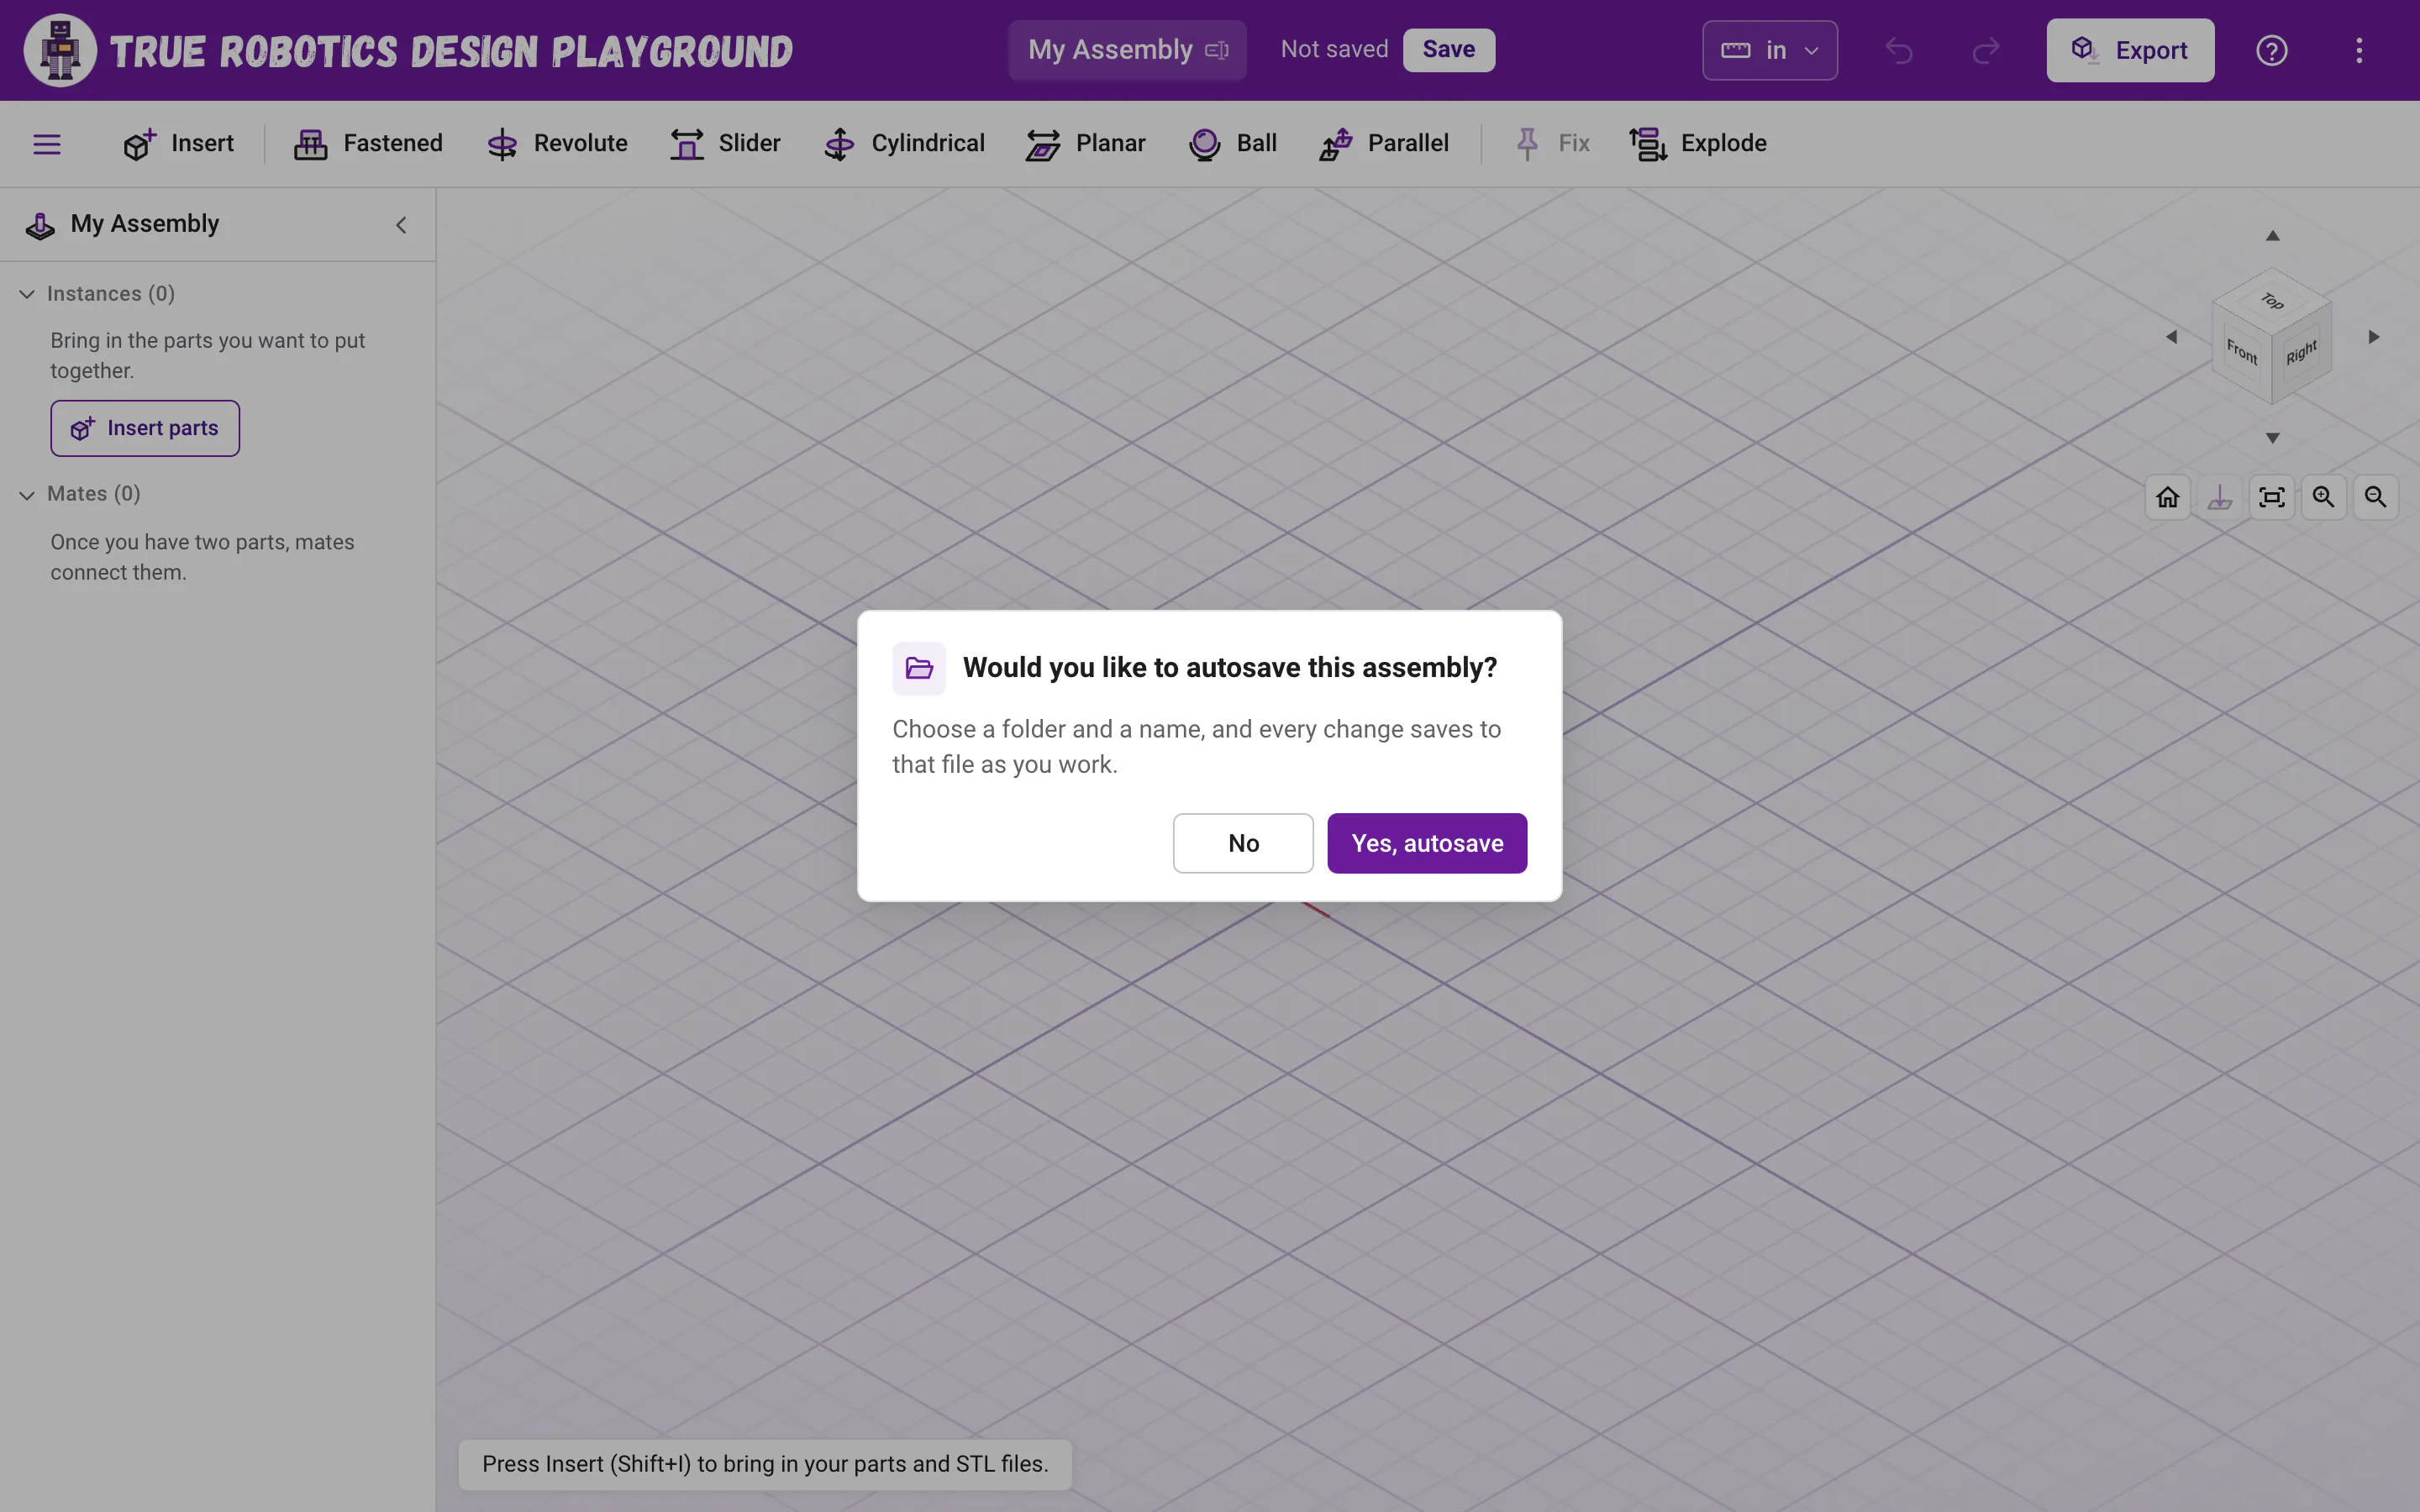
The axle base: a 3 by 2 inch plate with a 1/4 inch axle, grouped into one part. Start a new assembly Click New Assembly (or press A). Click Yes, autosave and name it
Spinning Wheel.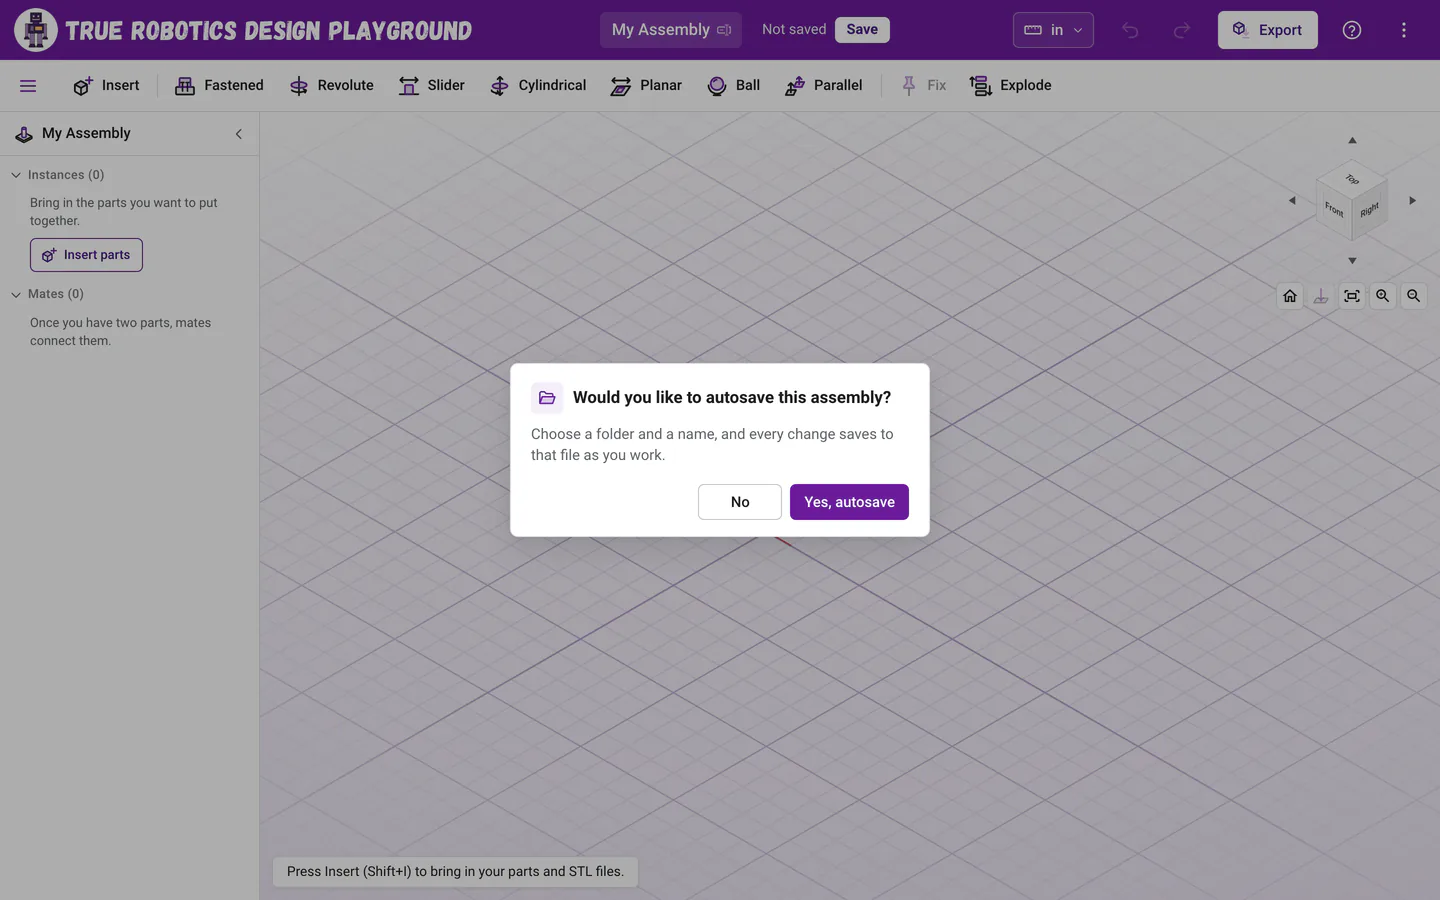
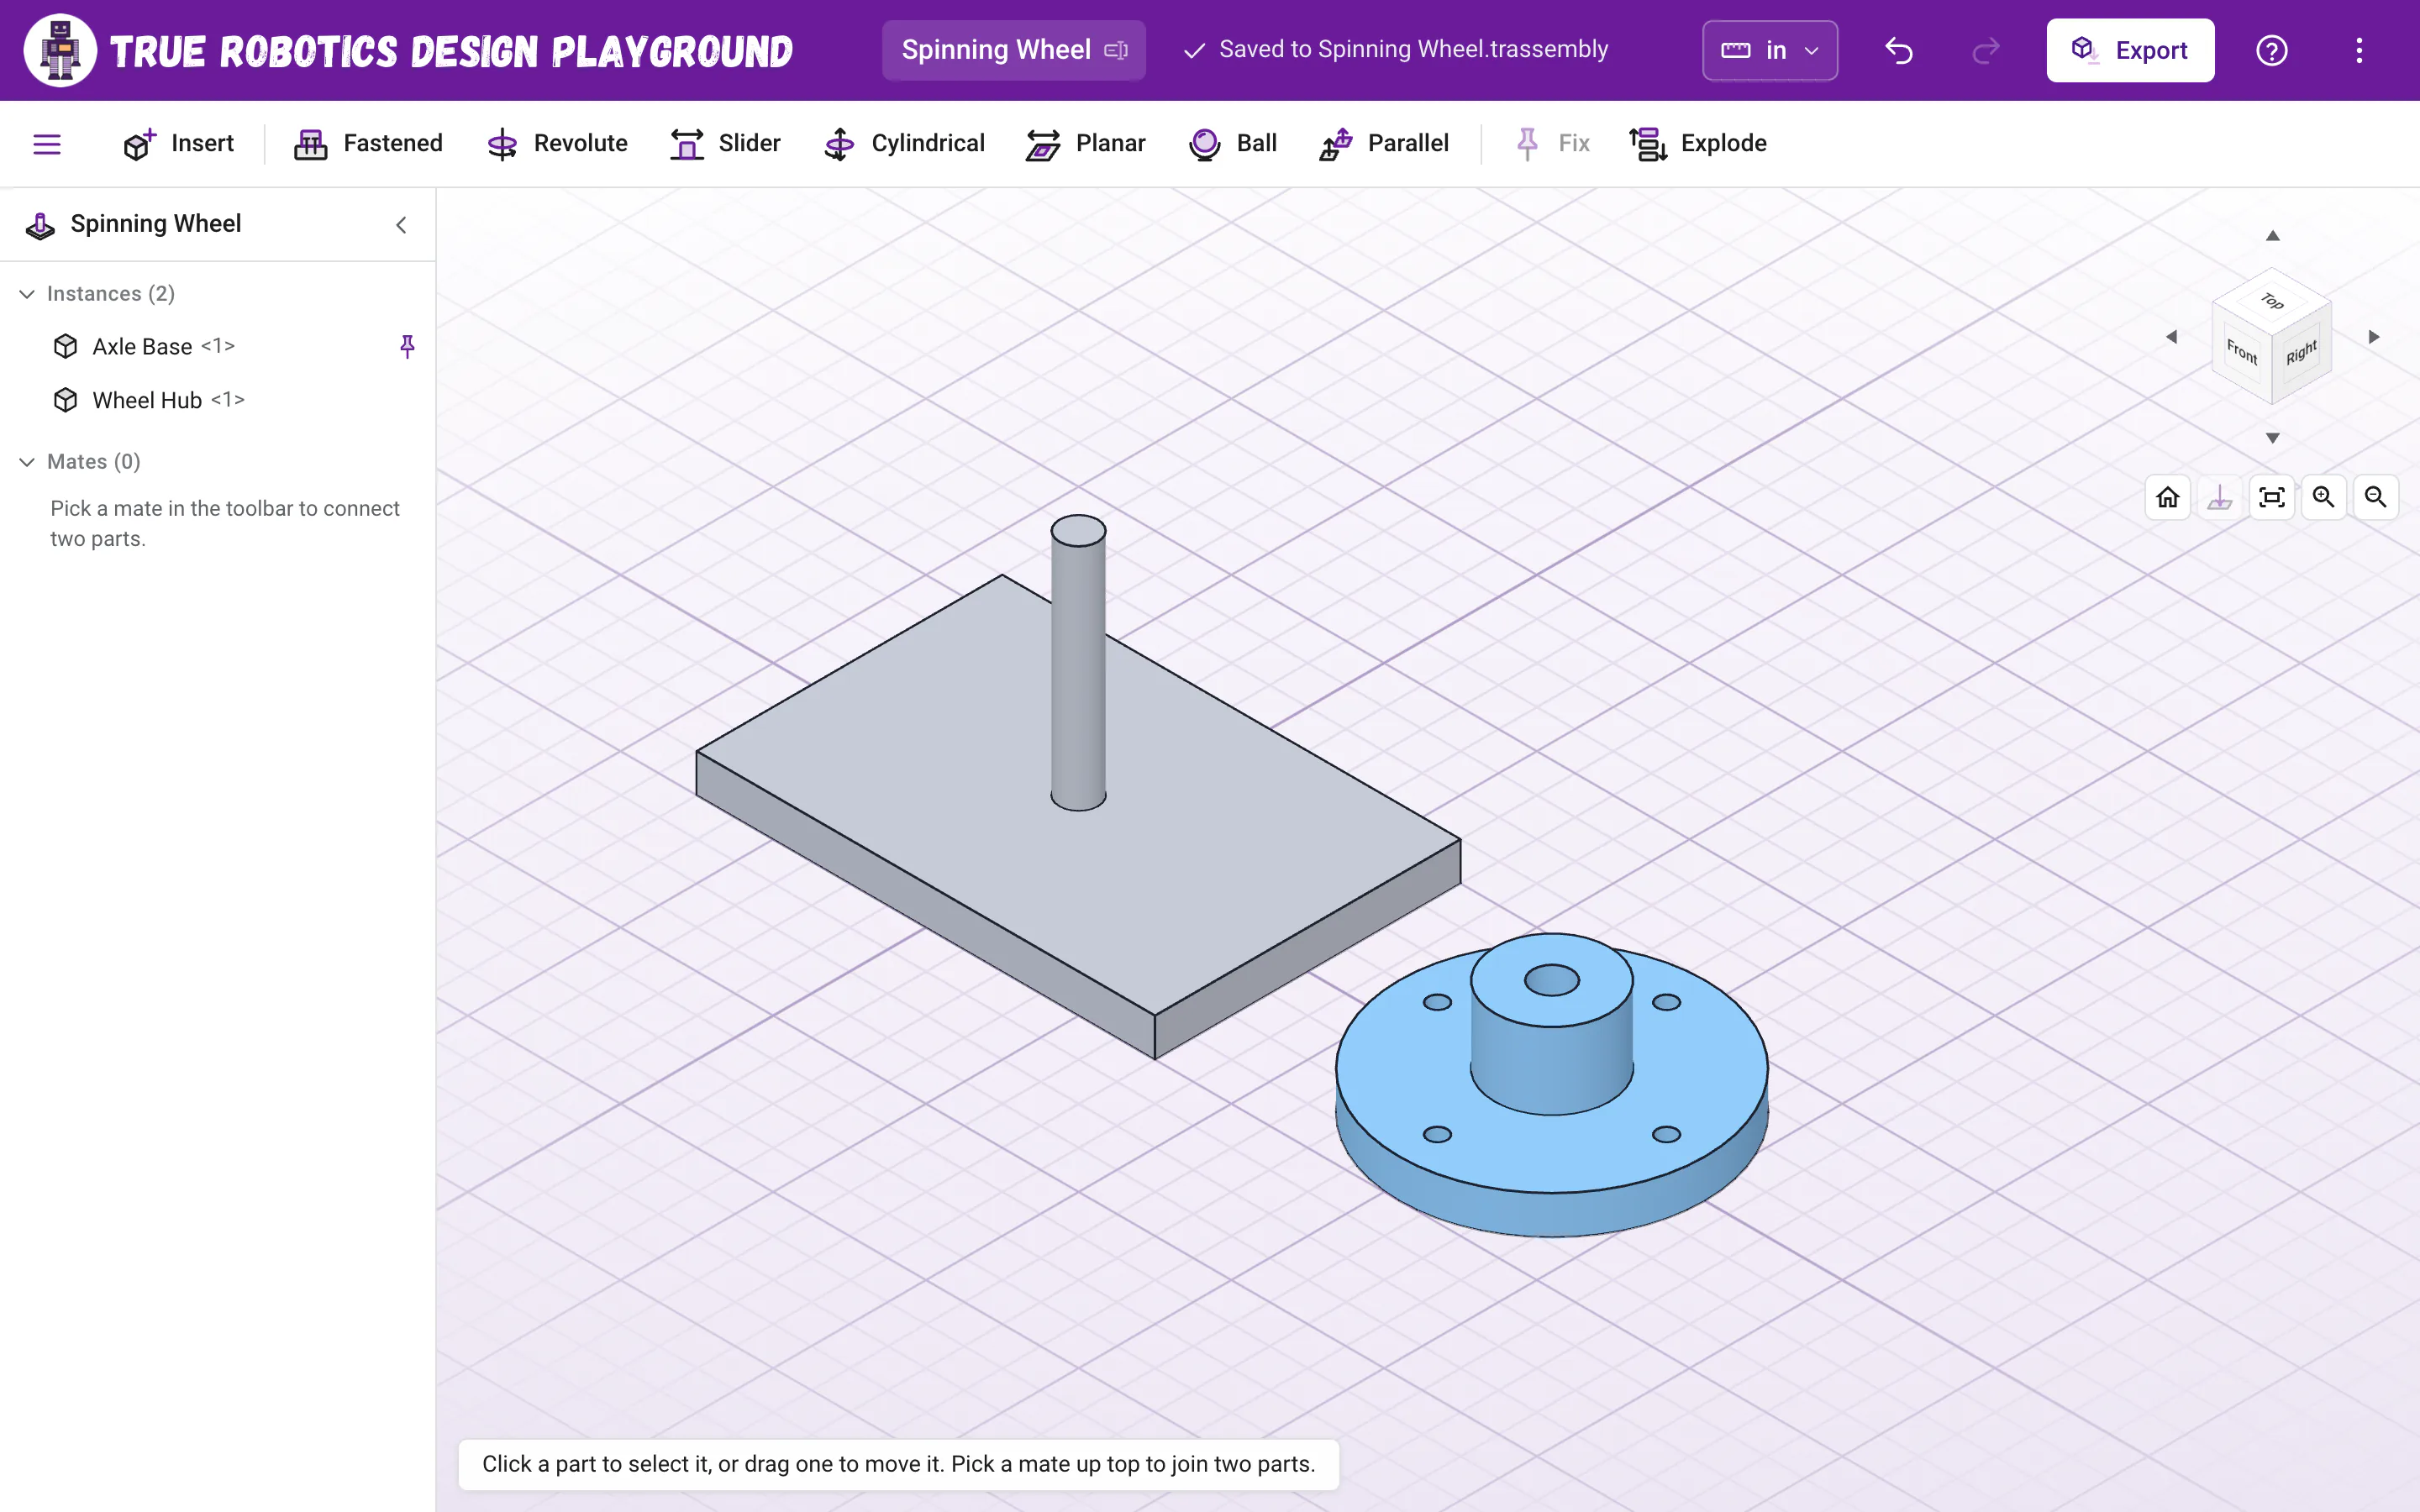
New Assembly opens right away and asks about autosave, just like a new part. Insert both parts Click Insert (or press Shift+I). Click Axle Base first, then Wheel Hub, and click Insert 2 parts. Axle Base came in first, so it is fixed in place, and Wheel Hub stands beside it.
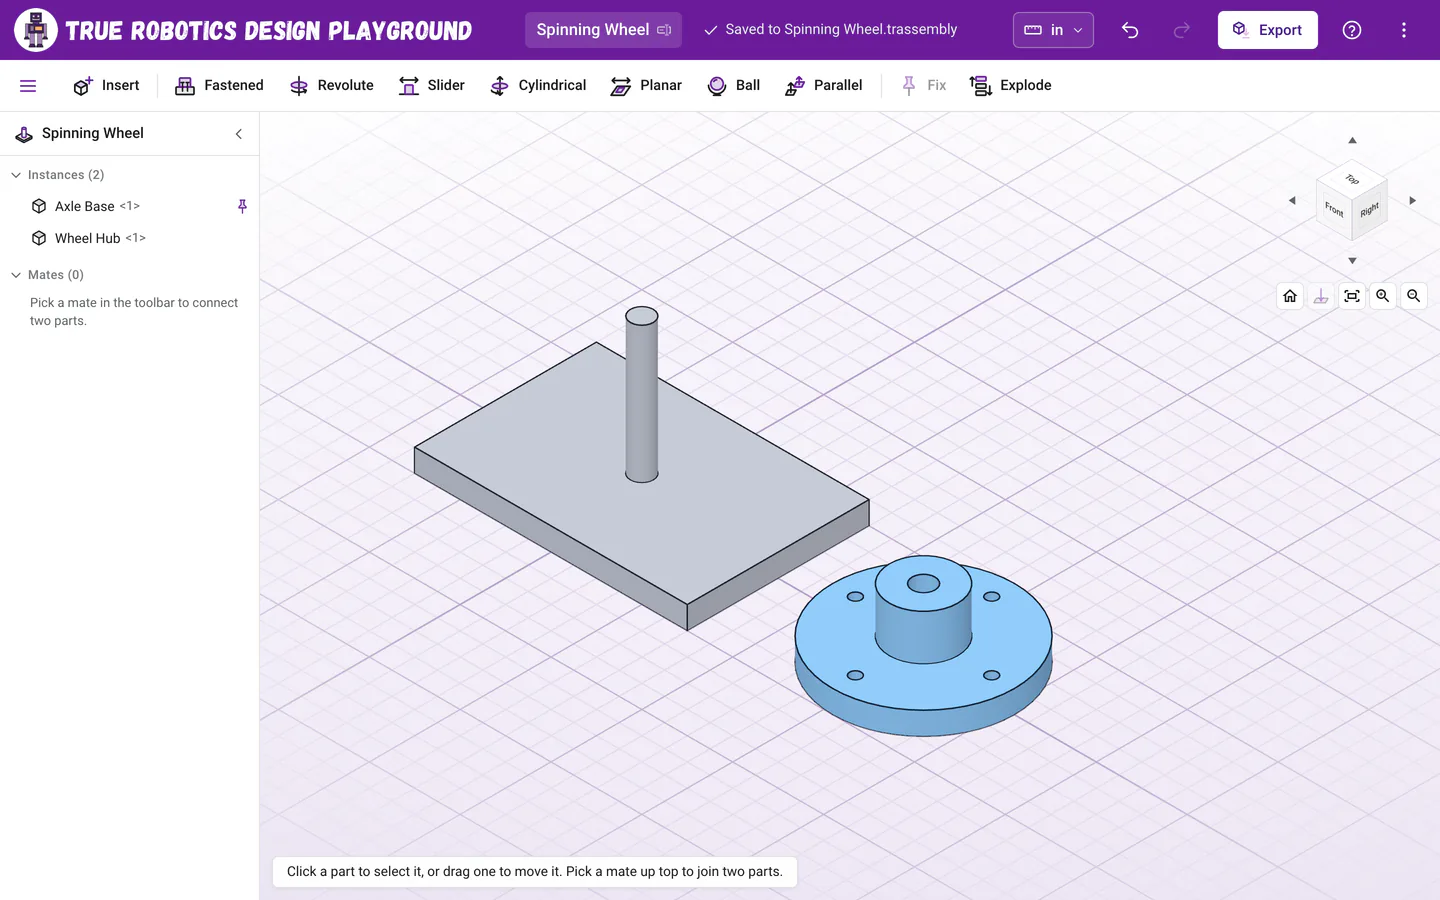
Both parts are in. Axle Base came in first, so it is fixed in place. Start a Revolute mate Click Revolute in the toolbar (or press Shift+R). A Revolute mate lets a part spin around one axis, just like a wheel on an axle.
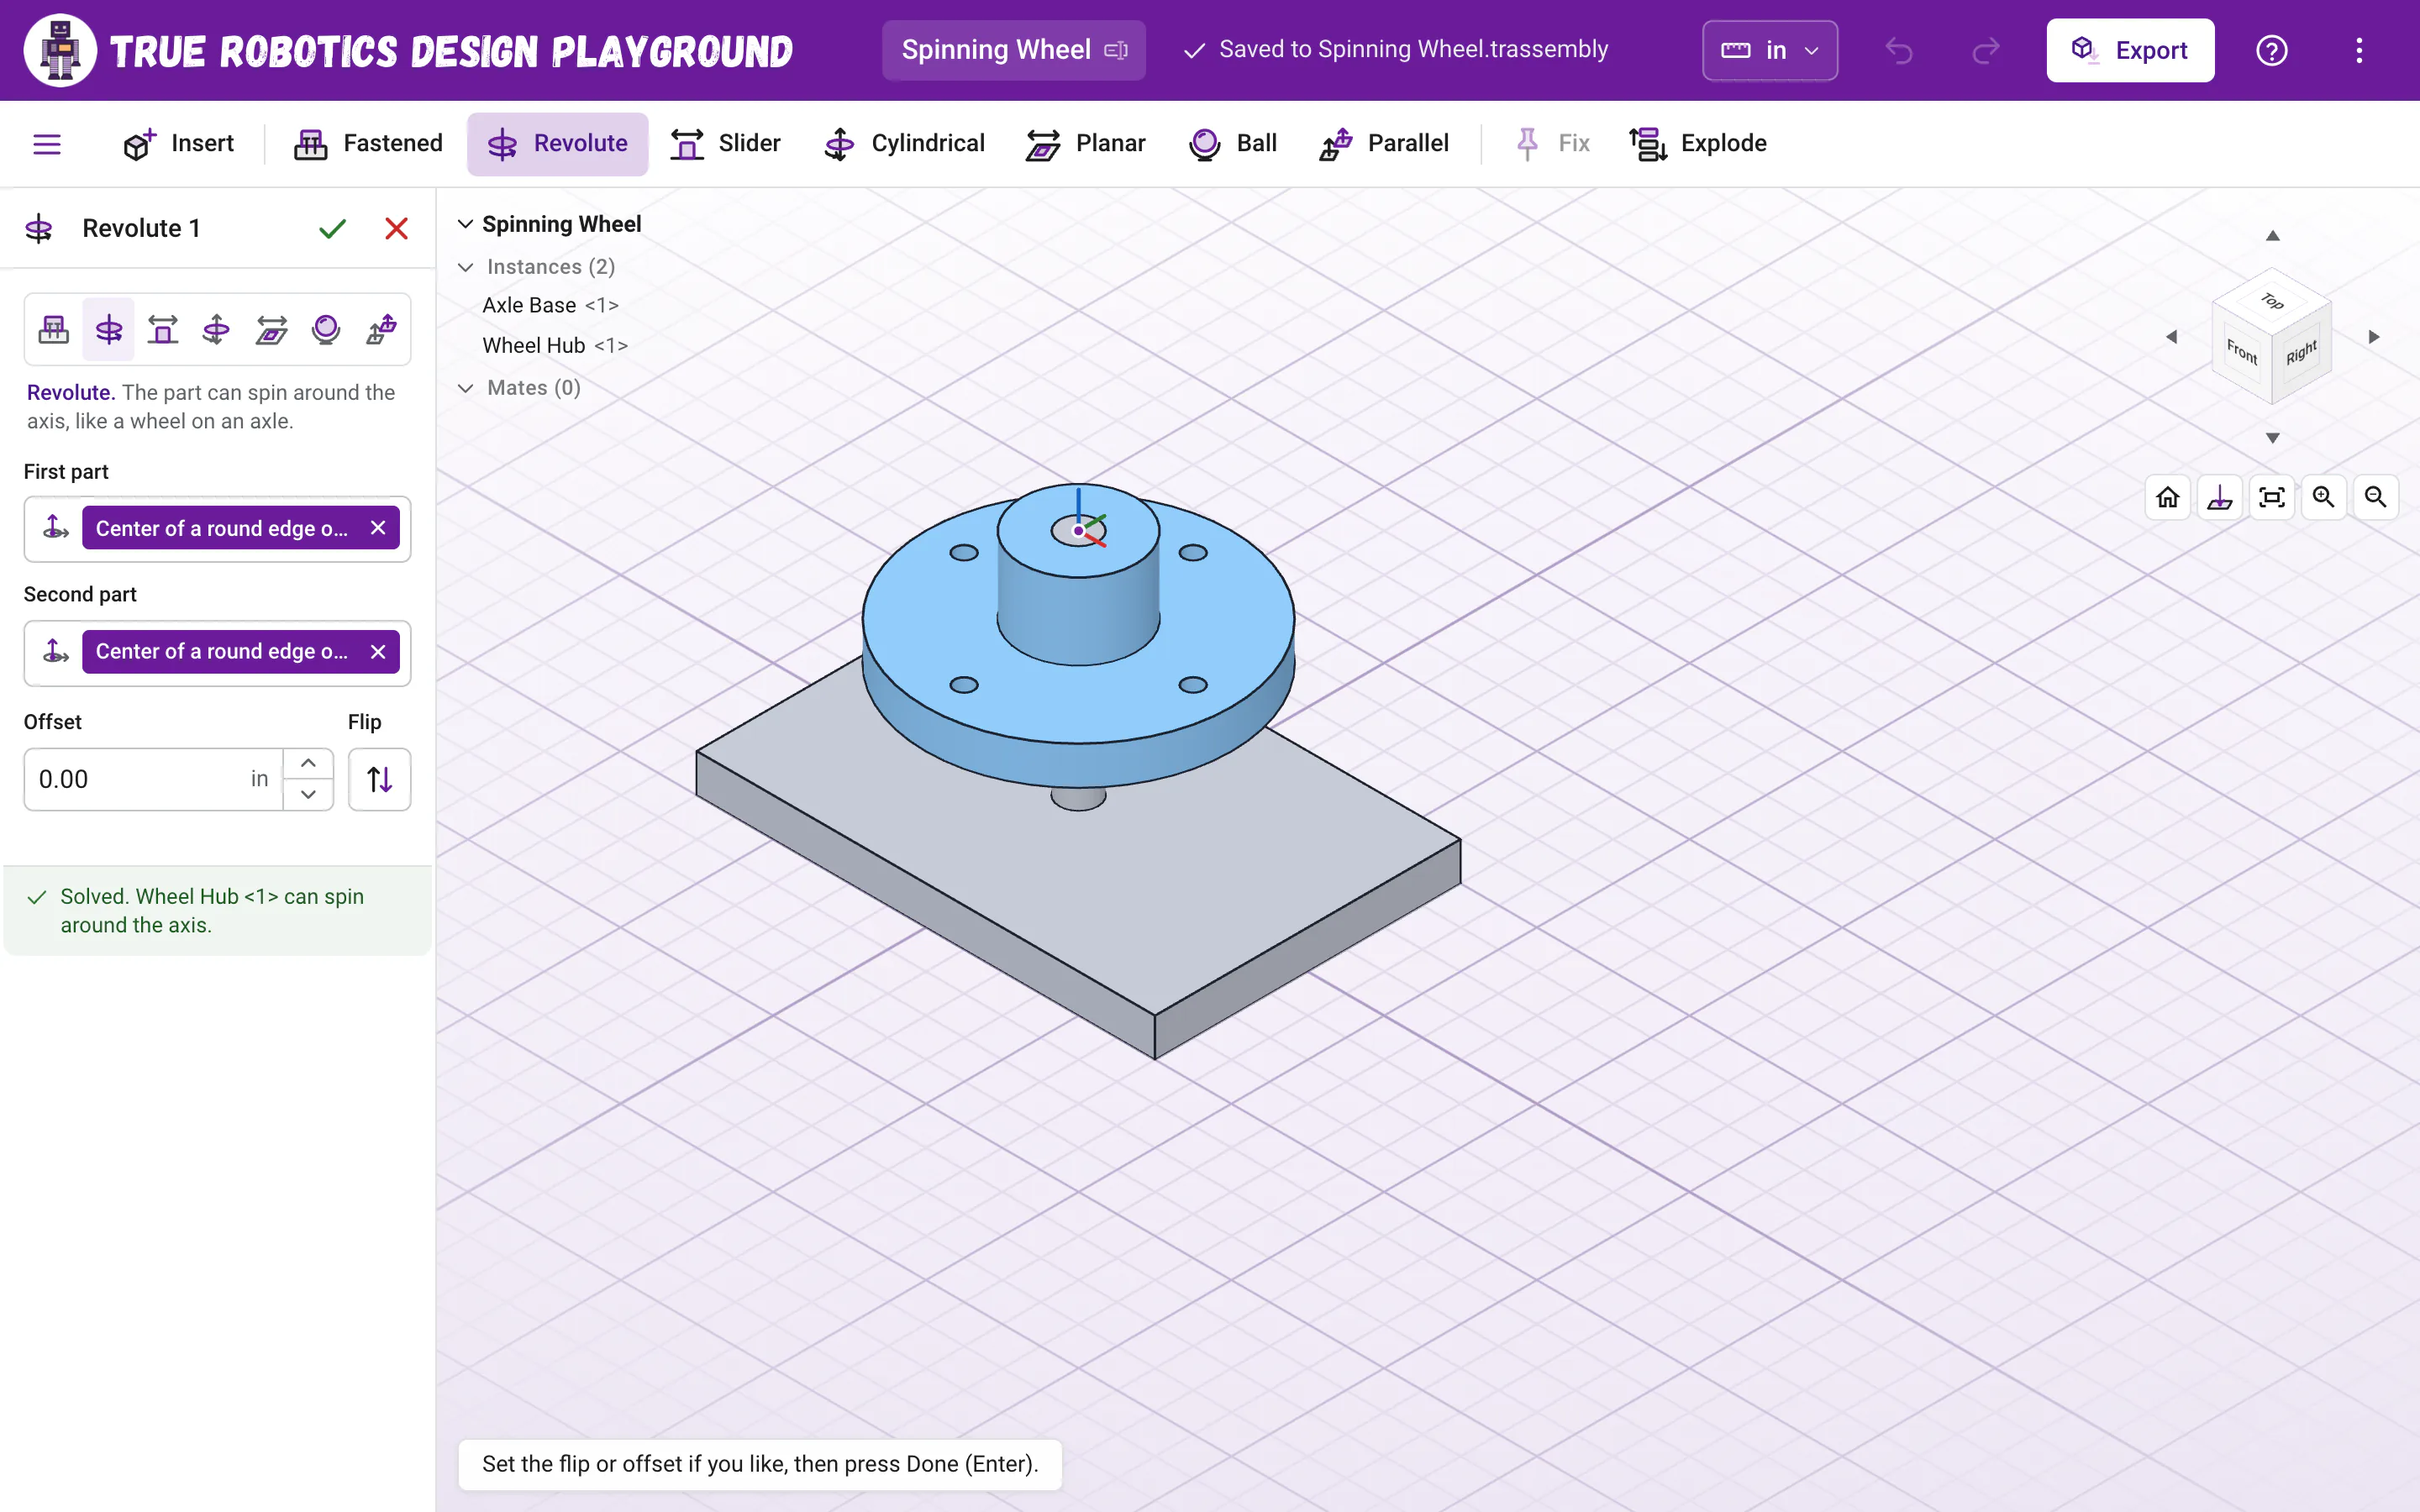
Click the axle Point at the side of the axle, near its top, until the marker sits on the axle's center line, and click. First part says
Center of a round edge on Axle Base <1>.Click the hole in the hub Click the inside wall of the wheel hub's axle hole, near its top. The wheel jumps onto the axle.
Flip it right side up If the wheel landed upside down, click Flip. The hub turns over and points up. The line at the bottom says Solved. Wheel Hub <1> can spin around the axis.
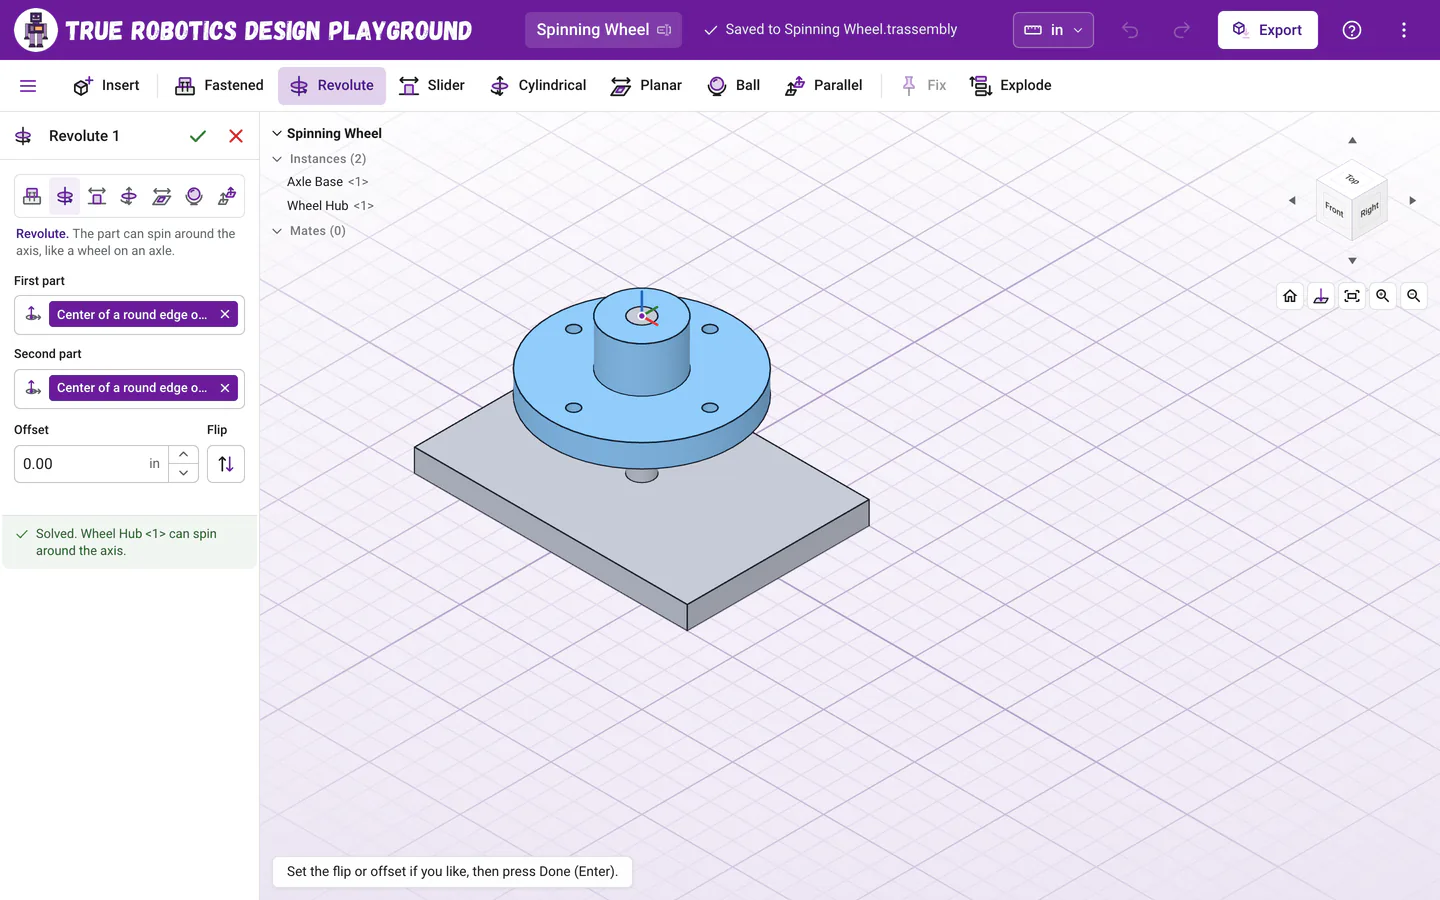
The Mate panel: the mate type, a connector on each part, Offset and Flip, and a line that says how it went. Finish the mate Click the green check, or press Enter. Revolute 1 shows under Mates in the list.
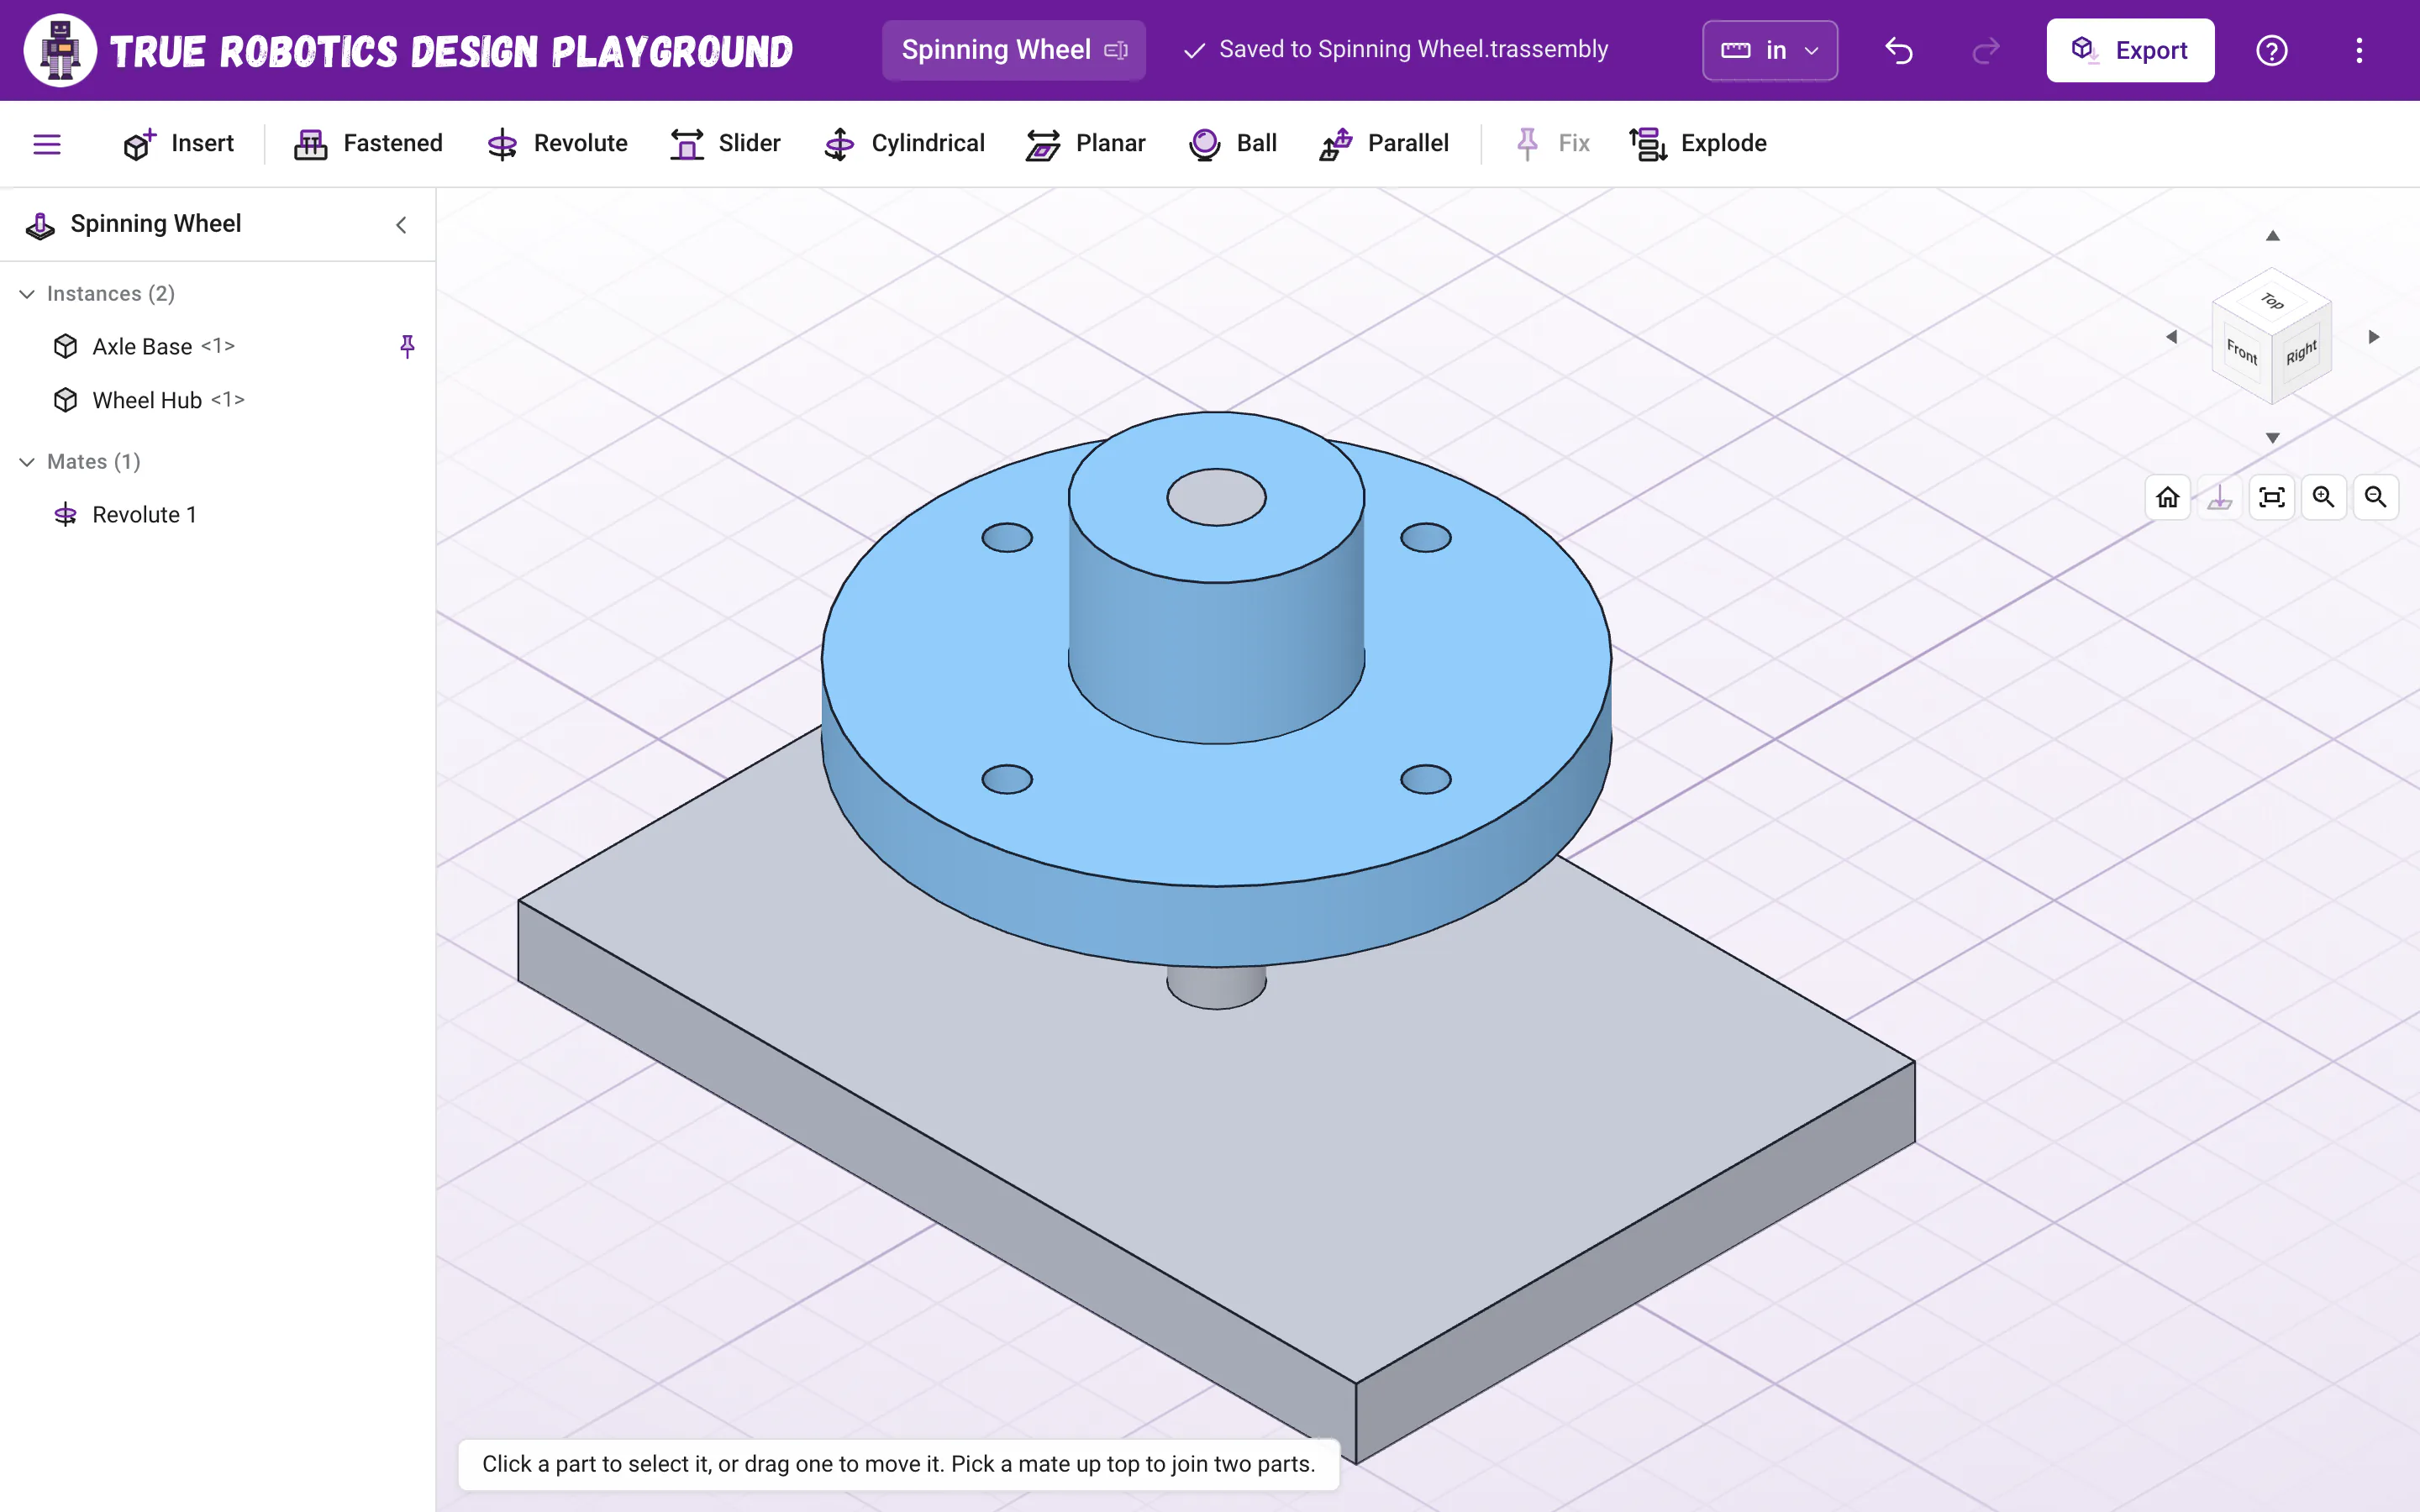
Spin it Drag the wheel sideways in the view. It spins around the axle and never slides off. Your first moving assembly!
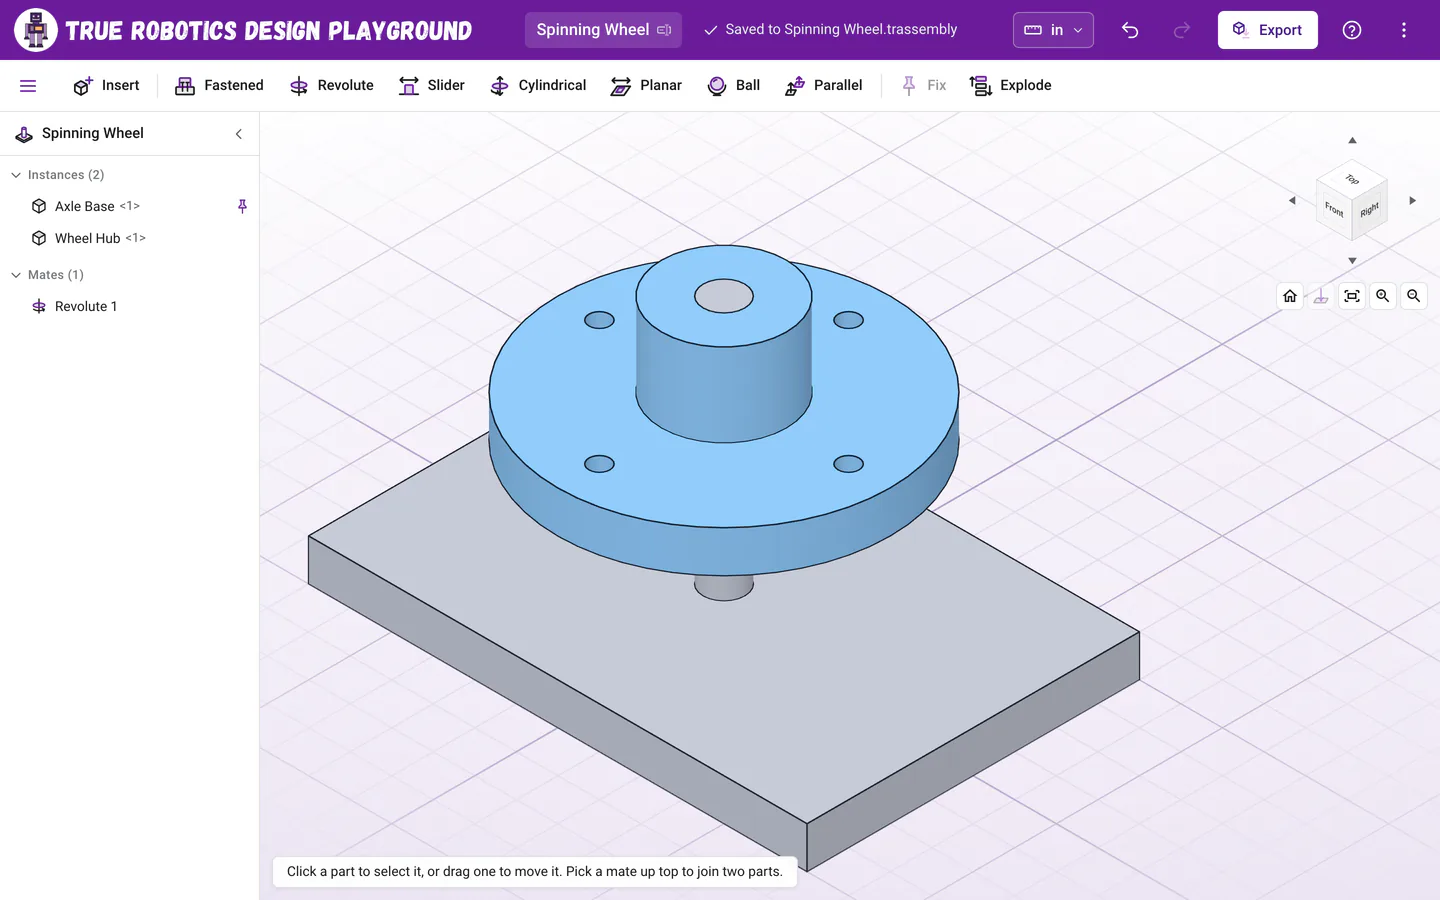
The finished spinning wheel. Drag it and it turns around the axle.
Tip: Printing it for real?
The axle and the hole are both exactly 1/4 inch, which is perfect on screen. A printed axle needs a little room to turn, so make the hole about 0.01 inch bigger in the Wheel Hub, or the axle that much smaller in the Axle Base. Then open the assembly and choose Refresh from file in that part's menu to see the change.
What should I try next?#
- Type a number in the mate's Offset to slide the wheel up or down the axle. Double-click Revolute 1 in the list to open it again.
- Click Explode (or press Shift+E) to spread the parts apart, then click it again to put them back.
- Insert a second Wheel Hub and give it its own Revolute mate. Every copy gets its own number, like
Wheel Hub <2>. - Export the whole assembly as one STL file with Export. Export STL and STEP shows how.
- Meet the other six mates on the Mates page.
Wheels, arms, hinges and sliders all start just like this. We can't wait to see what you build next!
Questions and answers#
Why is the Axle Base fixed in place?
The first part you insert is fixed, so the rest of the assembly has something to hold on to. That is why the axle base goes in first and the wheel moves over to it.
Why did the wheel land upside down?
The mate lined up the two connectors facing each other. Click Flip in the Mate panel, and the wheel turns over onto the axle the right way.
Why can't I find Wheel Hub in the Insert window?
The Insert window lists parts saved in this browser. Open Wheel Hub and click Save in the purple bar, or insert its .trdesign file with Choose files.