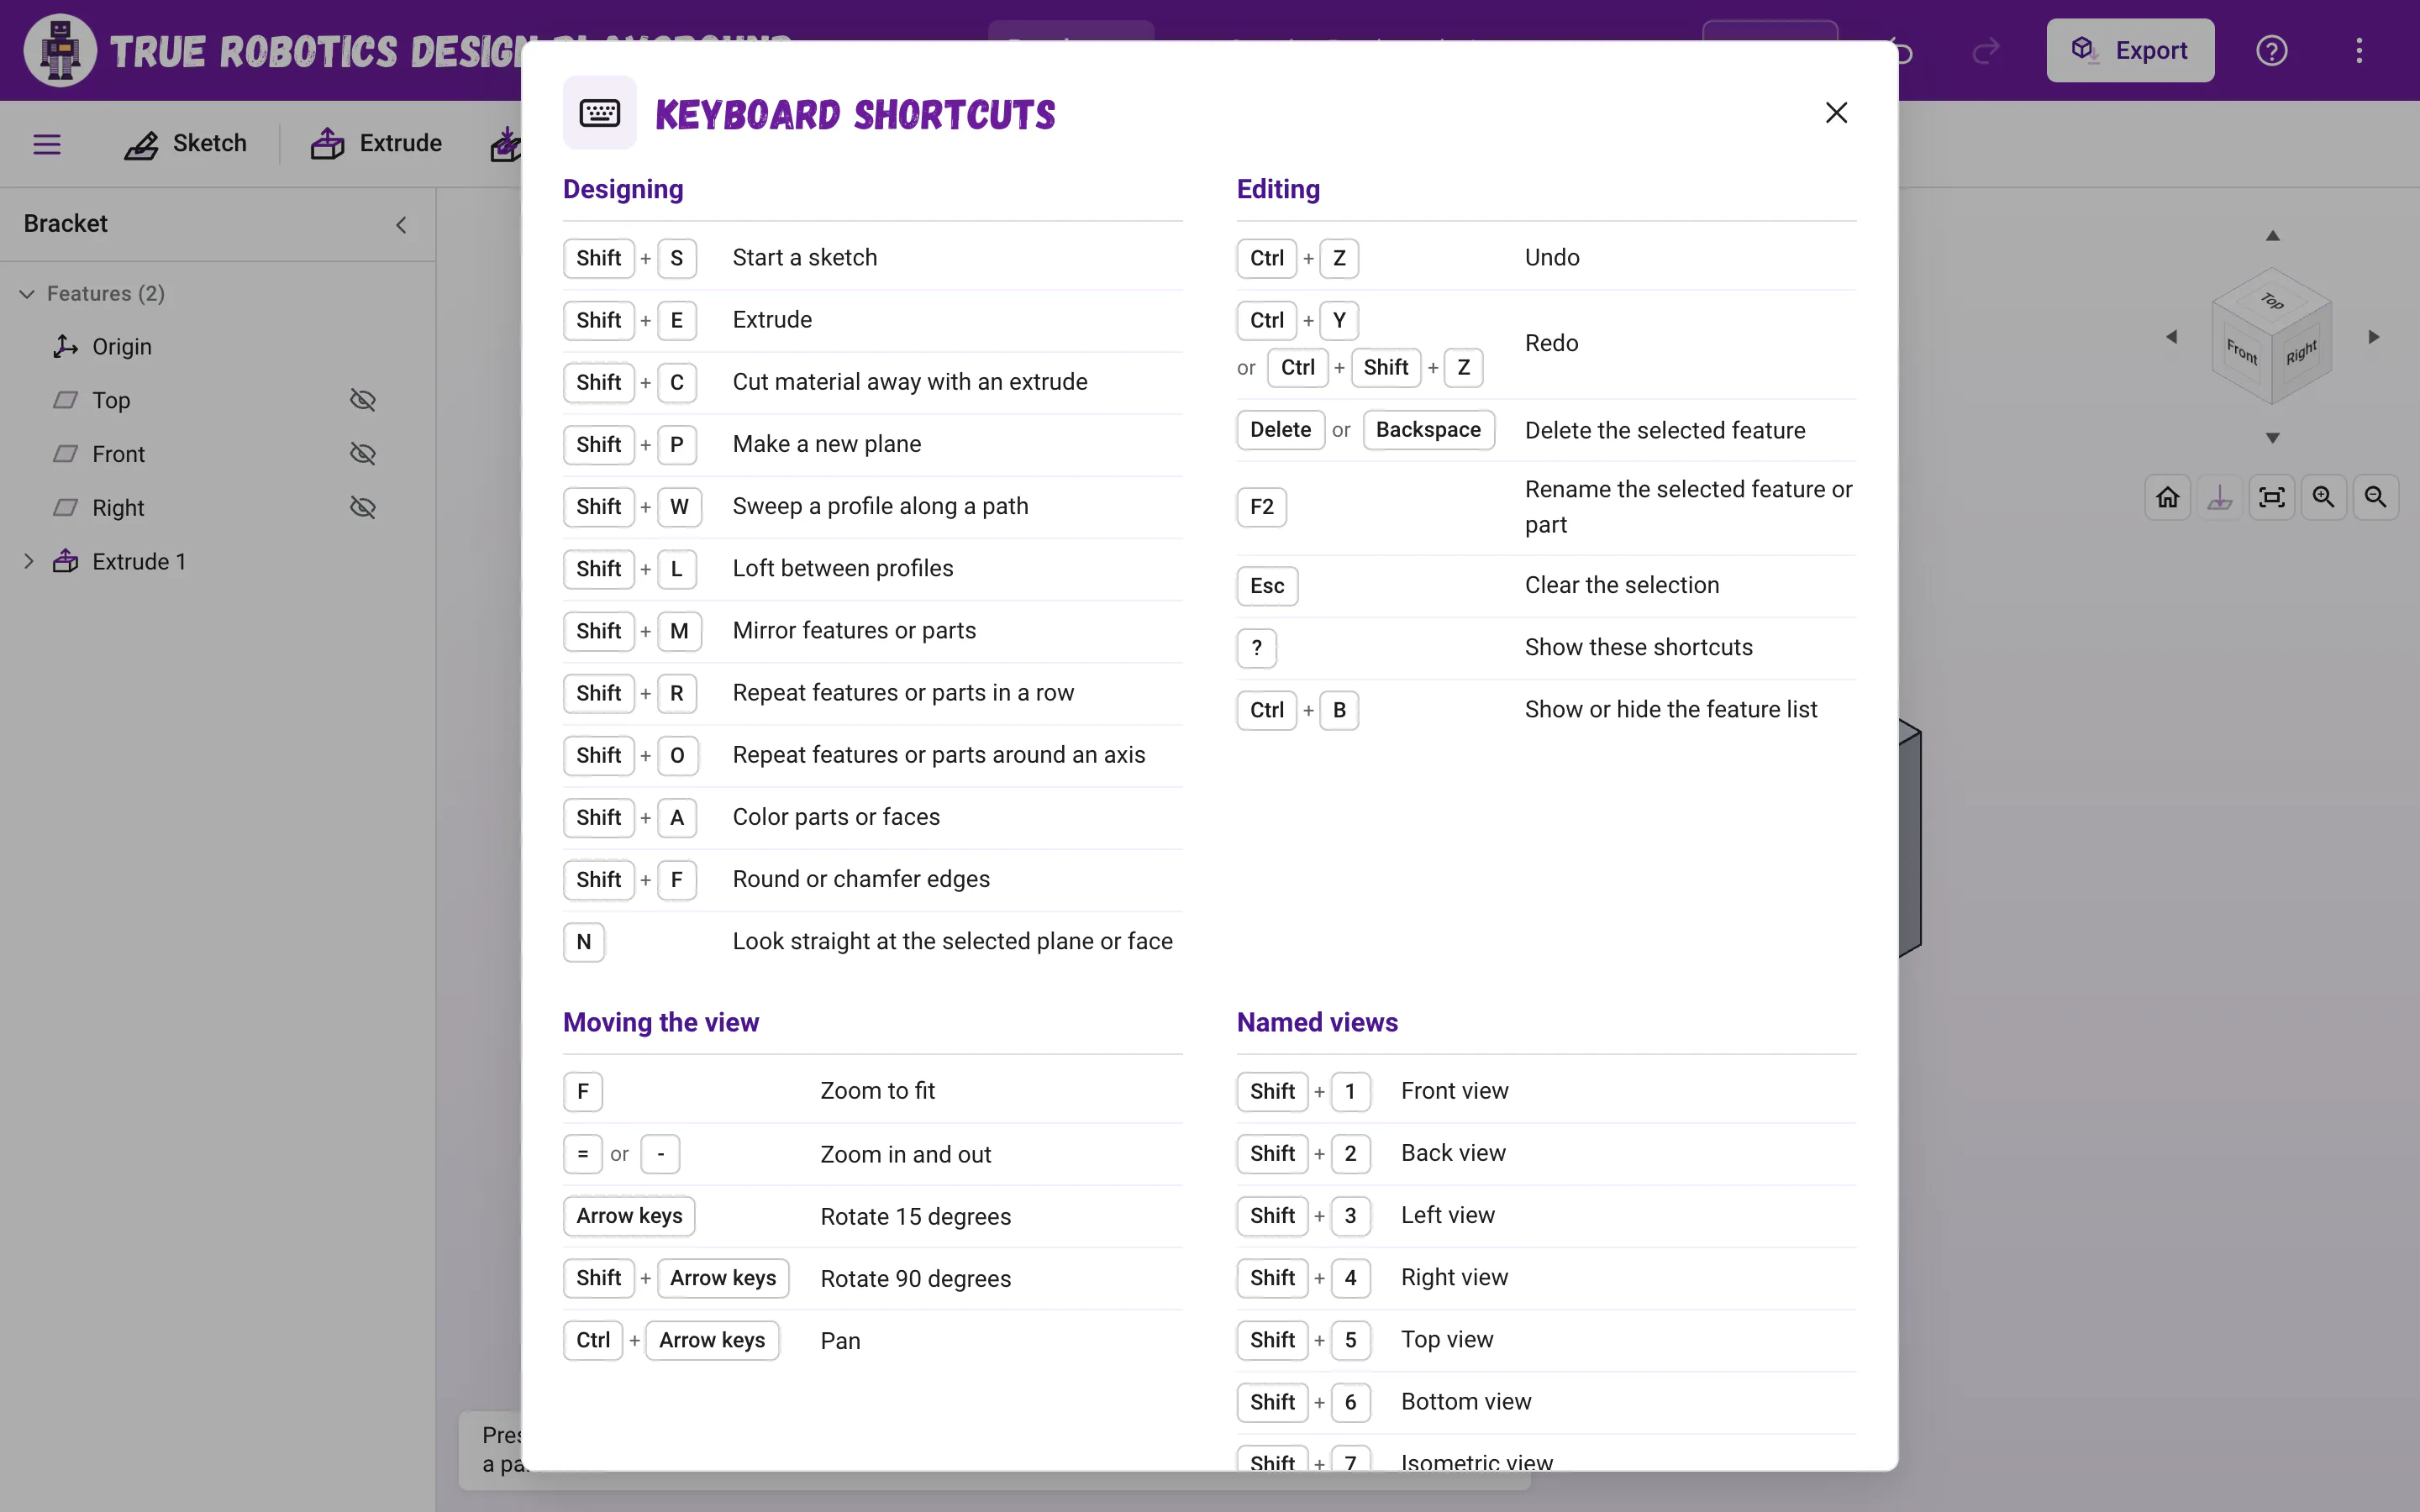
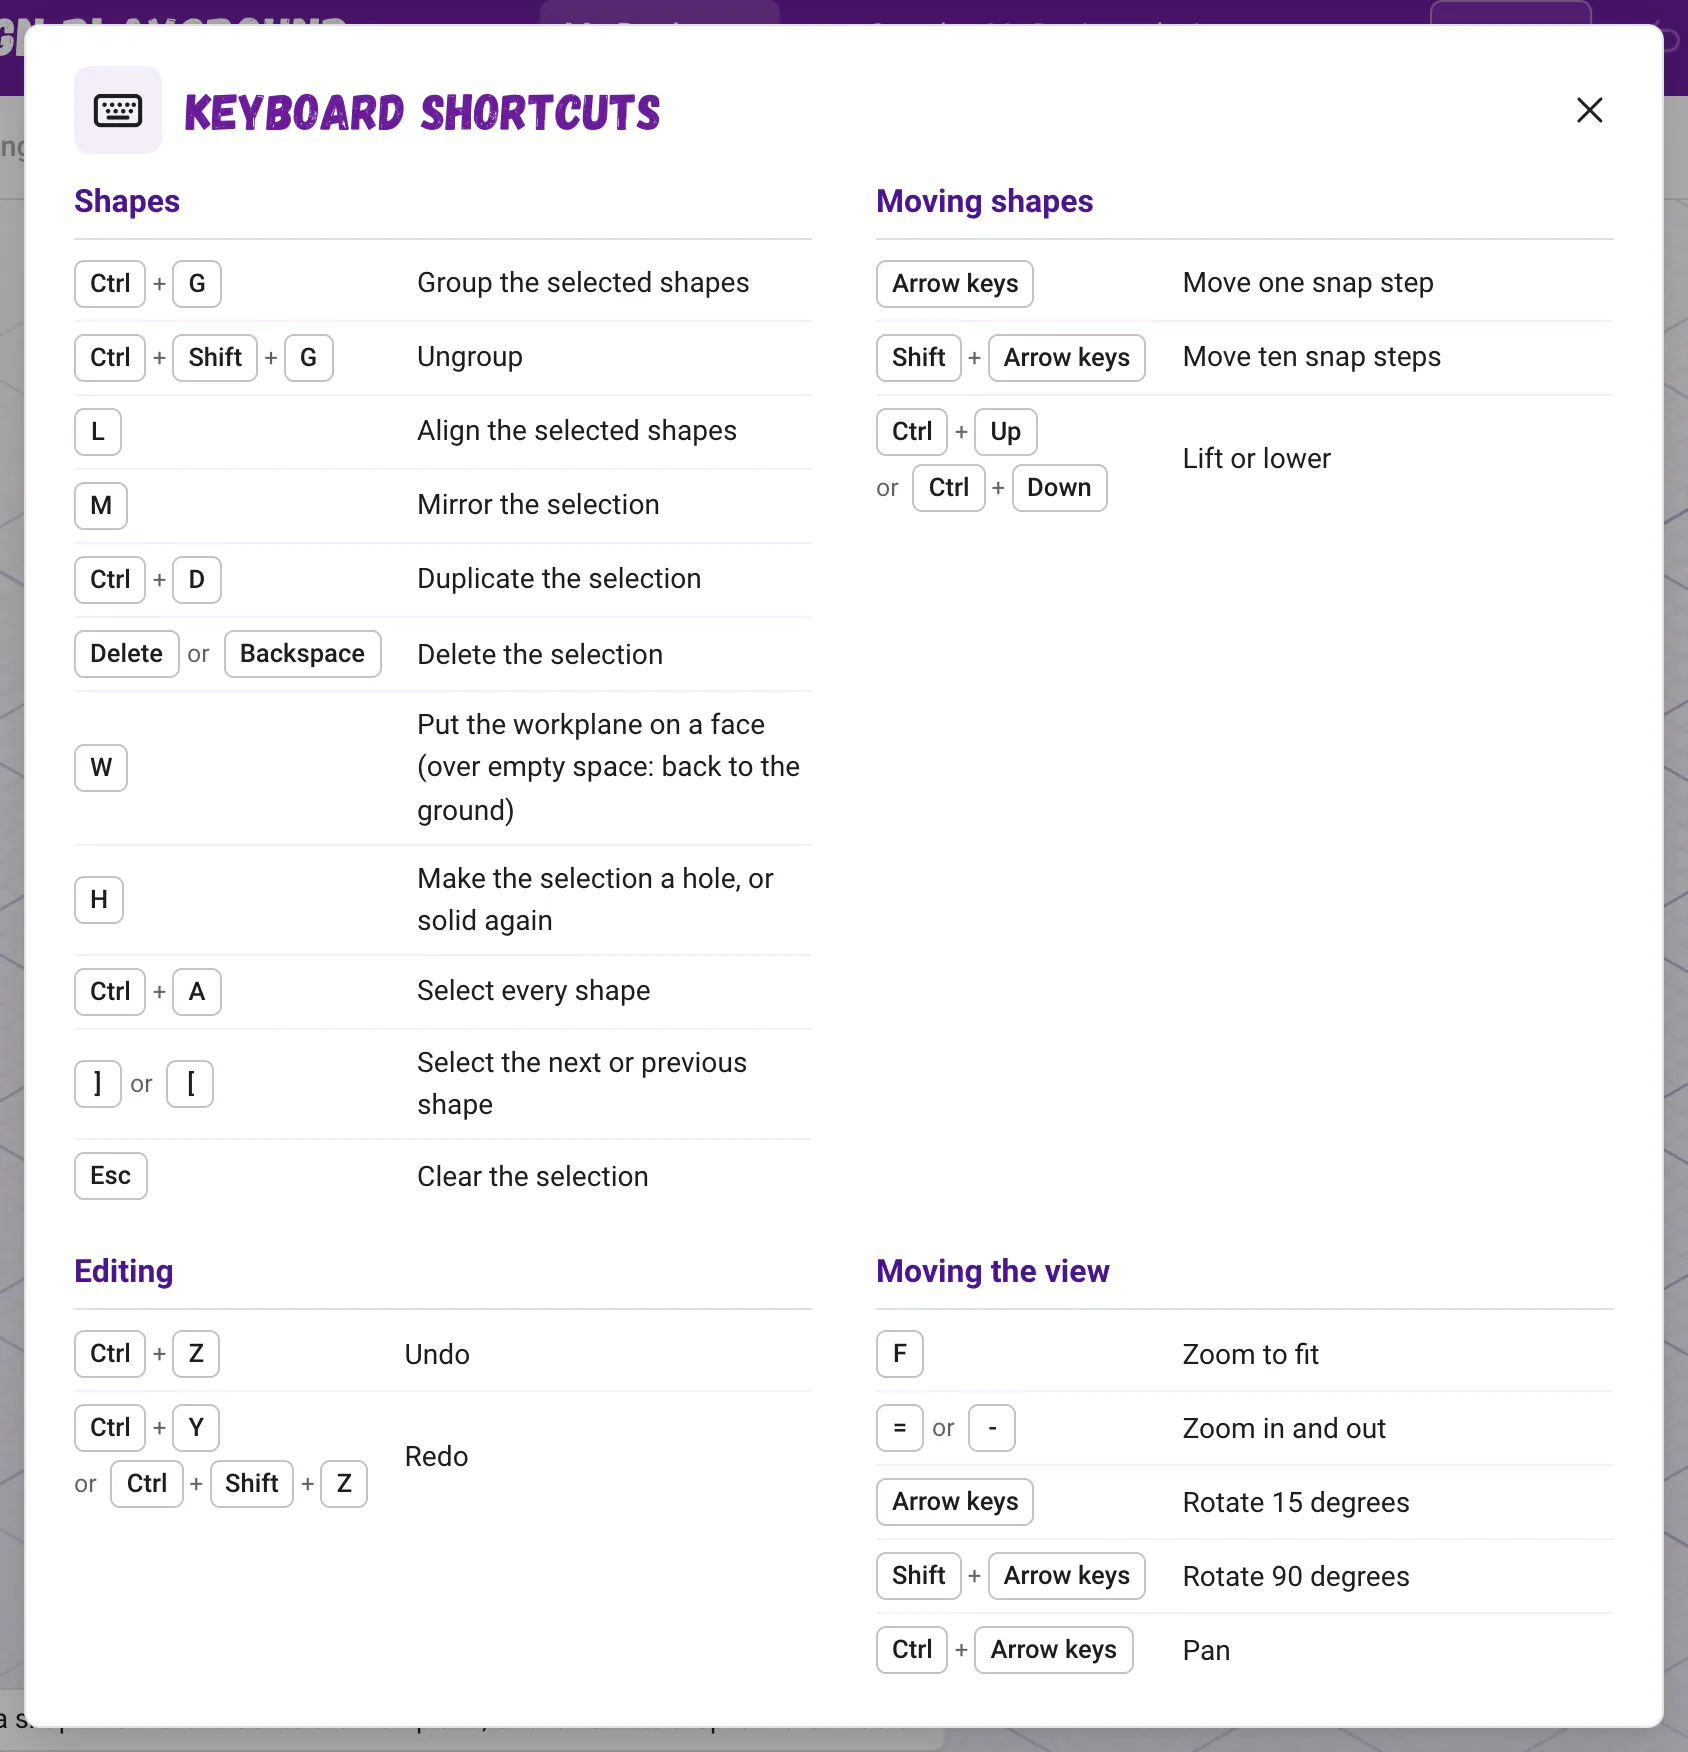
The True Robotics Design Playground can be used almost entirely from the keyboard. In Basic mode, Ctrl+G groups shapes, H makes a hole and the arrow keys nudge. In Standard mode, Shift and a letter starts a feature, like Shift+E for Extrude or Shift+M for Mirror, and single letters pick sketch tools, like L for Line or K for Trim. The question mark key shows every shortcut.
Updated
8 minute read
Press ? anytime to see every shortcut.
Press ? anytime in the workspace to see the keys for the project you have open, or choose Keyboard shortcuts from the three dots menu. On Windows and Chromebooks, shortcuts with Ctrl use the Ctrl key. On a Mac, use Cmd instead. Chromebooks have no Delete key, so Backspace works everywhere Delete does.
These keys work in a Basic project. The arrow keys move the selected shapes; with nothing selected, they turn the view like the Moving the view keys below.
Shapes
Keys
What it does
Ctrl+G
Group the selected shapes
Ctrl+Shift+G
Ungroup
L
Align the selected shapes
M
Mirror the selection
Ctrl+D
Duplicate the selection
Delete or Backspace
Delete the selection
W
Put the workplane on a face (over empty space: back to the ground)
The letters are easy to remember: V for Revolve (the V in the middle of the word, since R already means a row), X for a new Axis, M for Mirror, R for a row (Linear pattern), O for a circle (Circular pattern), F for Fillet (and Chamfer, the same tool) and A for appearance, the paint bucket that starts Color. Ctrl+B folds the left panel away; while a feature is open, it folds the feature list in the view instead.
Stop drawing, put the tool away, then save and close the sketch
Enter
Finish the line or spline, or finish the sketch
Parallel, Perpendicular, Midpoint, Concentric and Fix have no keys, just like in Onshape. Select your geometry and click their buttons in the sketch toolbar.
Some letters mean something different in a sketch than in a Basic project: in a sketch, O is Fillet, M is Chamfer, K is Trim, X is Mirror, W is Linear pattern and U is Circular pattern. In a sketch, S on its own draws a Spline, while Shift+S outside a sketch starts a new one.
Leaving a sketch
Keys
What it does
Esc
One step back each time: the size you are typing, a drag, the shape you are drawing, the tool, then the selection
Esc
With nothing left to step back from: save the sketch and close it (the same as Exit sketch)
Enter
In a tool: finish the shape you are drawing and keep the tool on for the next one
Step the number up or down by 1 in your units, 1 degree or 1
Shift+Up or Shift+Down
Step by 10
Alt+Up or Alt+Down
Step by a tenth
These work while you type in any number box, like an extrude Depth or a pattern Count, and the up and down arrows beside the box do the same with a click. See Units and typing math.
Revolve, Loft, Sweep, Fillet, Plane, Axis, Mirror, pattern and Color panels
Keys
What it does
Tab
Move between the panel's buttons and boxes
Space
Make the focused box the one that waits for picks
Up or Down
In the feature list, move to a row without picking it
Enter
In the feature list, pick the focused row for the open panel
Alt+Up or Alt+Down
Move the focused Loft profile up or down the list
Delete or Backspace
Remove the focused pick or Loft profile, or the last pick in a focused box
The feature tree has its own keys for moving through rows, opening the features that hold sketches (Right and Left), renaming, hiding and deleting.
Good to know: One click to start a shape
Drawing tools place their first point where you click or tap. After that first click, everything else, from sizes to finishing the sketch to the extrude depth, can be typed.
Shortcuts make designing fast and fun. Start with Shift+S, G and Shift+E, add Shift+C for your first hole and Shift+O to repeat it around a hub, and the rest will come naturally.