
Building parts
Color Parts and Faces
Color in the True Robotics Design Playground paints a whole part or single faces. Press Color, the paint bucket, or Shift+A, choose Part or Faces, click what to paint, pick a swatch or your own color, and click the green check. Colors are features in the list, so you can change them later, and they follow the part as it changes.
How do I color a part?#
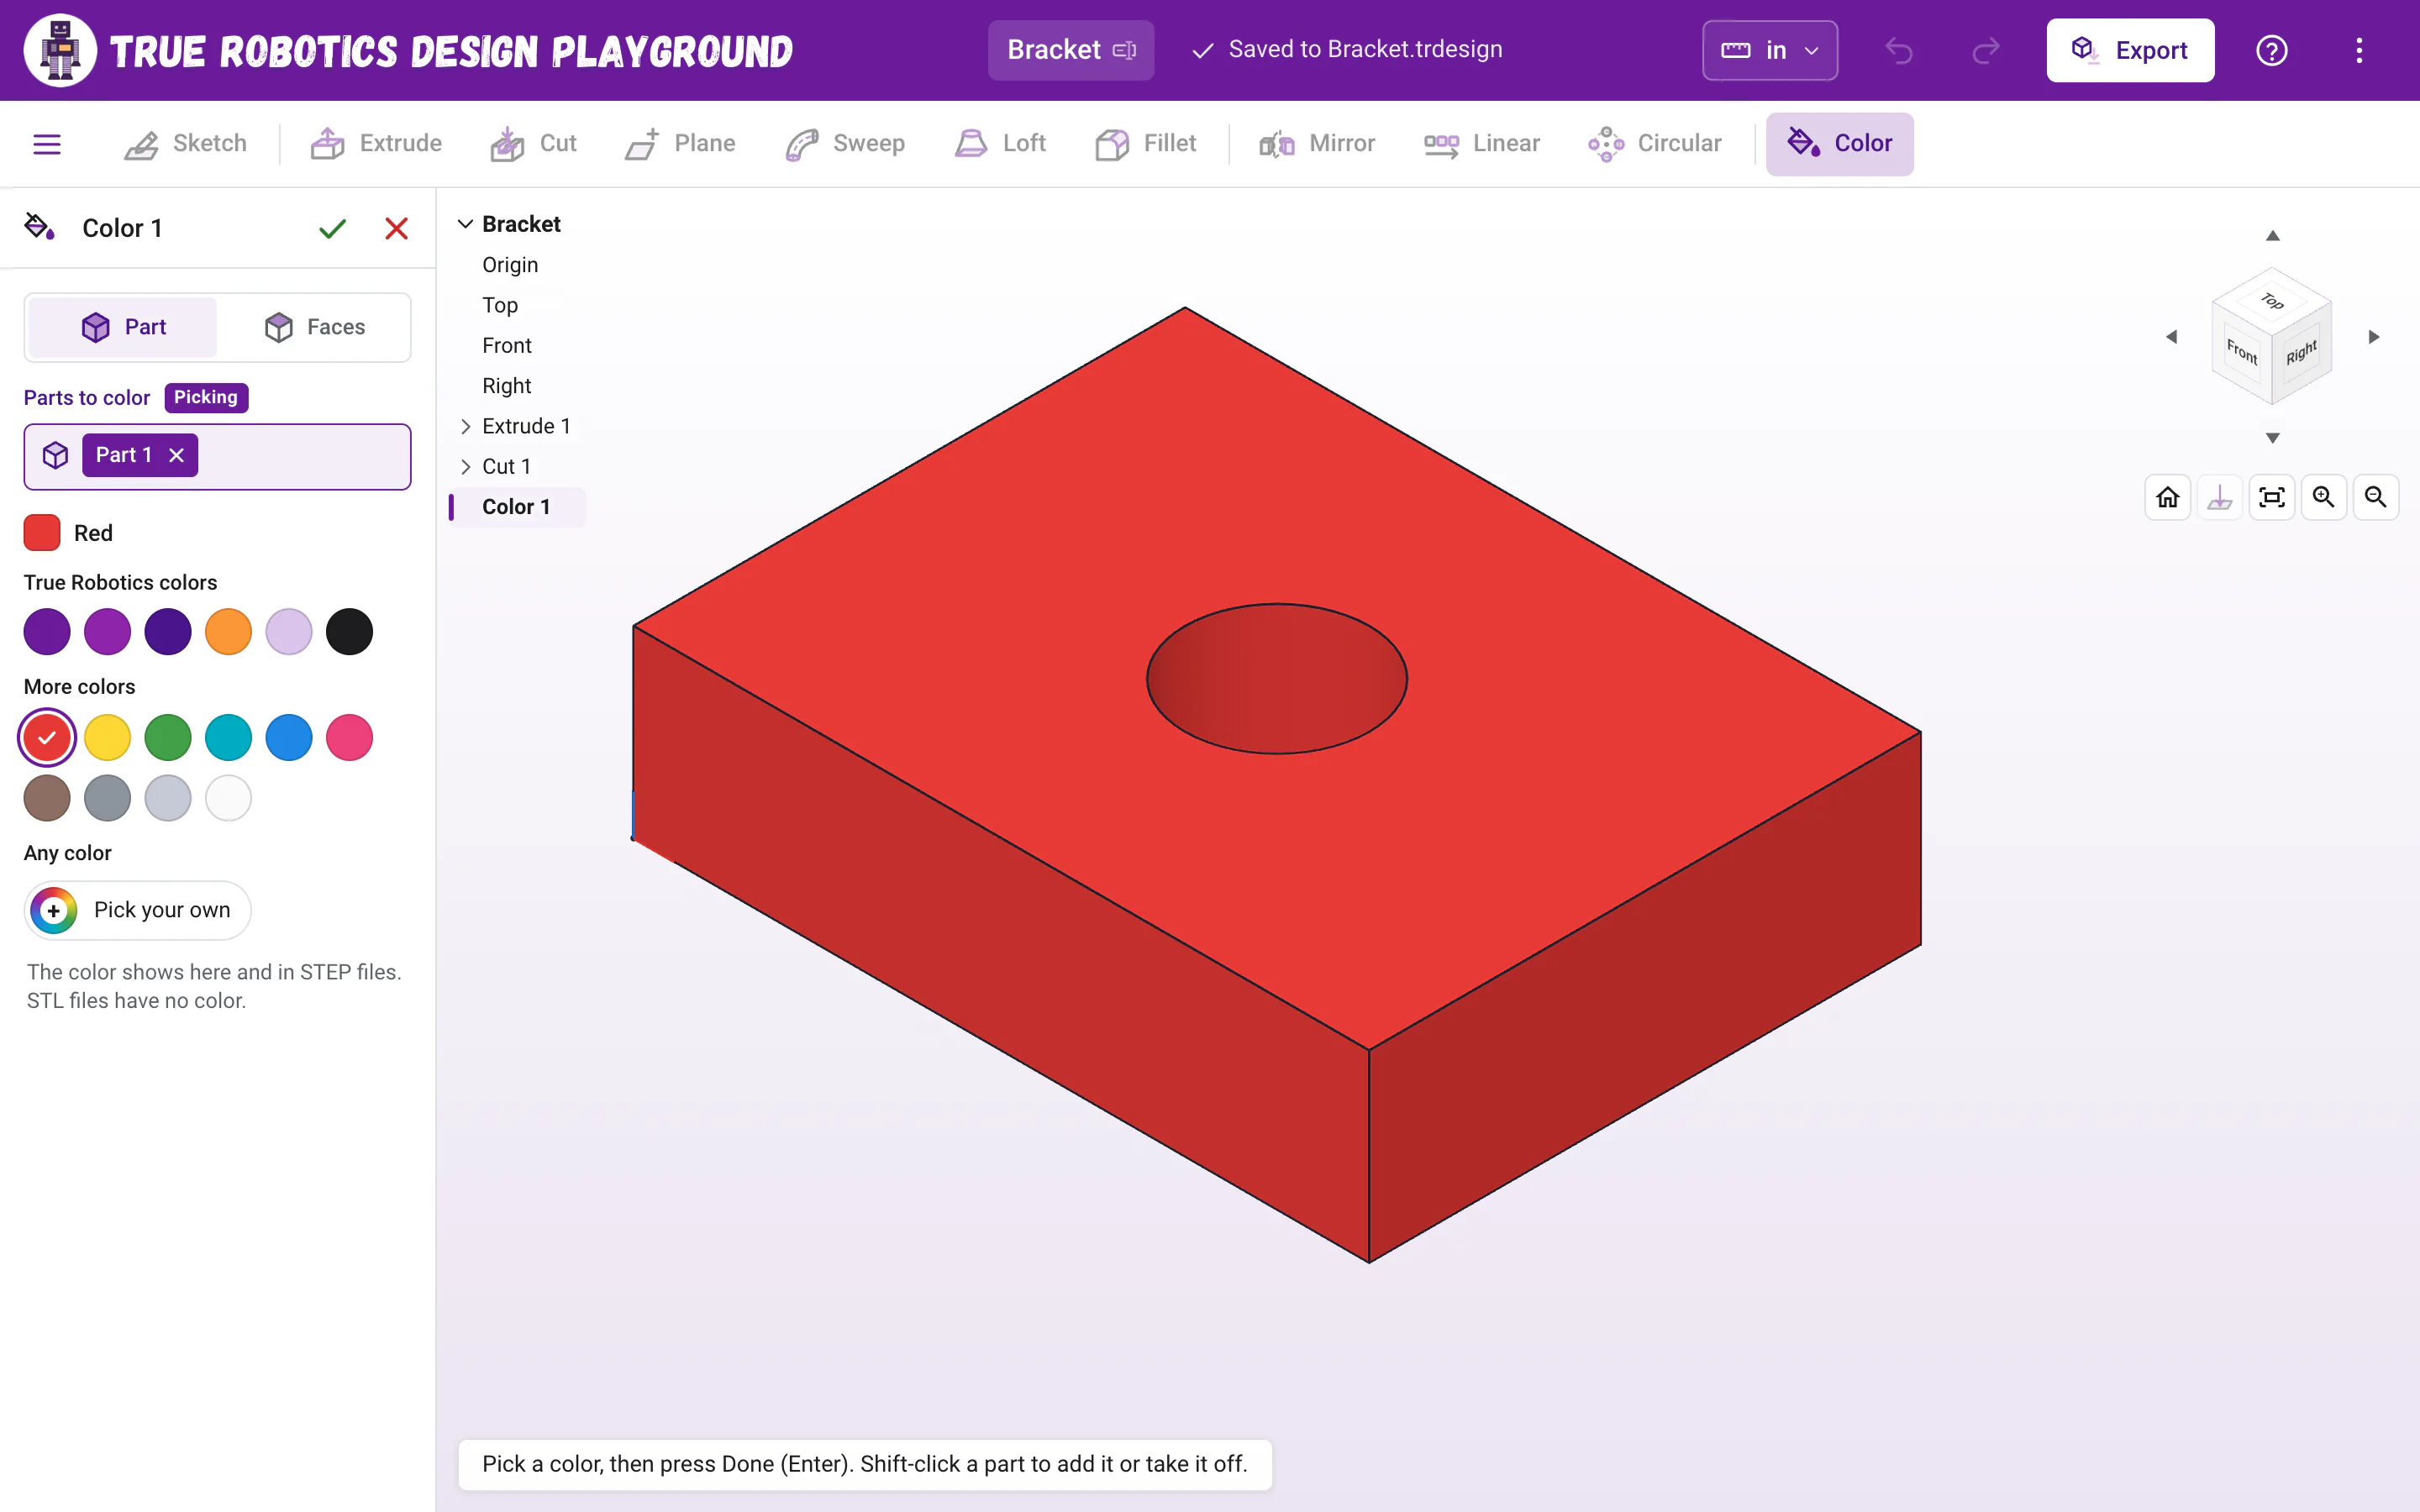
Start Color Click Color, the paint bucket at the end of the toolbar, or press Shift+A. The Color panel opens on the left with Part chosen and True Robotics purple ready to go.
Click what to color Click a part in the view. It shows as a chip in Parts to color. To color single faces instead, choose Faces at the top of the panel and click the faces. Hold Shift as you click to pick more than one.
Pick a color Click a swatch under True Robotics colors or More colors, or click Pick your own for any color at all. The view shows the new color right away.
Finish Click the green check at the top of the panel, or press Enter. Color 1 joins the feature list.
Picked something before you pressed Color? Those parts start out in the panel, and faces you picked open it on Faces, so all that is left is the color.
Read what happens in this video
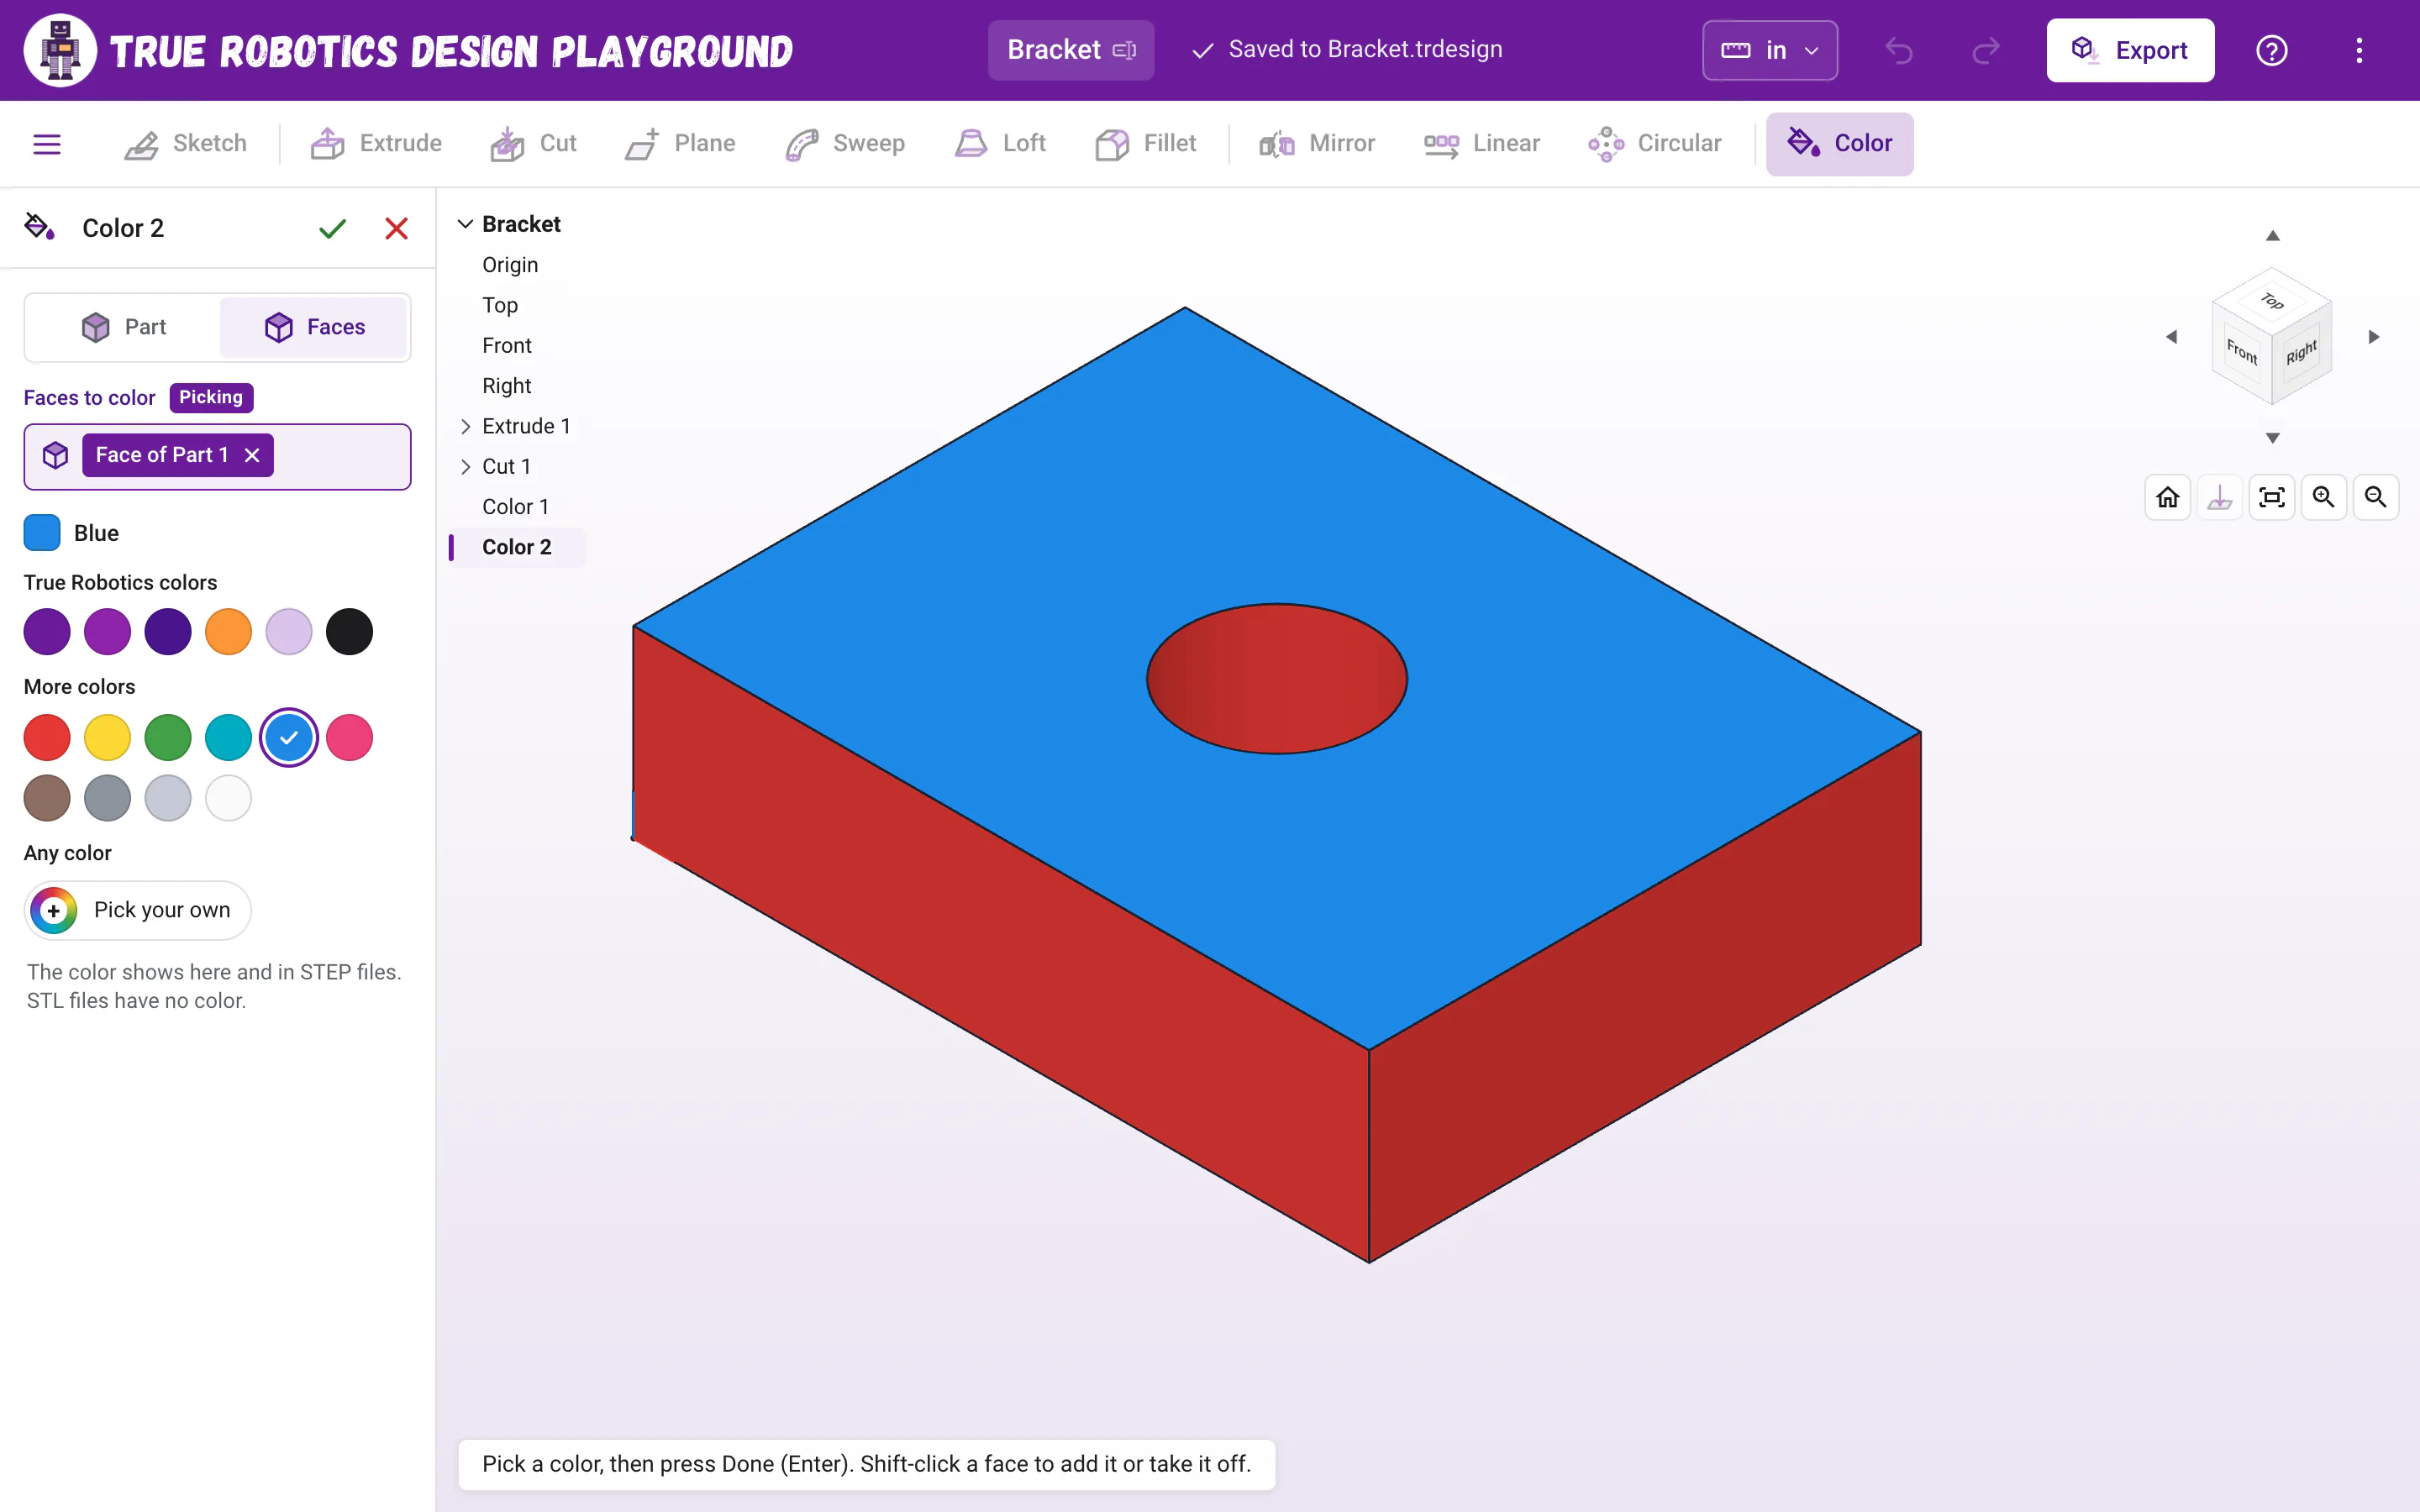
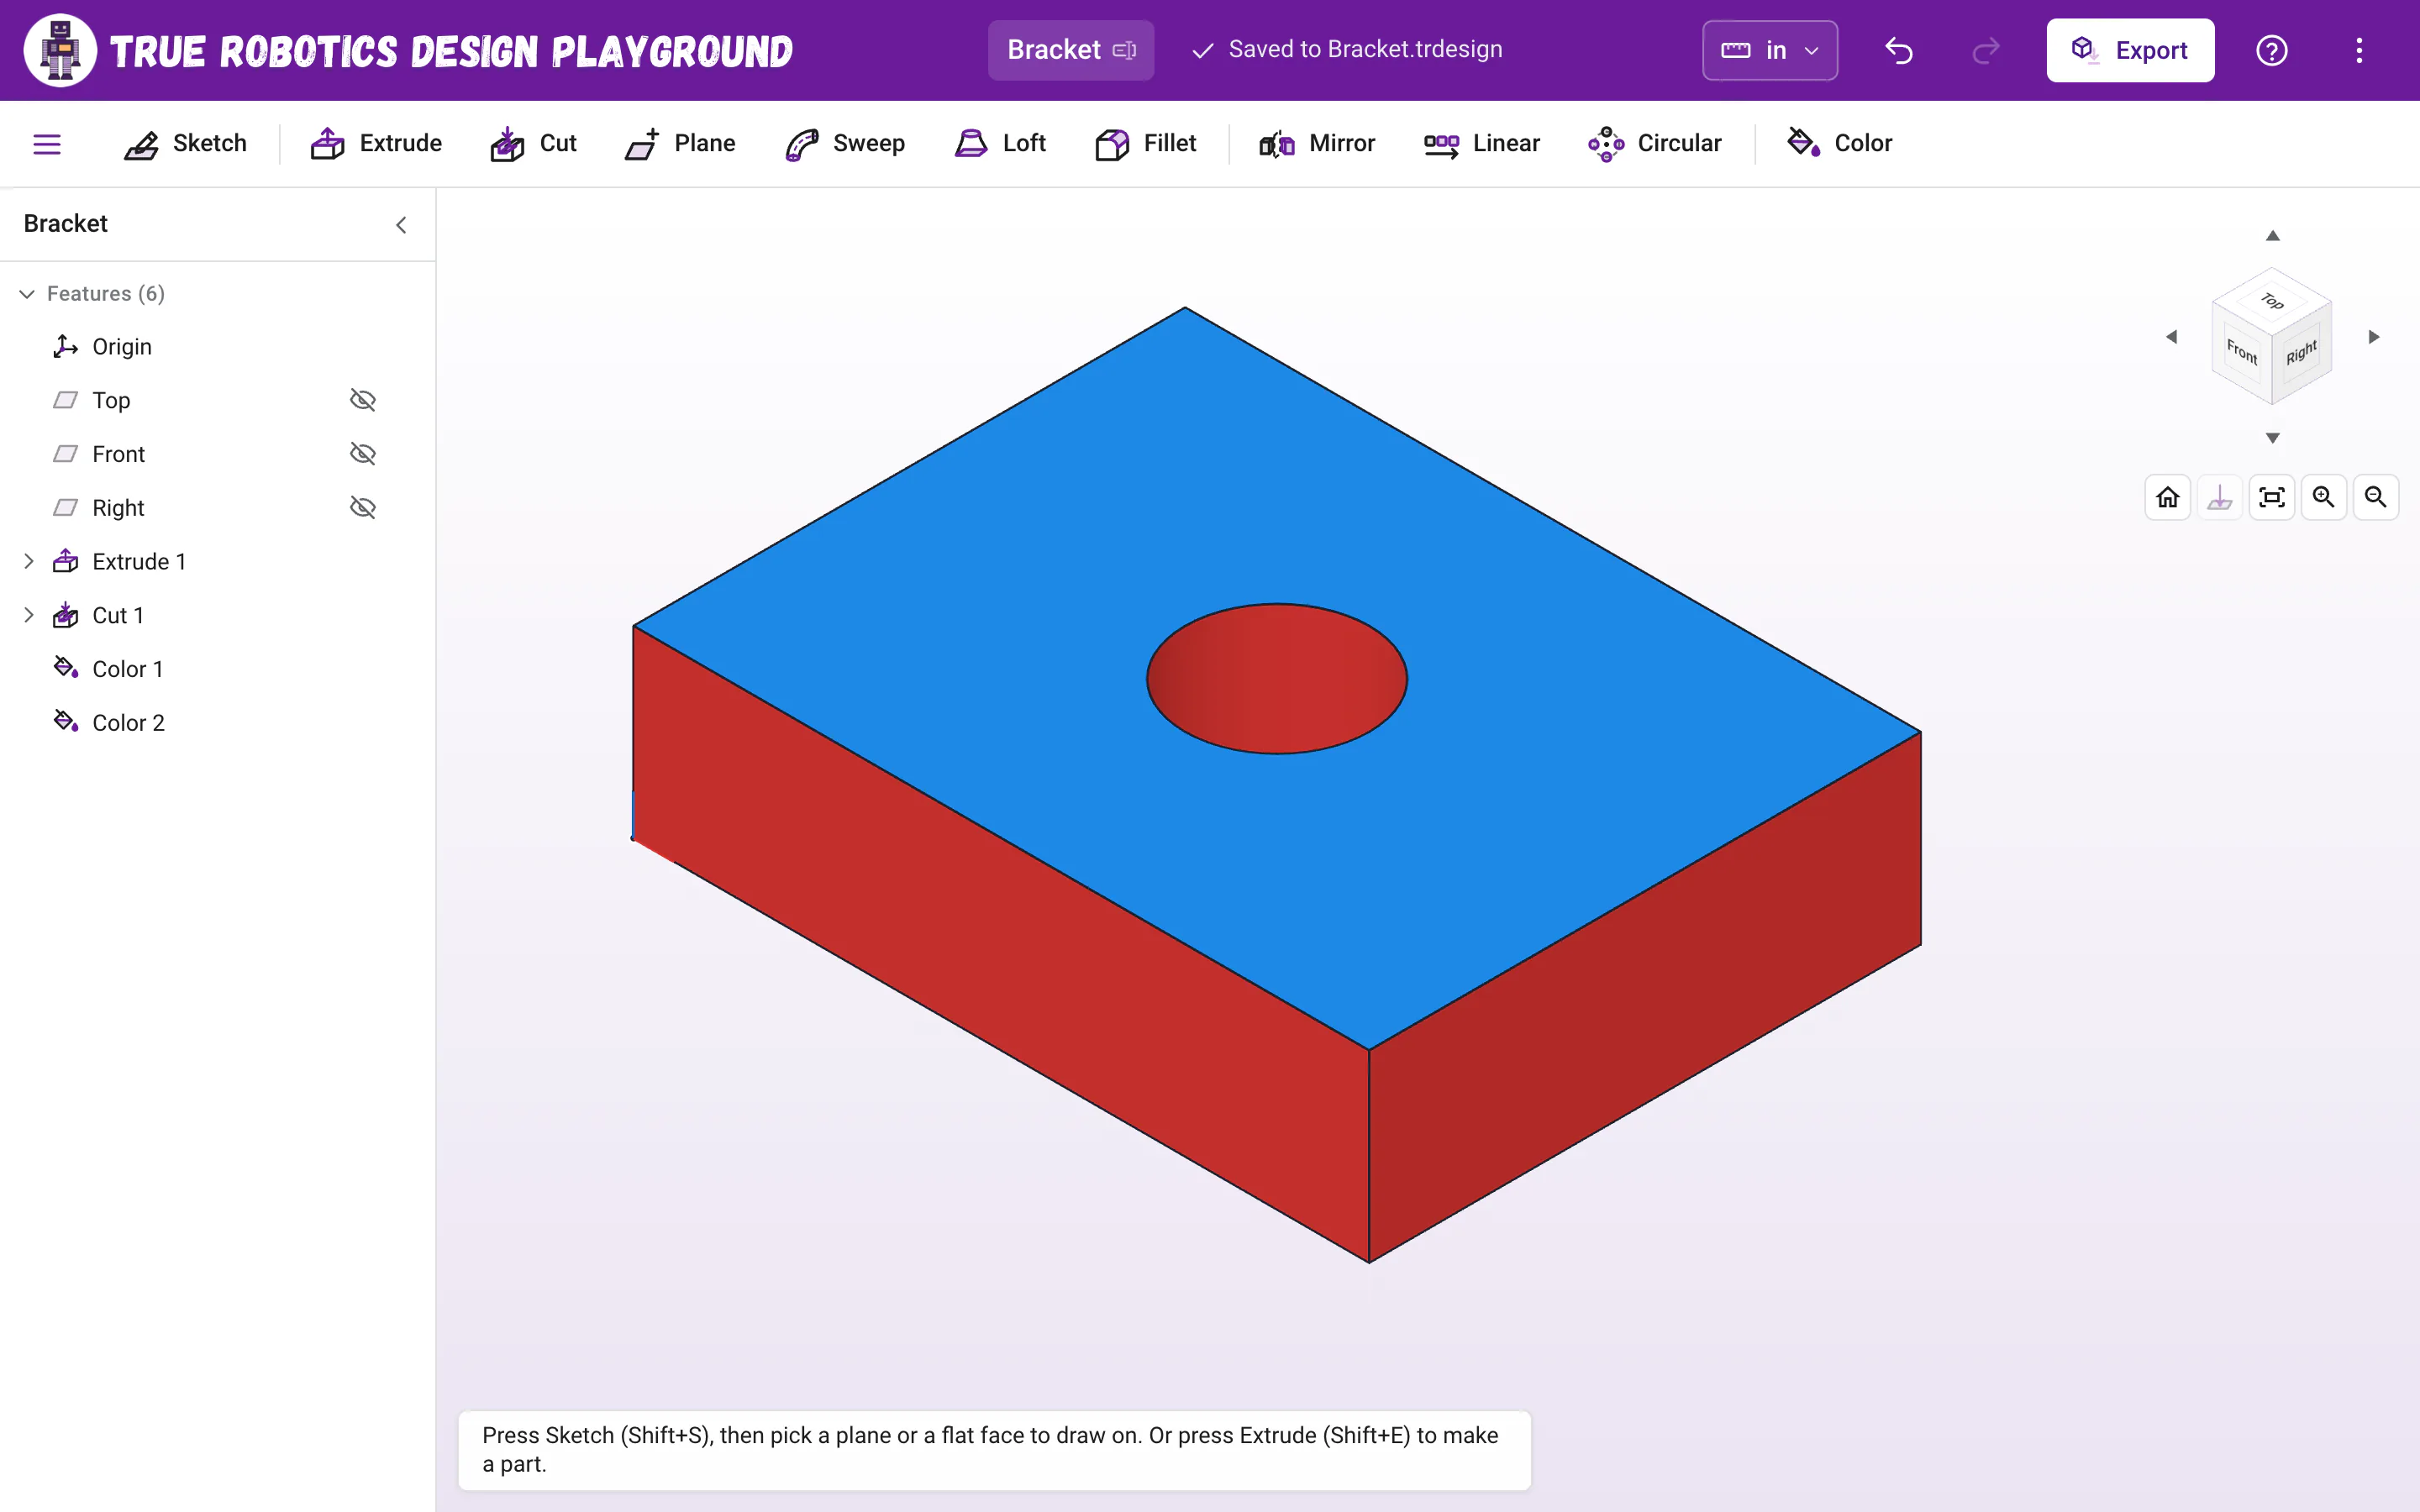
We press Shift and A to start Color and click the part, which shows up in Parts to color and turns True Robotics purple, the color Color starts with. Clicking Red paints the whole part red right away, and the green check adds Color 1. A second Color in Faces mode paints just the top face blue, so the finished part is red with a blue top.
The steps in the video:
- Press Shift + A to start Color.
- Click the part. It shows in Parts to color and turns purple.
- Click Red under More colors. The part turns red.
- Click the green check to finish Color 1.
- Press Shift + A again, then click Faces at the top.
- Click the top face, then click Blue.
- Click the green check. The top is blue and the rest stays red.
Part or Faces: which should I pick?#
| Choice | What it paints | Great for |
|---|---|---|
| Part | Whole parts, every face of them. Faces that later features add to the part get the color too. | Telling the parts of a robot apart, or matching the filament you will print with. |
| Faces | Only the faces you click. A face keeps its color when you change the part, as long as the face is still there. | A colored top, a stripe, or marking the face that mounts to the robot. |
In Part, you can also click a feature's row in the feature list to pick the parts it made. Click a picked part or face again with Shift held to take it off, or click the X on its chip.
Which colors can I use?#
- True Robotics colors: True Robotics purple, bright purple, deep purple, True Robotics orange, lavender and True Robotics black.
- More colors: red, yellow, green, teal, blue, pink, brown, gray, light gray and white, everyday colors like the ones in Basic mode.
- Pick your own opens your device's color picker, so any color works. The view changes as you drag around the picker.
What happens when I change my part later?#
- Colors are features, so they rebuild with everything else. A part keeps its color when you resize it, cut a hole in it or add to it.
- A colored face follows its face. If a change removes that face, the color is skipped and its row says so, so double-click it and pick the face again.
- Later colors win. Paint a part red, then paint its top blue with a second Color, and the top is blue. Paint the whole part again after that, and it all turns that color.
- Want to see the part without a color for a moment? Suppress the Color row. Right-click it (or use its three dots) to rename, suppress or delete it, and double-click it to change its color or picks.
Do colors show up in my files and assemblies?#
Yes and no. STEP files keep your colors, so other CAD programs show them. STL files have no color at all, so your slicer shows the part in the color of your filament. When you insert a colored part into an assembly, it shows its colors there too, which makes a robot full of parts much easier to read.
What do the color messages mean?#
| Message | What to do |
|---|---|
| Pick at least one part to color. | Click a part in the view, or a feature's row in the list. |
| Pick at least one face to color. | Faces is chosen, so click a face of your part. |
| One of the parts this colors is gone, so it was skipped. Edit the color to pick it again. | A change removed a part this color painted. Double-click the color and pick the part again. |
| One of the faces this colors couldn't be found, so it was skipped. Edit the color to pick it again. | A change removed or moved a face. Double-click the color and click the face again. |
Color is the finishing touch: it does not change the shape, just how it looks. Next, round off the edges with Fillet and chamfer, or bring your colored parts together in an assembly.
Questions and answers#
Can I color just one face of a part?
Yes. Start Color, choose Faces at the top of the panel, click the face, pick a color and click the green check. Hold Shift to pick several faces at once.
Does color change the shape of my part?
No. Color only changes how the part looks. The shape, the sizes and the STL file stay exactly the same.
Why is my 3D print not the color I picked?
STL files have no color, so the printer uses whatever filament is loaded. Pick a part color that matches your filament to see how it will look. STEP files do keep colors.