
Assemblies
Mates: Connect Parts So They Move
Mates connect two parts in a True Robotics Design Playground assembly and say how they may move. Pick a mate in the toolbar, click a face or round edge on the part that stays put, then a spot on the part that moves. Fastened locks parts together, Revolute spins like a wheel, and Slider slides like a drawer. Flip, Offset and Angle fine tune it.
Read what happens in this video
We click Fastened, then a spot near a corner of the plate, then the side of a standoff near its bottom, and the standoff stands up on that corner. Enter finishes the mate. Shift and F starts another one for the second standoff on the opposite corner. Shift and E explodes the view to see each part, and pressing it again puts them back.
The steps in the video:
- Click Fastened in the toolbar.
- Click the plate's top face near a corner. A small marker shows the spot.
- Click the side of a standoff, near its bottom. It stands up on that corner.
- Press Enter to finish Fastened 1.
- Press Shift + F for another Fastened mate.
- Click the opposite corner of the plate.
- Click the side of the other standoff, near its bottom.
- Press Enter to finish Fastened 2.
- Press Shift + E to explode the parts and see each one.
- Press Shift + E again to put them back together.
How do I add a mate?#
Pick a mate Click a mate in the toolbar, like Fastened (or press its key, like Shift+F). The Mate panel fills the left side of the screen, and the list of parts moves to the top left of the view, where you can still click it.
Click the first part Point at a flat face or a round edge on the part that should stay put. A small marker with three colored arrows shows exactly where the mate would grab. Click, and First part fills in, like
Middle of a face on Plate <1>.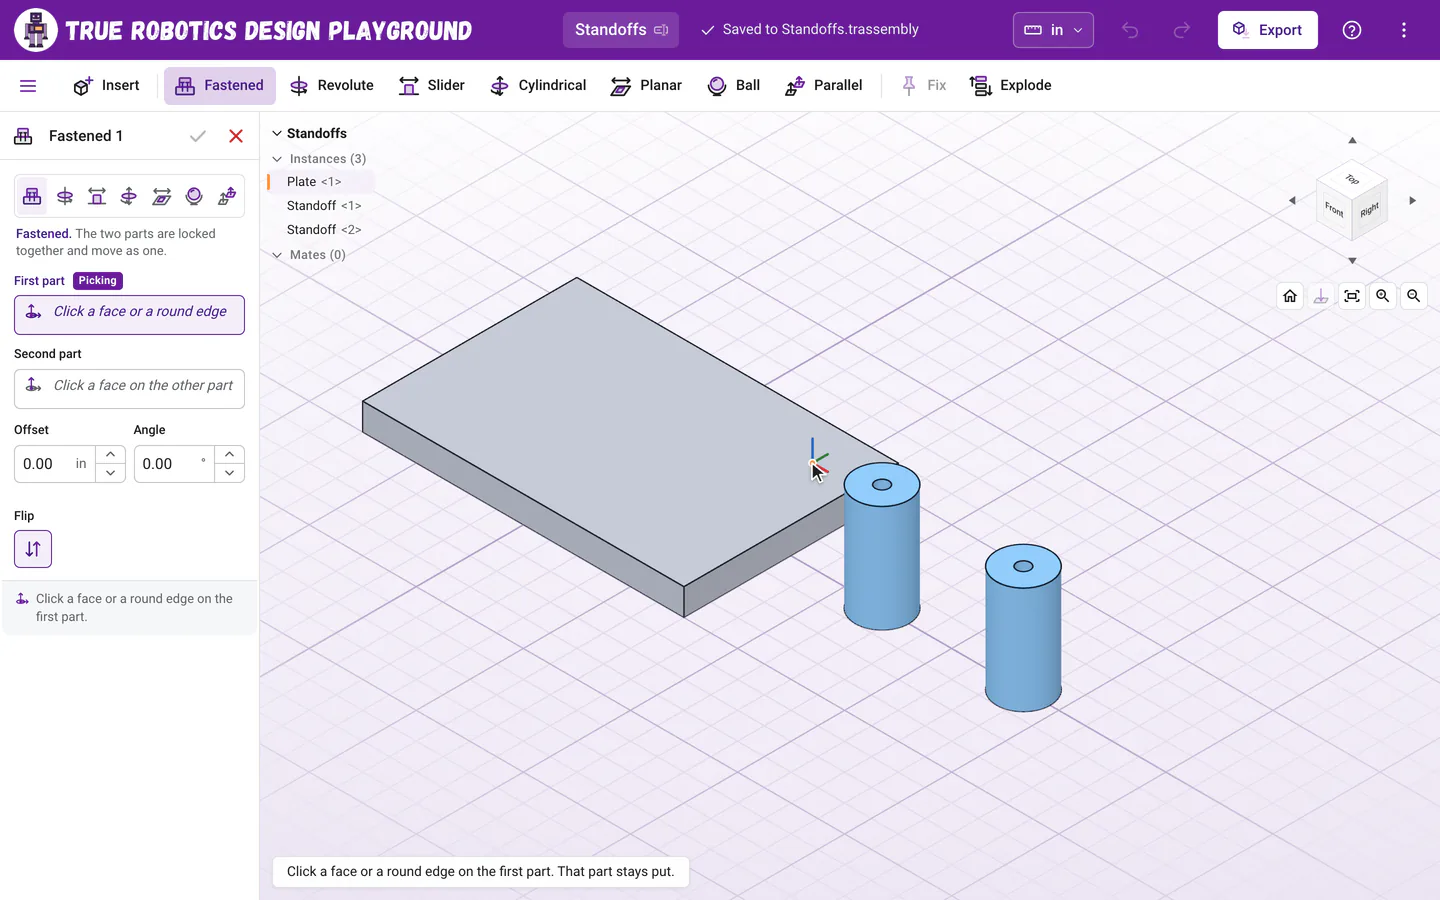
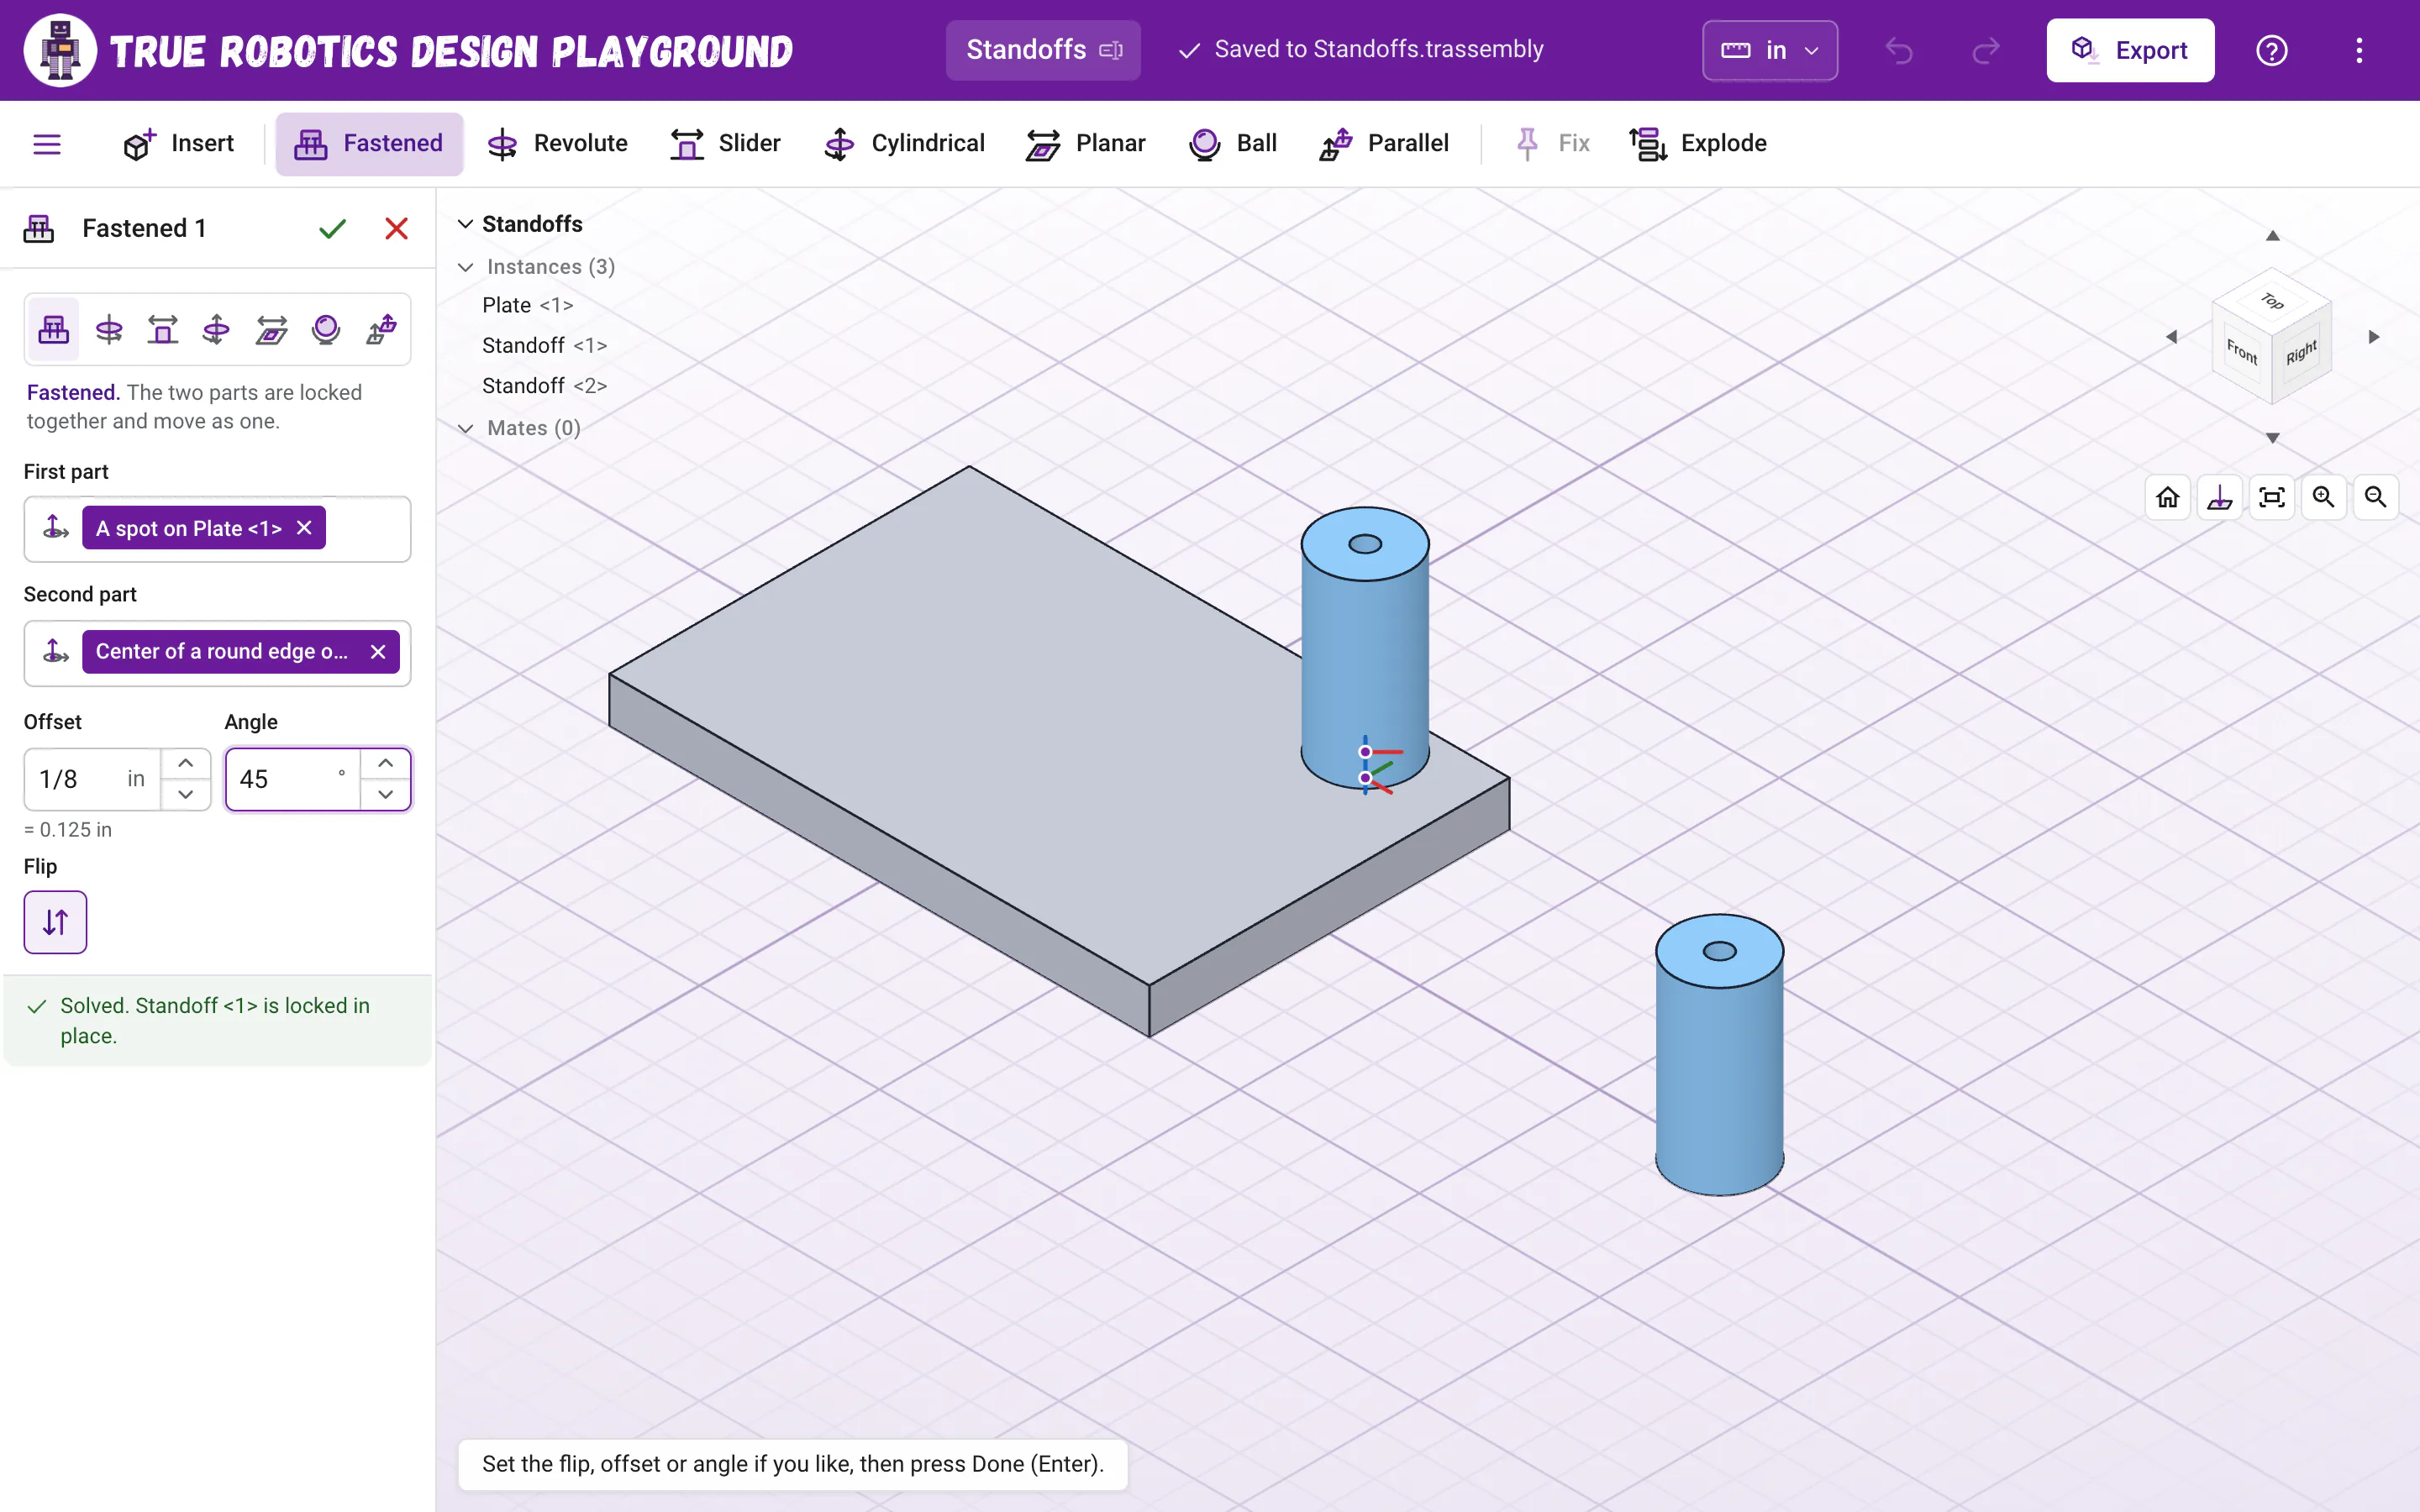
Point at a face or a round edge, and a mate connector shows where the mate would grab. Click the second part Click a spot on the part that should move. It jumps over to the first spot, and Second part fills in. The line at the bottom of the panel says how it went, like Solved. Standoff <1> is locked in place.
Adjust it If the part landed upside down or backward, click Flip. Type an Offset to leave a gap, or an Angle to turn it, where the mate has them.
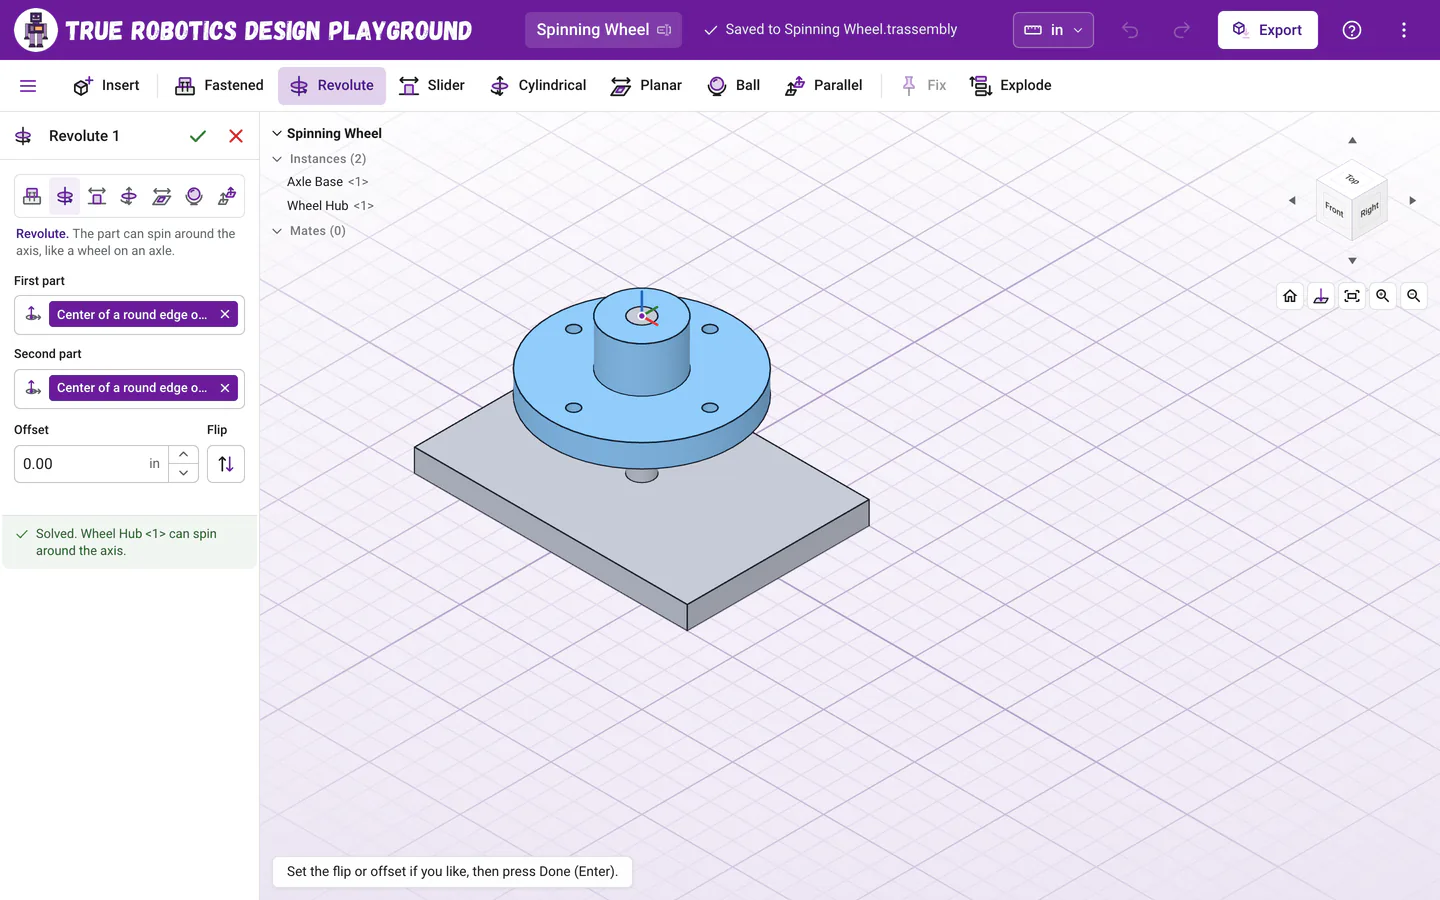
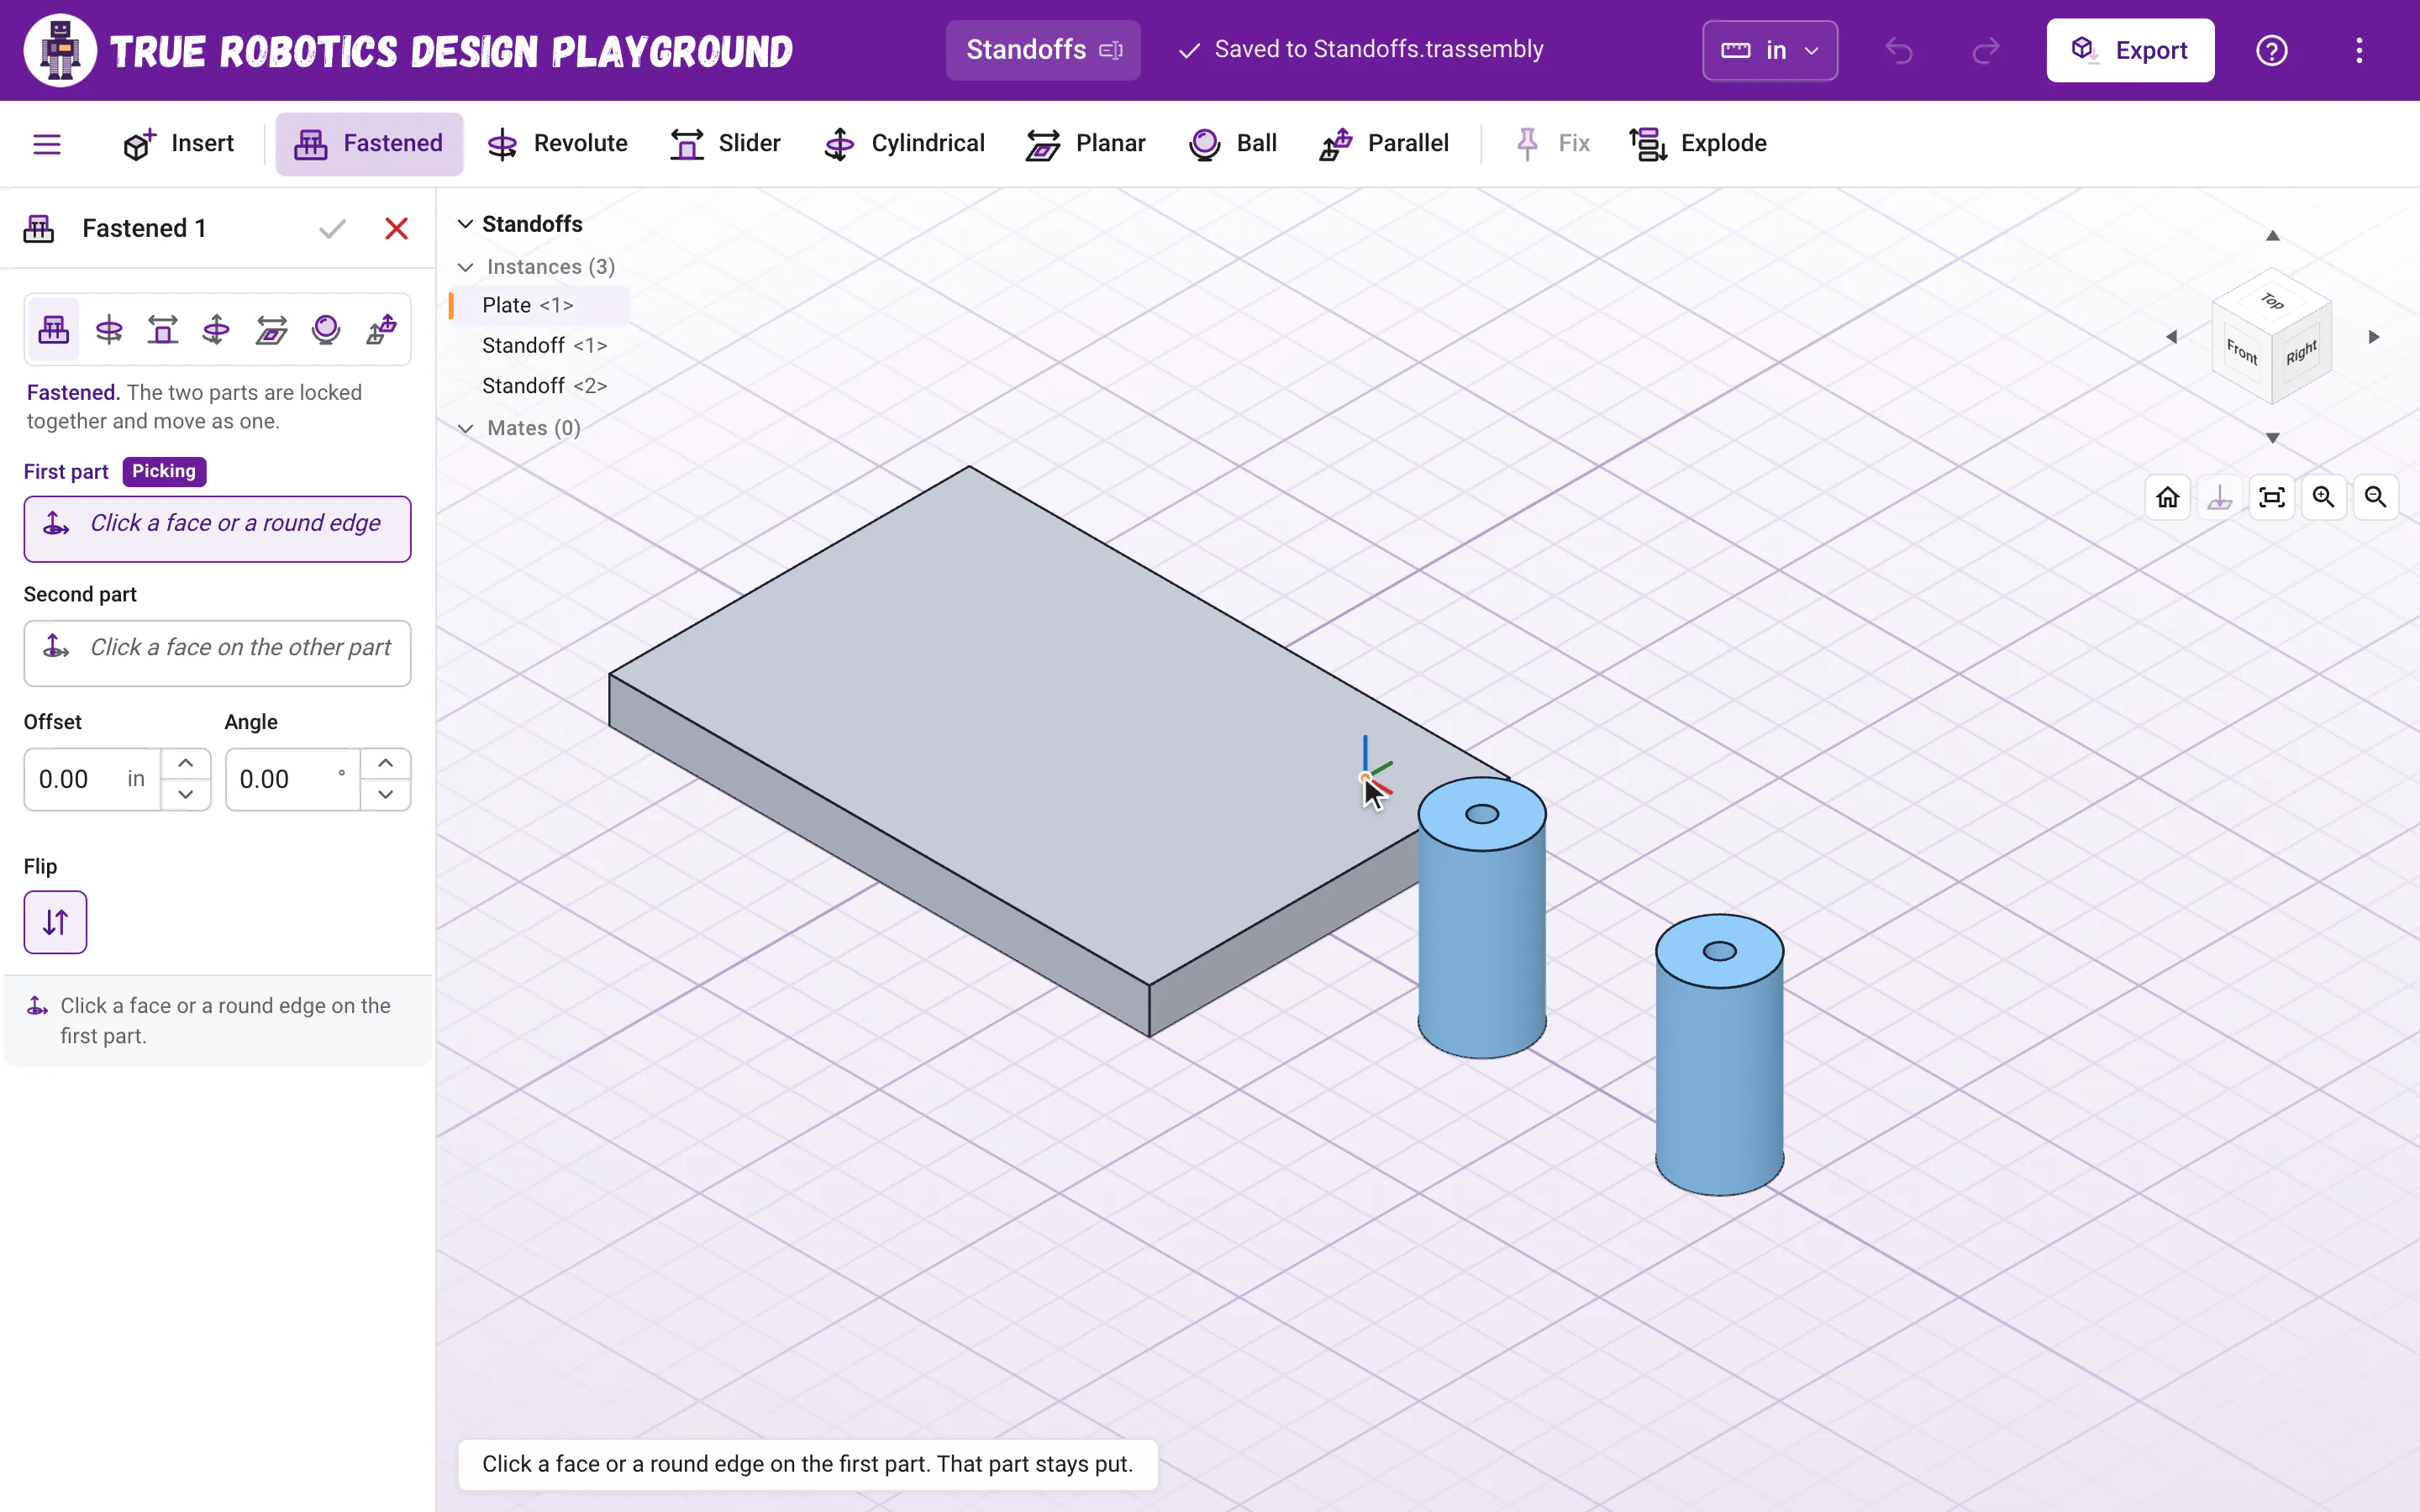
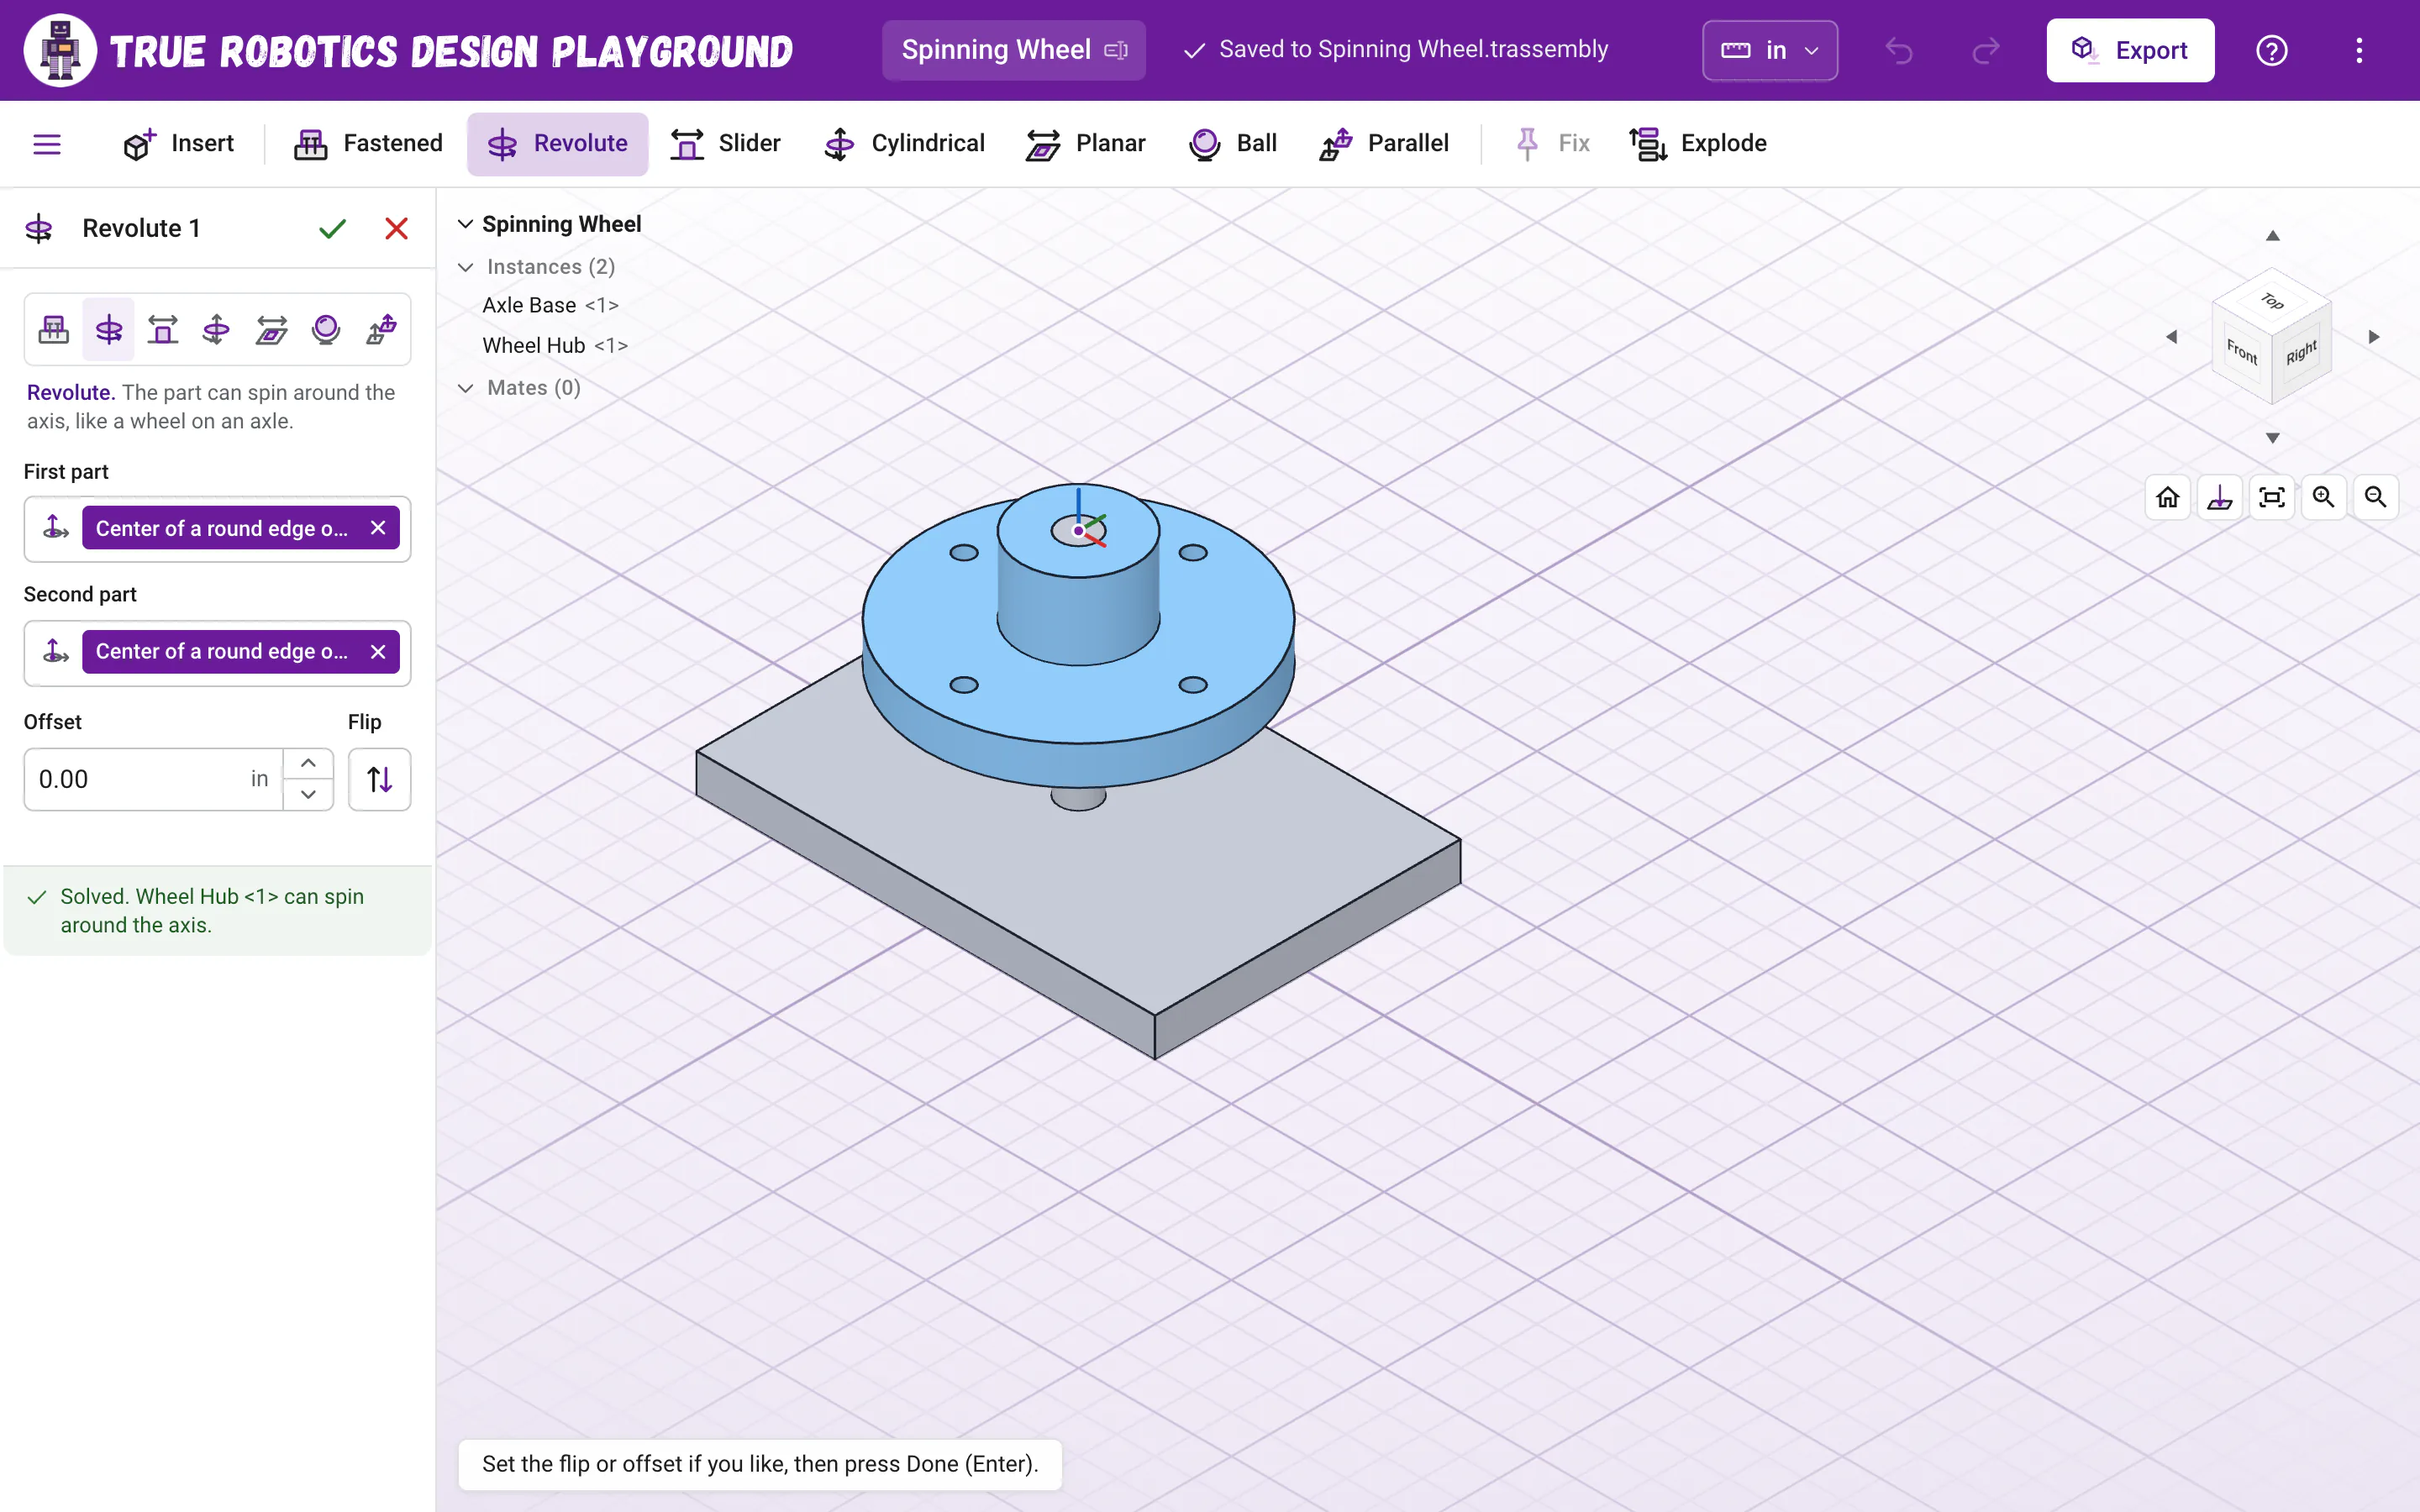
The Mate panel: the mate type, a connector on each part, Offset and Flip, and a line that says how it went. Finish Click the green check, or press Enter. The mate shows under Mates in the list, like Fastened 1. Press Esc or click the red X to close it without a mate.
Which mate should I use?#
Each mate leaves the second part free to move in some ways and locks the rest. Pick the one that matches the real thing you are building.
- FastenedShortcut: Shift+FLocks two parts together so they move as one, like a standoff screwed to a plate.
- RevoluteShortcut: Shift+RLets a part spin around one axis, like a wheel on an axle or a door on its hinge.
- SliderShortcut: Shift+SLets a part slide along one line without turning, like a drawer.
- CylindricalShortcut: Shift+CLets a part spin around an axis and slide along it, like a piston or a pin in a hole.
- PlanarShortcut: Shift+PKeeps two faces together while the part slides and turns on them, like a puck on a table.
- BallShortcut: Shift+BLets a part swivel every way around one point, like a joystick.
- ParallelShortcut: Shift+LKeeps two directions lined up while the part still moves around.

| Mate | The second part can | Offset | Angle | Flip |
|---|---|---|---|---|
| Fastened | Not move at all | Yes | Yes | Yes |
| Revolute | Spin around the axis | Yes | No | Yes |
| Slider | Slide along the axis | No | Yes | Yes |
| Cylindrical | Spin around the axis and slide along it | No | No | Yes |
| Planar | Slide and turn on the face | Yes | No | Yes |
| Ball | Swivel around the point | No | No | No |
| Parallel | Move around, staying lined up | No | No | Yes |
Changed your mind? The row of seven icons at the top of the Mate panel switches the type of the mate you are making, and the picks stay.
Where should I click on each part?#
Every mate joins two mate connectors, one on each part. A connector is a spot plus a direction, shown by the small marker with three colored arrows as you point:
- A flat face: the connector sits where you click, and snaps to the middle of the face when you are close. Its direction points straight out of the face. Great for Fastened and Planar.
- A round edge or a round face, like an axle, a hole or the rim of a cylinder: the connector sits on the center line, at the middle of the circle. Its direction runs along the axis. Great for Revolute, Cylindrical and Slider.
- No mouse? In the list, move to a part with the arrow keys and press Enter to pick it at its origin.
The first part stays put and the second part moves over to it, so click the part that is already in place first. To change a pick, click its field in the panel and pick again, or click the X on it to clear it.
What do Flip, Offset and Angle do?#
- Flip turns the second part around, so its connector faces the other way. Use it when a part lands upside down or inside out. It starts on, so faces meet face to face.
- Offset leaves a gap along the first connector's direction, like
1/8for a washer between two parts. Fastened, Revolute and Planar have it. - Angle turns the second part around that direction, like
90for a quarter turn. Fastened and Slider have it.
Offset and Angle work like every size box in the app: type math or other units, like 1/4 + 1/8 or 3 mm, or click the little up and down arrows. The preview moves as you type.
How do I test a mate?#
Drag the part in the view. It moves only the ways its mates allow, and anything mated to it comes along. A wheel on a Revolute mate spins and stays on its axle; a part on a Slider mate glides along its line. Let go to put it down. Press Ctrl+Z if you would rather have it back where it was.
Read what happens in this video
We click Revolute, then the side of the axle near its top, then the inside of the wheel hub's axle hole. The wheel jumps onto the axle upside down, so we click Flip, then the check to finish. Dragging the wheel spins it around the axle, and it never slides off.
The steps in the video:
- Click Revolute in the toolbar.
- Click the side of the axle, near its top.
- Click inside the axle hole of the wheel hub. The wheel jumps onto the axle.
- It landed upside down, so click Flip to turn it over.
- Click the green check to finish Revolute 1.
- Drag the wheel sideways. It spins around the axle and stays on it.
How do I change or remove a mate?#
- Edit: double-click the mate in the list, or select it and press Enter. The Mate panel opens with everything as you left it.
- Suppress: open the mate's menu (its three dots) and choose Suppress. A suppressed mate stays in the list but holds nothing, which is handy for testing. Choose Unsuppress to turn it back on.
- Rename: select it and press F2, like
Left wheel. - Delete: select it and press Delete (or Backspace). The parts stay where they are.
Why did my mate turn red?#
A red mate can't hold together with the others. The list shows it in red, a red line joins its two connectors in the view, and the hint says This mate can't hold together with the others. Try flipping it, or check the other mates on these parts. Usually two mates ask for different things, like a part fastened to two spots that are too far apart.
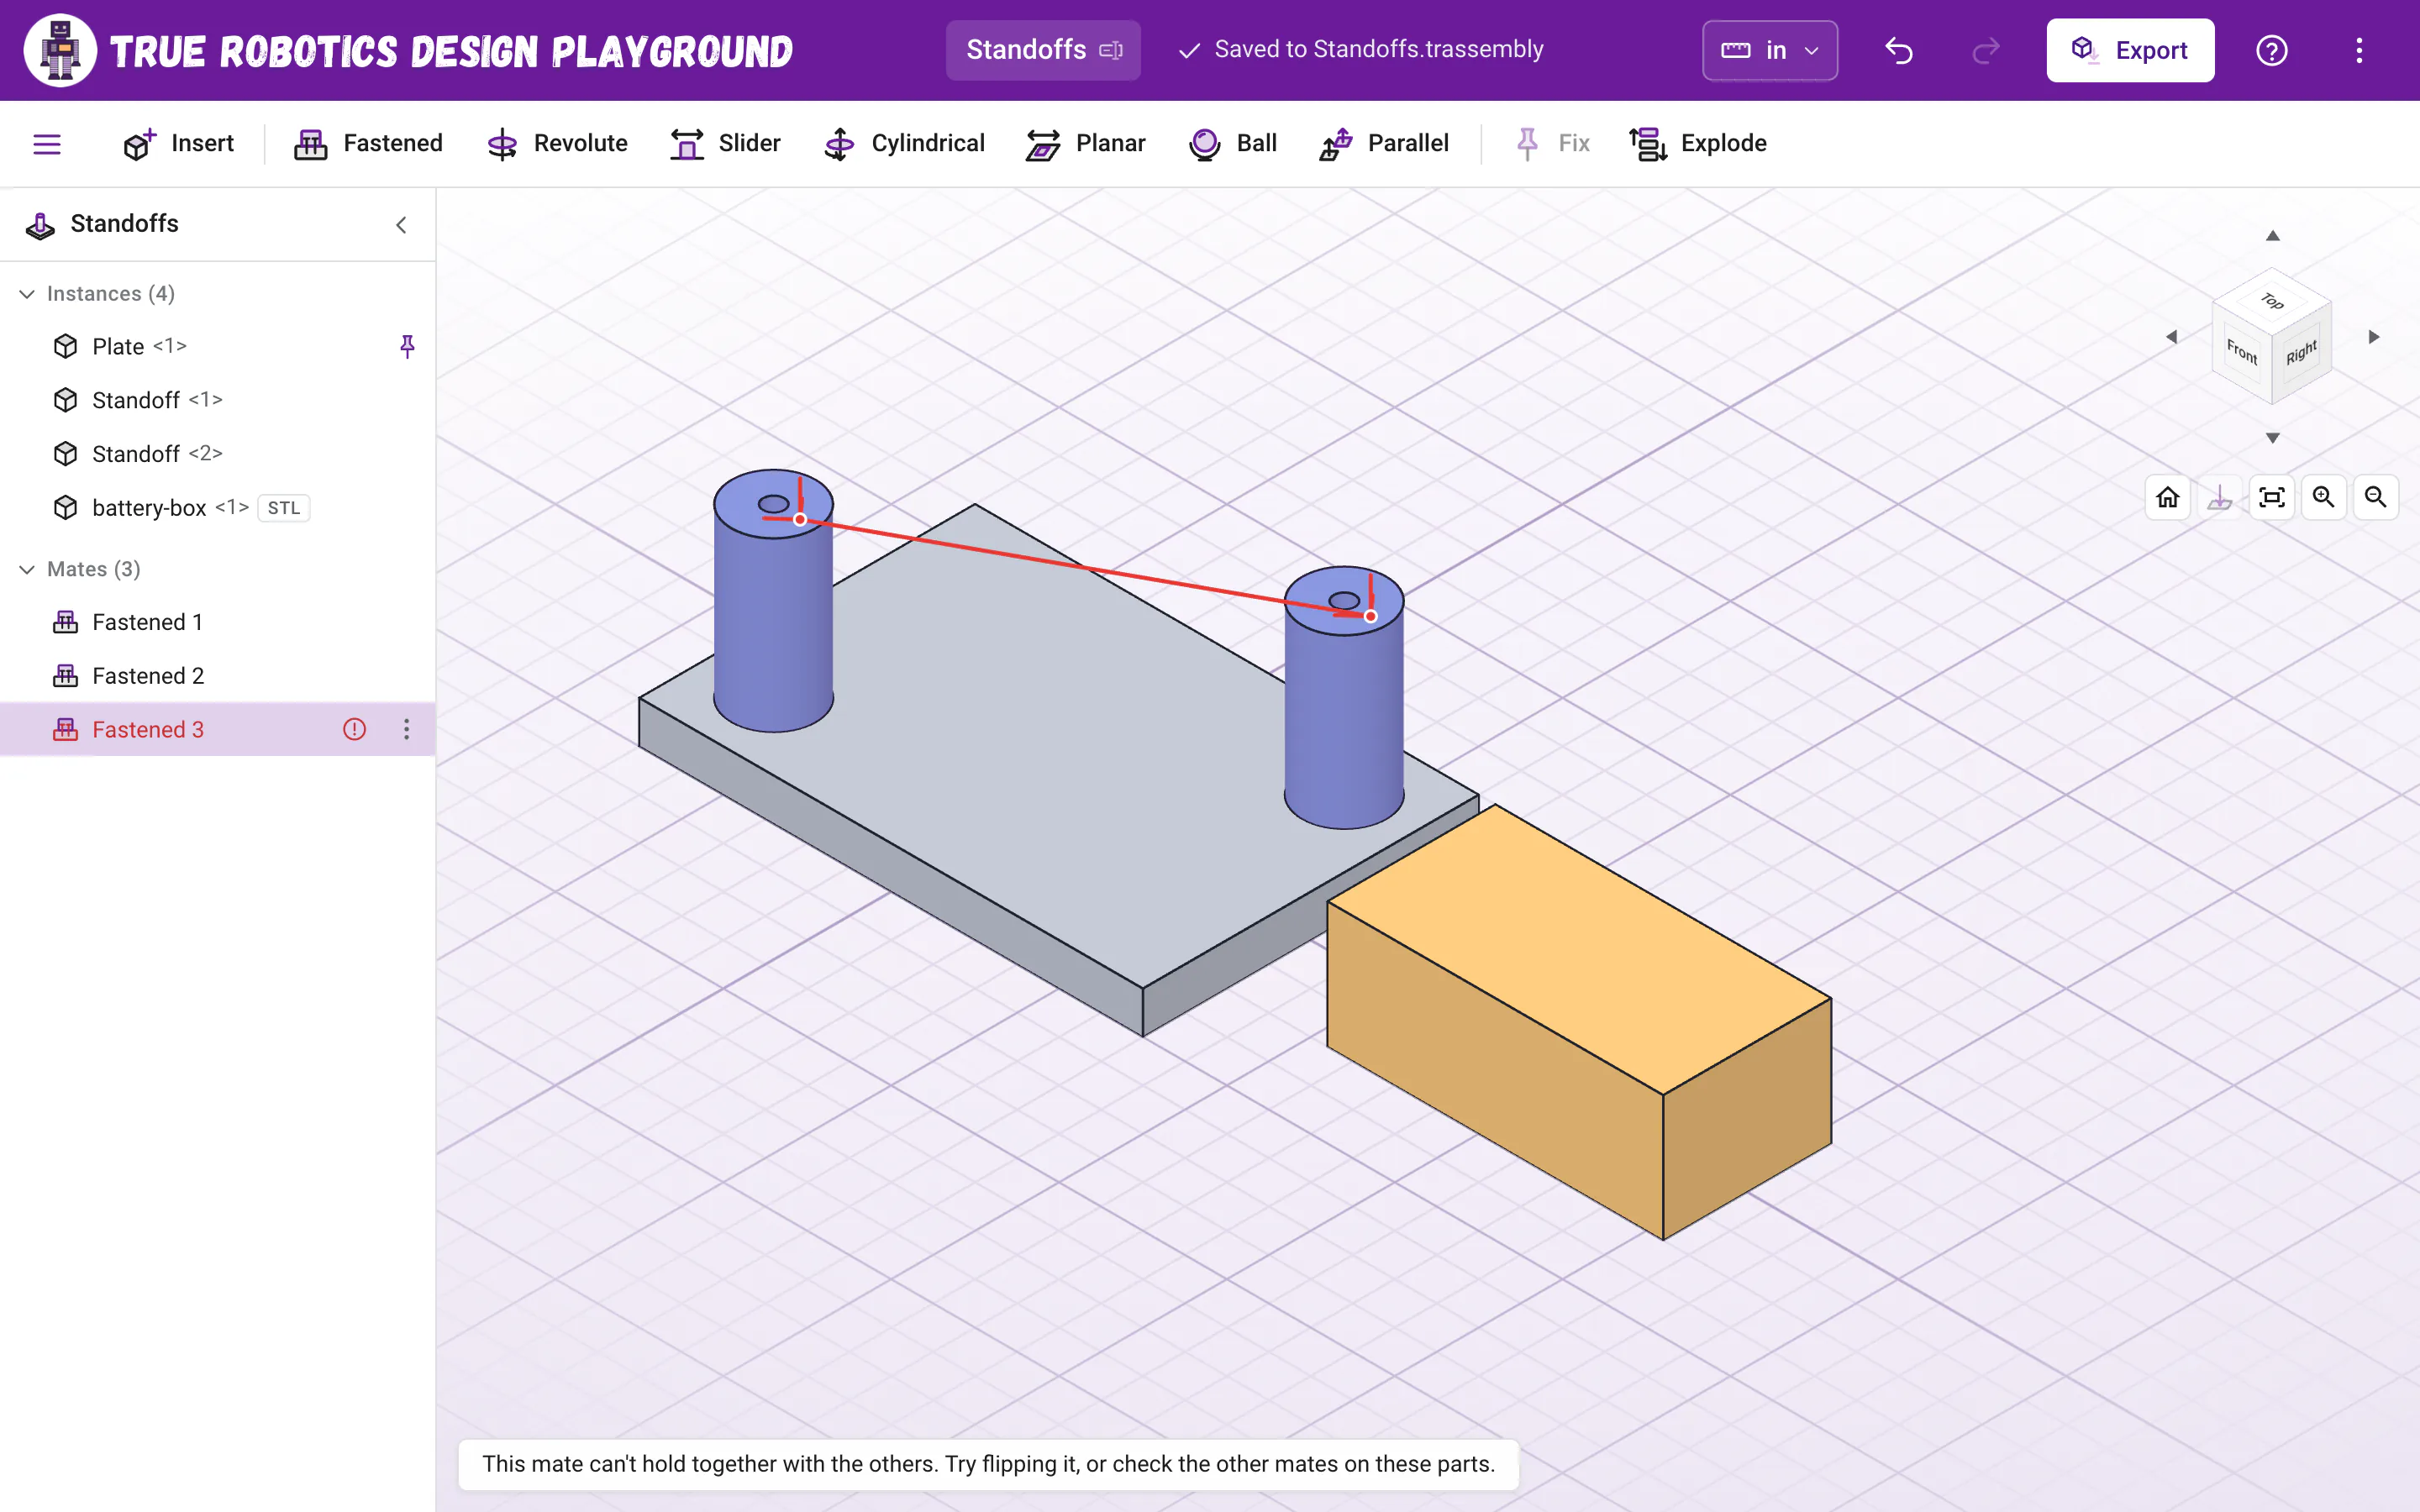
- Double-click the red mate and click Flip, or pick different spots.
- Check whether both parts are already held by other mates, or both are fixed. A fixed part never moves, so when both are fixed the hint says Both parts this mate holds are fixed in place, so neither one can move to meet it. Unfix one of them. Select one of them and click Unfix in the toolbar, or right-click it and pick Unfix so it can move.
- Suppress or delete the newest mate, then try again.
| Message | What to do |
|---|---|
| Insert at least two parts to mate them together. | Click Insert and bring in another part first. |
| A mate holds two different parts together. Pick the second spot on another part. | Both clicks were on one part. Click a spot on the other part. |
| Finish the mate you are working on first, or close it. | Click the green check or the red X in the Mate panel, then try again. |
| One of the parts this mate holds is gone. Delete the mate, or edit it and pick new spots. | A part it held was deleted. Delete the mate, or double-click it and pick new spots. |
Want to try it on a real build? The spinning wheel tutorial uses a Revolute mate from start to finish. You've got this!
Questions and answers#
What is a mate in CAD?
A mate connects two parts in an assembly and says how they may move. In the True Robotics Design Playground, Fastened locks parts together, Revolute lets one spin, Slider lets one slide, and four more mates cover the other ways parts move.
Which part moves when I add a mate?
The second part you click moves over to the first one. The first part stays put, so click the part that is already in place first.
Why did my part land upside down?
The connectors faced the other way. Click Flip in the Mate panel and the second part turns around.
How do I make a wheel spin?
Use a Revolute mate. Click the axle near its end first, then the inside of the wheel's hole, click Flip if it lands upside down, and click the check. Drag the wheel and it spins around the axle.