
Help and reference
Teaching with the True Robotics Design Playground
The True Robotics Design Playground is built for K-12 classrooms. It is free, needs no student accounts or logins, and runs in the browser on Chromebooks, computers and iPads, even offline once installed. Students start in Basic mode, building with shapes, move to Standard for sketches and dimensions, and put parts together in assemblies. They export STL files for your 3D printer.
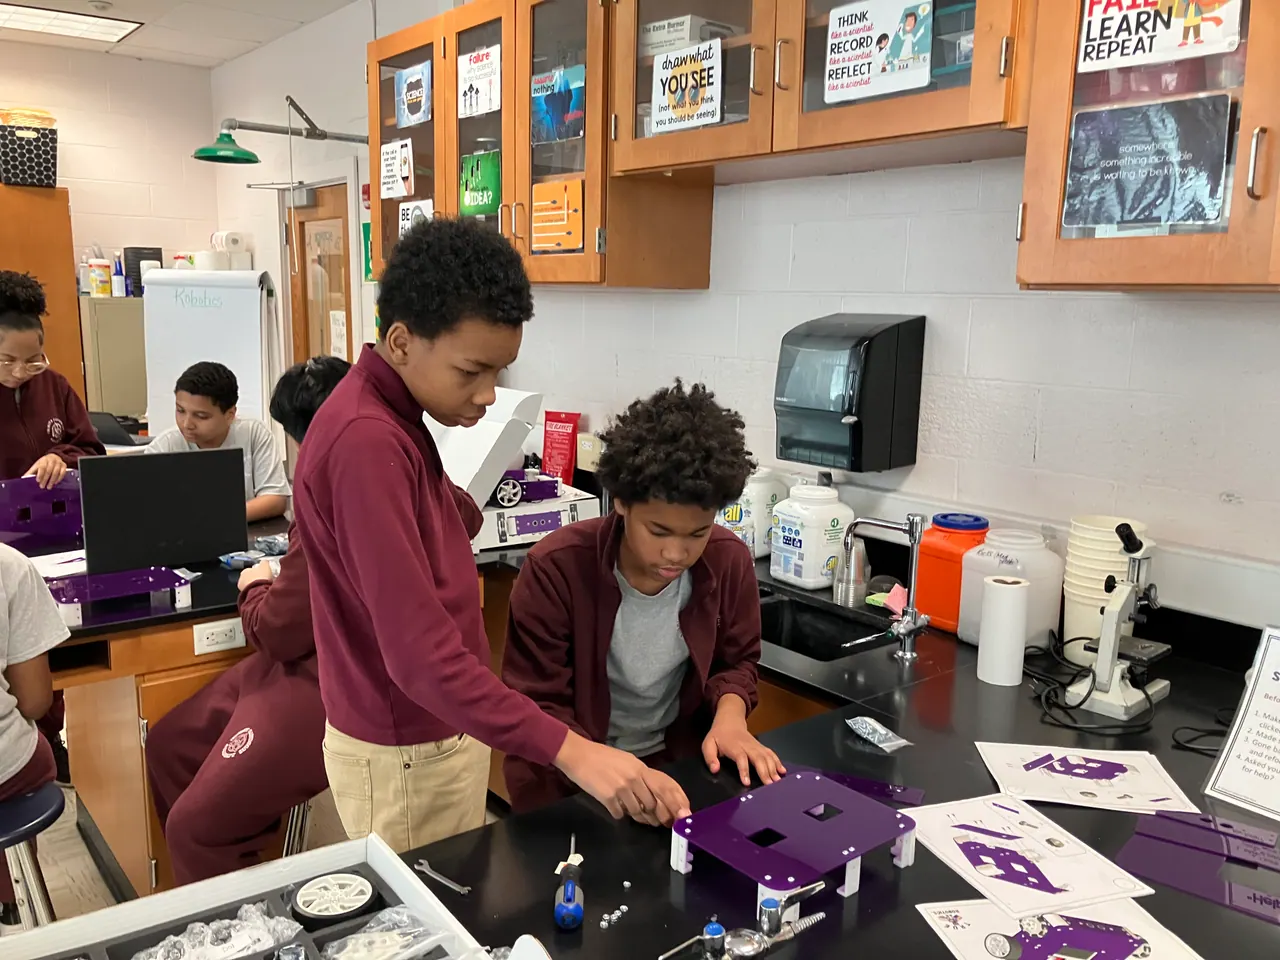
Why does it work well in a classroom?#
- No logins and nothing to install. Students open design.truerobotics.org and start designing. There are no accounts to create or passwords to reset.
- Free. Every student can use it, at school and at home.
- Works offline. Install it on your Chromebooks once, and it keeps working on a slow or missing school network. Install and use it offline shows how.
- Works on the devices you have. Chromebooks, Windows and Mac computers and iPads all run it in the browser, with a mouse, a trackpad, a touch screen or the keyboard.
- Projects stay on your devices. Work saves in a file students choose or inside the browser, never on a server.
- Two ways to build, plus assemblies. Basic mode lets younger and brand new students build with shapes, holes and groups in minutes. Standard mode teaches real CAD habits: planes, sketches, dimensions, constraints, extrudes, sweeps, lofts, patterns and an editable history work the way professional tools do, so the skills carry forward. Assemblies put parts together with mates, so students see how a robot moves before they build it.
- Inches or centimeters. New projects start in inches, and students can pick centimeters for metric work. Typing other units works too, like
25 mm. - Exact sizes that print right. Every part exports as an STL in millimeters, the unit slicers expect, at exactly the size students designed. Students who go on to other CAD programs can export STEP files too.
- Help right where they need it. The Help and Tutorials card on the home screen and the ? button in the workspace open these guides in a new tab, on the page for what the student is doing.
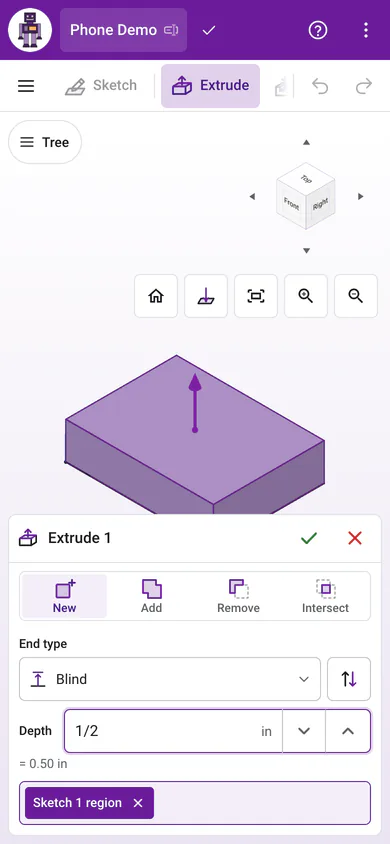
It even runs on a phone, which is handy for showing a quick demo or checking a design on the go. Everything fits: Export and the units sit in the three dots menu, and the feature dialogs dock along the bottom.
Should students start in Basic or Standard?#
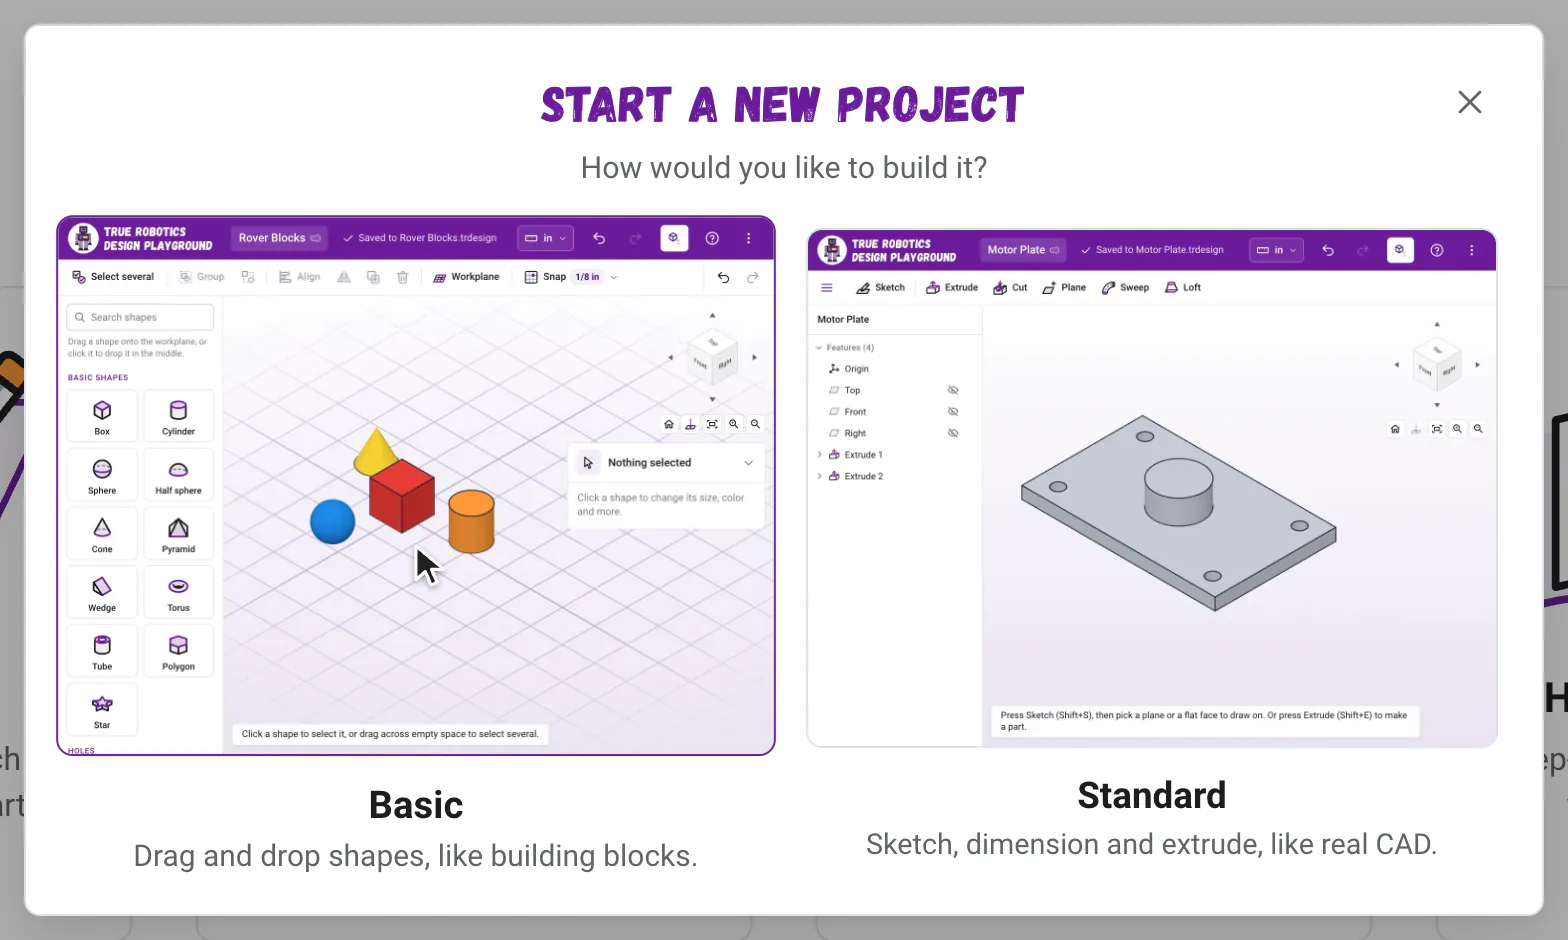
Start them in Basic, the picture on the left when they click New Project. Students get a real part on the screen in their very first minutes: drag in shapes, type exact sizes, make holes and group. That early win builds confidence and teaches the big ideas of 3D design, like width, depth and height, positions on a grid, and cutting one shape from another. Younger students can stay in Basic all year.
When students are comfortable, move them to Standard, the picture on the right in the New Project window. Sketches and dimensions take a little longer to learn, and they reward students with parts no stack of shapes can make, plus the habits that professional CAD tools use. Many classes keep both going: Basic for quick ideas, Standard for final parts. Basic mode compares the two side by side. Then bring the parts together in a New Assembly to check how they fit and move.
How should students save on shared computers?#
Every new project asks Would you like to autosave this project? Teach students to click Yes, autosave and save into their own folder on Chromebooks and in Chrome or Edge, so every change lands in a file they own. A student who clicks No sees Not saved in the purple bar until they click Save. On shared computers, remember that projects saved in the browser are visible to anyone who opens the app in that same browser. At the end of class, students can keep their own file (or use Download a copy) and then delete the browser's copy from Open Project. Deleting from that list never touches a file saved on the computer.
On iPads, in Safari and in Firefox, projects save in the browser. Make Download a copy part of your end of class routine so each student has a file to keep or turn in.
How should students name their files?#
Agree on a pattern before the first project, like P3 Mounting Plate plus a student number or initials. The name students type in the save window becomes the project's name, and the STL takes the same name, so a good name now saves sorting later. The characters \ / : * ? " < > | are swapped for spaces in file names, so skip them.
How do students turn in their work?#
- For checking the design: ask for the
.trdesignfile from Download a copy. Open it in the app to see the whole thinking process: every shape, hole and group in a Basic project, or every sketch, dimension and feature in a Standard one. An assembly downloads as one.trassemblyfile with every part inside. - For printing: ask for the STL from Export. It lands in the student's Downloads folder, ready to upload to your learning platform or a shared drive.
What is a good first lesson?#
- Show the Basic mode tour on your projector for five minutes.
- Have everyone make a phone stand, typing every size in inches.
- Challenge pairs to change one size each, like a steeper back or a wider base, and explain what they changed.
- Print a few stands and measure them with a ruler to check the sizes.
Next, the robot wheel hub adds holes and Duplicate, and the spinning wheel puts it on an axle in a first assembly. Then switch to Standard with your first part in five minutes, and the tutorials step up to robot parts: a mounting plate, a hex standoff, a slot and an L bracket. Ready for curves? The curved handle and funnel tutorials introduce Sweep, Loft and planes you make yourself, which make a great challenge for students who finish early.
Can we use it without the internet?#
Yes. Open the app once on each Chromebook or computer while it is online and click Install app, or add it to the Home Screen on iPads. After that it opens and works with no internet: designing, saving, opening files, export and these help pages. Only help videos that haven't been watched yet need the internet, and their steps are written out below them. When a new version comes out, students see A new version is ready. the next time they are online, and Reload saves their work first. Install and use it offline has the details for each kind of device.
How does it fit with True Robotics Classroom Packages?#
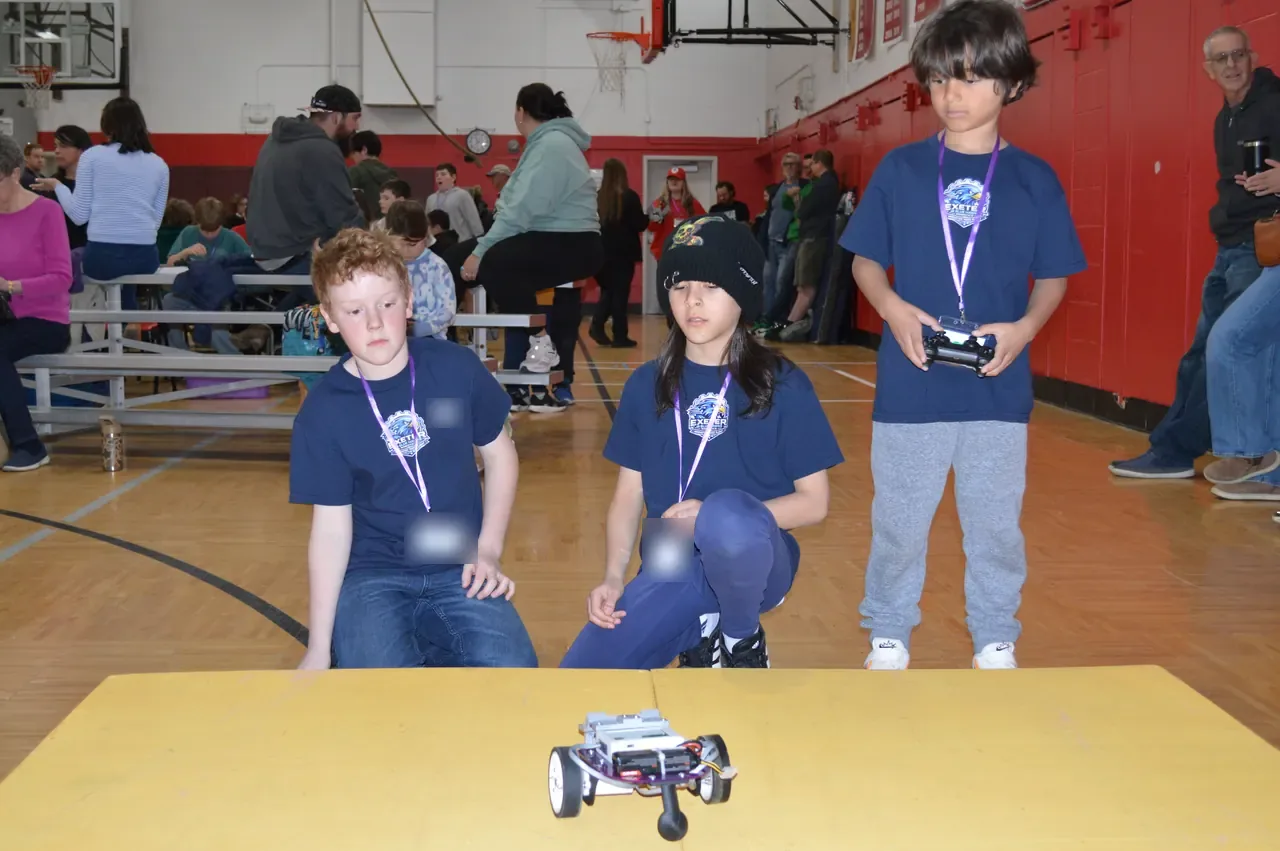
True Robotics has developed Classroom Packages for students in grades K-12 as a practical solution to help schools introduce robotics to all students. Our packages include grab-and-go curriculum, reusable robot kits, and interactive teacher training. Students code their robots in the True Robotics Playground, and the True Robotics Design Playground gives them a place to design the custom parts their robots need, like a sensor mount or a new attachment.
Tip: Design, print, test, improve
Have students measure their robot, design a part, print it, test it, and then change one dimension and print again. Because the design is parametric, each improvement is just a new number.
Interested in bringing robotics to your school? Get in touch with our team at truerobotics.org!
Questions and answers#
Do students need accounts to use the True Robotics Design Playground?
No. There are no accounts or logins. Students open the site and start designing, and their projects save to a file they choose or in the browser.
Which mode should students start in?
Basic, the first choice in the New Project window, where students build with shapes, holes and groups. Move them to Standard, with sketches and dimensions, once they are comfortable.
Does the True Robotics Design Playground work on Chromebooks?
Yes. Chromebooks run it in the browser and can save each project straight to a file in a folder the student picks, with every change saved automatically.
Where is student work stored?
Only on the student's device: in a .trdesign file the student chooses, or inside the browser. The True Robotics Design Playground does not save projects on a server.
Does the True Robotics Design Playground work offline in school?
Yes. Install it once on each device while online, and it works with no internet after that: designing, saving, opening files, export and the help pages. Only help videos not yet watched need the internet.
Can students keep working at home?
Yes. Students can take their .trdesign file home, or download a copy, then open it at design.truerobotics.org with Open Project and Open a file from your computer.