
Sketching
Sketching Basics
A sketch in the True Robotics Design Playground is a flat drawing on a plane or on a flat face of a part. Click Sketch, pick Top, Front, Right or a face, and the view turns to look straight at it. Draw with lines, arcs, circles and smooth splines, size shapes with dimensions, and press Enter to finish. Closed shapes fill light purple, and those regions are what Extrude uses.
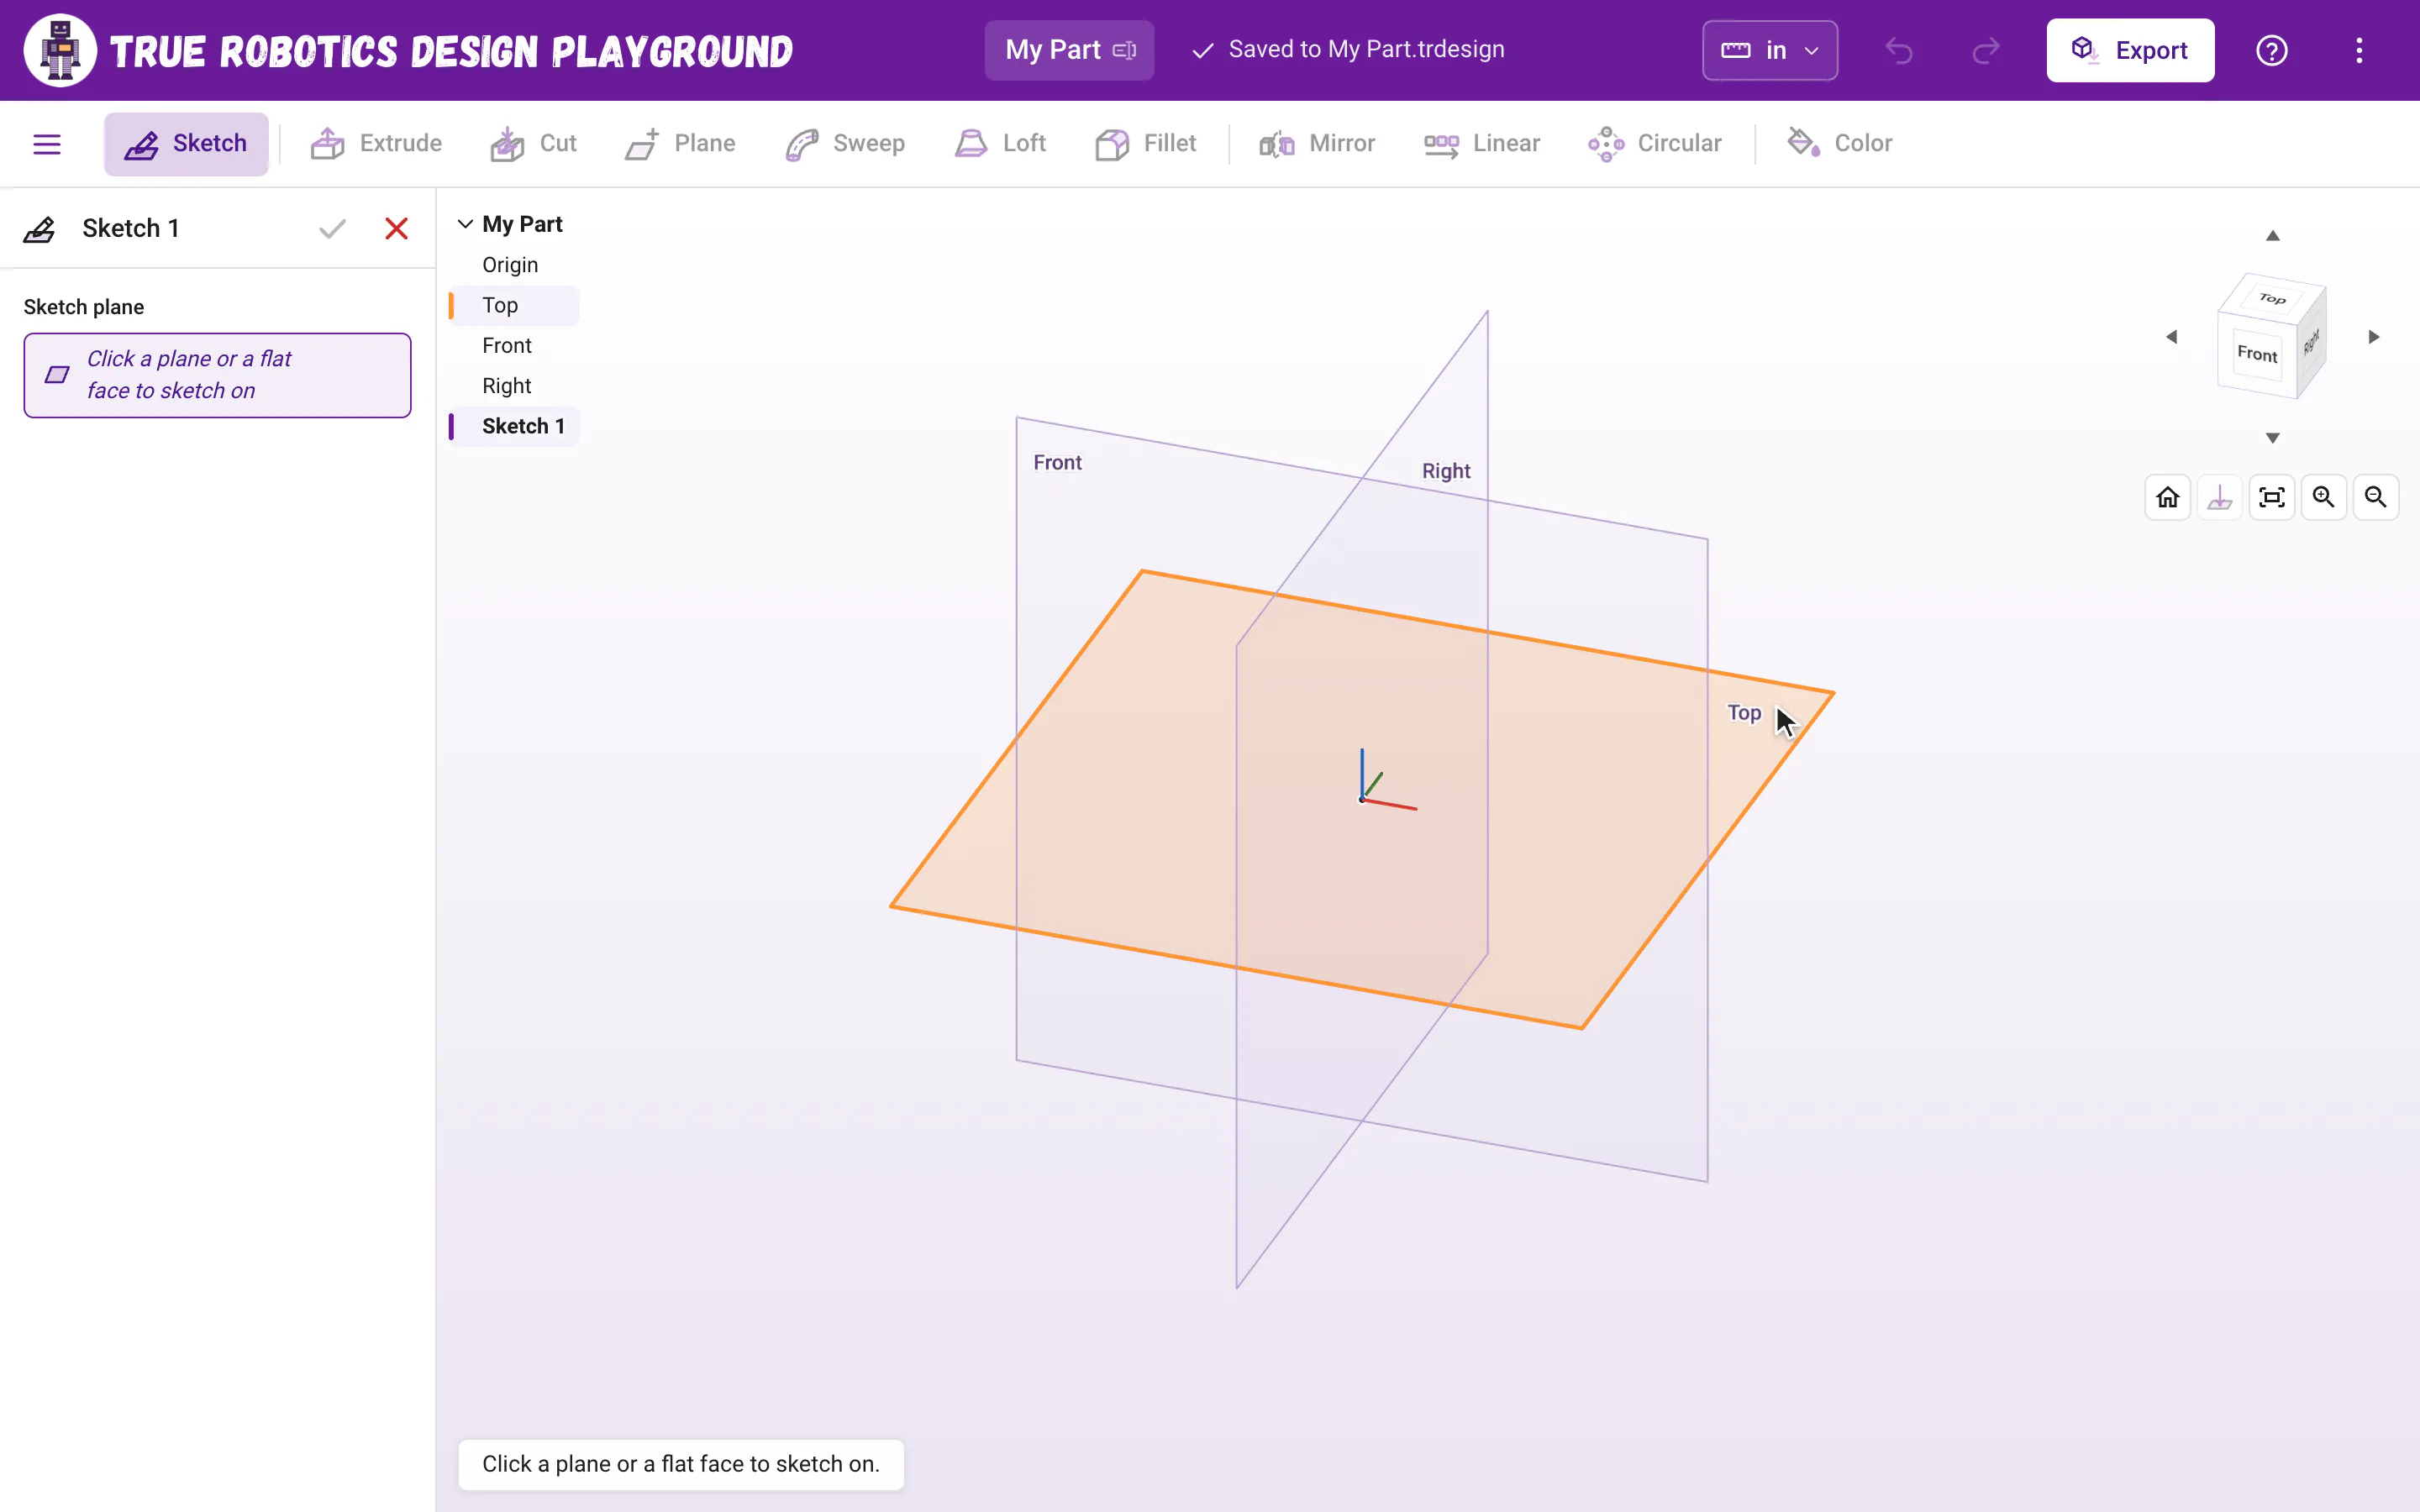
How do I start a sketch?#
Click Sketch in the toolbar, or press Shift+S. The Sketch panel opens on the left and says Click a plane or a flat face to sketch on.
The Top, Front and Right planes appear, and the view turns so all three fit and read apart, each with its name in its outer corner. Click one of them, a flat face of a part, or a plane you made. You can also click a plane's row in the feature tree.
The view turns to look straight at your plane and zooms to fit, the planes tuck away again, and the sketch toolbar appears. Time to draw!
Already selected a plane or a face? Then Sketch starts right away on it. Press Esc while the planes are showing to change your mind, and they hide again.
Where did the planes go?#
New projects keep the Top, Front and Right planes hidden, so they never get in the way of your part. They show up by themselves whenever you need to pick one, like when you click Sketch with nothing selected, and hide again once you pick. To keep a plane showing, click the eye on its row in the feature tree. Projects made before the planes started hiding keep them the way they were saved.
When you sketch on a plane, your parts fade so you can see your drawing. When you sketch on a face, the part stays solid and the face's outline shows as gray lines you can snap to. Sketching on faces explains more.
What is the Sketch panel?#
While you sketch, the Sketch panel fills the left side of the screen, where the feature tree usually sits. It shows the plane you are on and how close the sketch is to fully defined, with a green check to finish and a red X to throw the sketch away. The feature tree moves out to a compact list at the top left of the view, so you can still click planes and features. On a phone, the panel docks along the bottom of the screen instead.
What is the Exit sketch button?#
A small Exit sketch button sits right after your part's name at the top left of the view, the whole time you are in a sketch. Click it from any tool, even in the middle of drawing a rectangle, and the sketch is saved and closed in one click. It works just like pressing Esc until the sketch closes. On a phone it sits in the header of the docked panel.
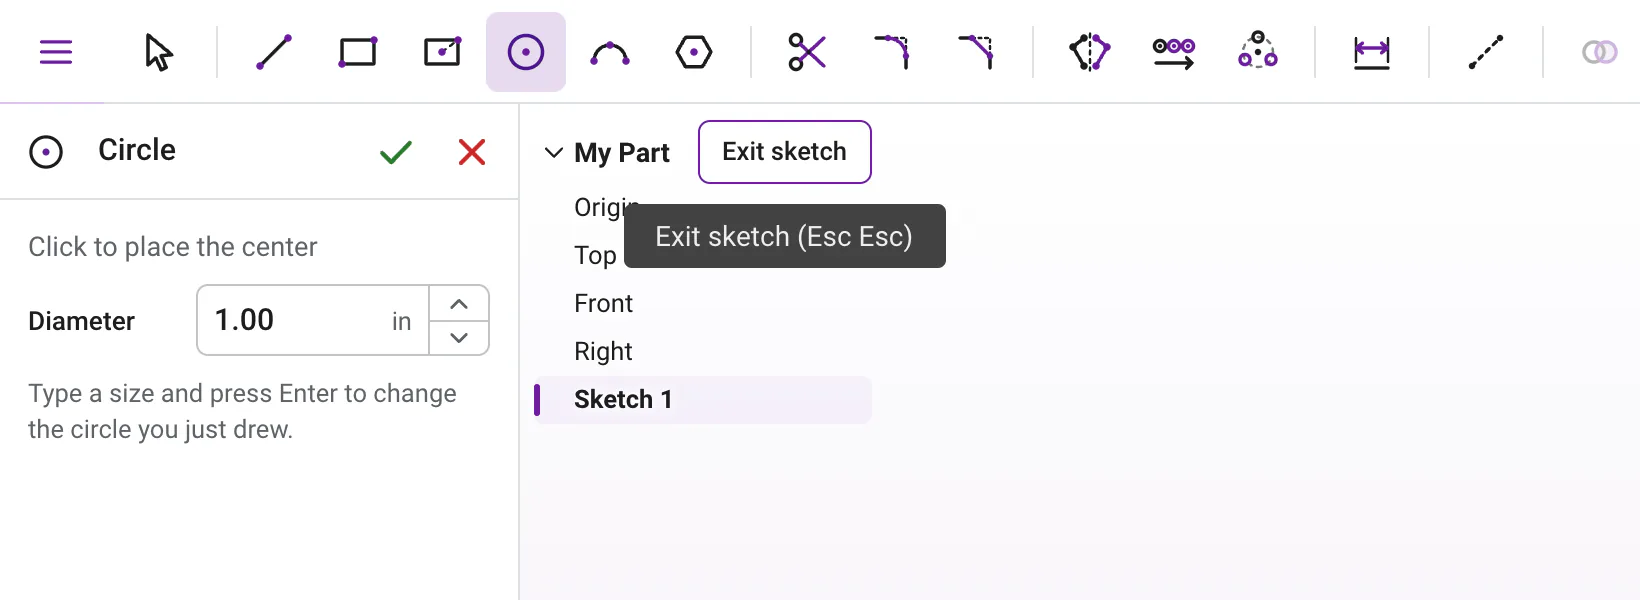
What is in the sketch toolbar?#

- SelectShortcut: EscPick, move and delete geometry, dimensions and constraints.
- LineShortcut: LStraight segments that chain corner to corner.
- Corner rectangleShortcut: GA rectangle from one corner to the opposite corner.
- Center rectangleShortcut: RA rectangle that grows out from its center.
- CircleShortcut: CA circle from its center, perfect for holes.
- 3 point arcShortcut: AA curve through a start, an end and a point on the arc.
- PolygonShortcut: PHexagons and other shapes with equal sides.
- SplineShortcut: SA smooth, squiggly curve through the points you click.
- TrimShortcut: KClick or drag to remove pieces back to where something crosses them.
- FilletShortcut: ORounds a corner where two lines meet.
- ChamferShortcut: MCuts a corner off at an angle.
- MirrorShortcut: XFlips a copy across a line or through a point.
- Linear patternShortcut: WCopies in a row or a grid.
- Circular patternShortcut: UCopies around a center point.
- DimensionShortcut: DExact lengths, diameters, distances and angles.
- ConstructionShortcut: QDashed helper geometry that never becomes solid.
After those come the ten constraints, which light up only when your selection fits them, and Undo, Redo and Delete at the end of the row. Hover over any button to see its name and shortcut.
What is the tool panel?#
Whenever a tool other than Select is on, the tool panel takes the Sketch panel's place on the left. It shows the tool's icon and name, then either the next step, like Click to place the center, or the live size of the shape you are drawing, like Diameter 0.50 in. Under that are the tool's size boxes, like Width and Height for a rectangle or Radius for a fillet.
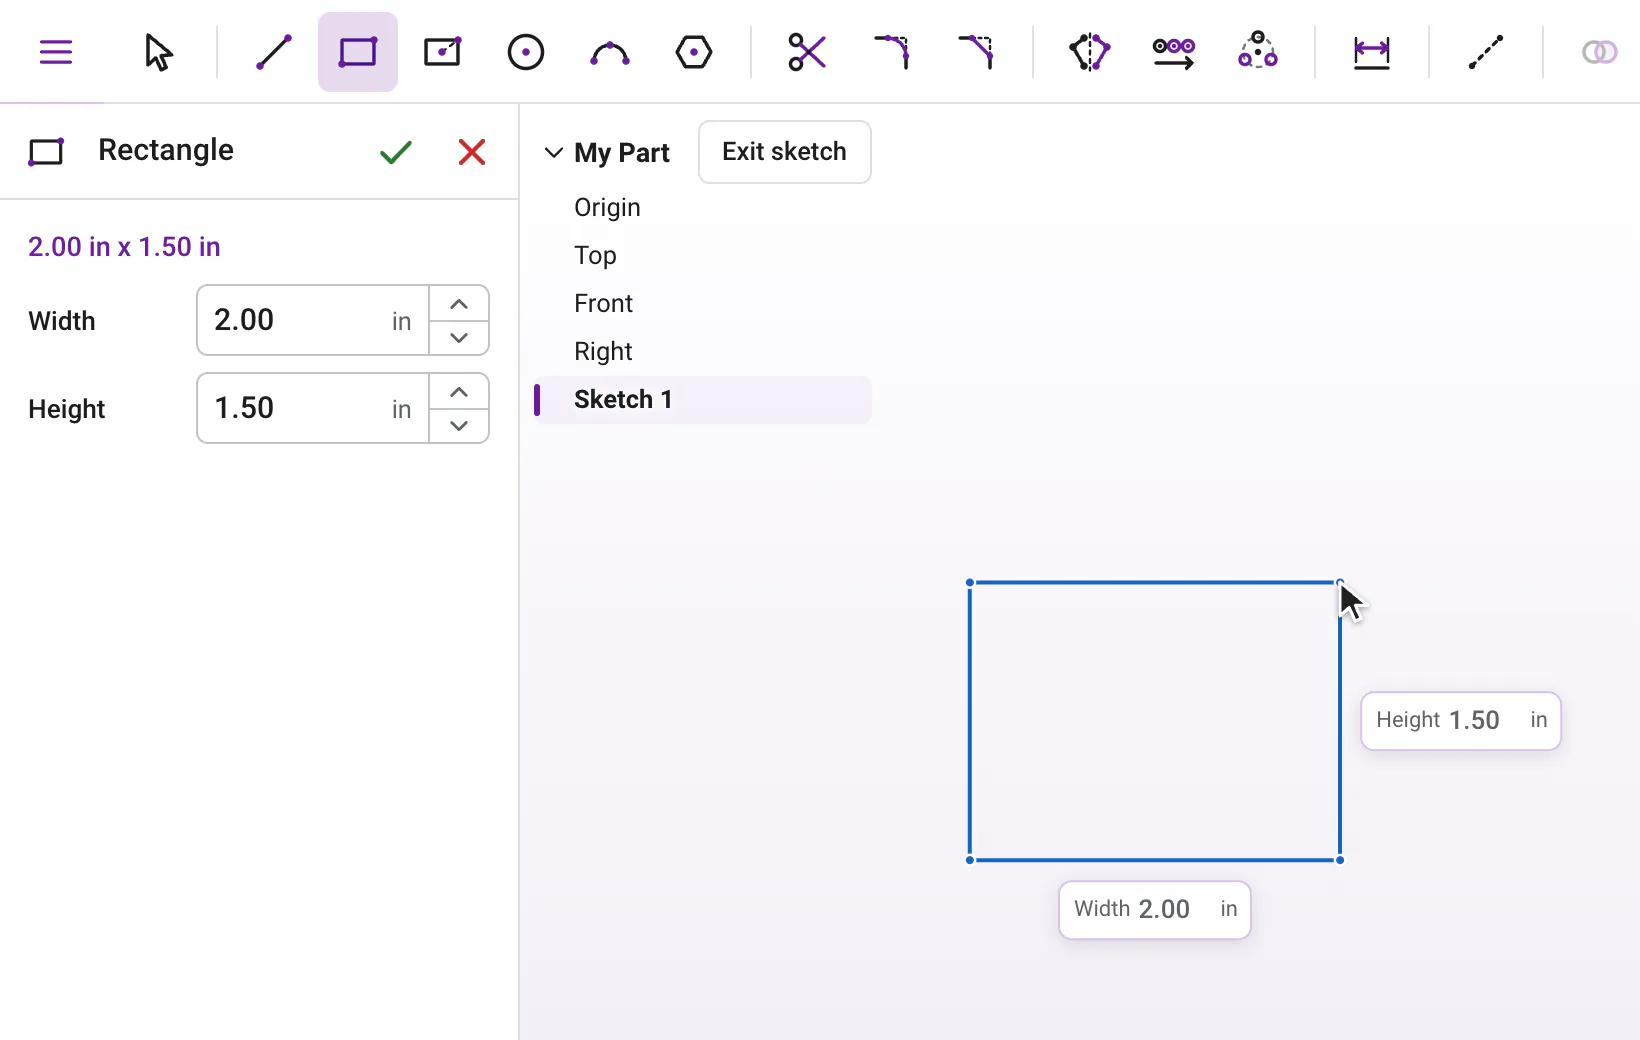
| Button | What it does |
|---|---|
| Green check, Done (Enter) | Finishes what you are in the middle of when it can, like placing the shape with the sizes you typed or ending a line chain, then goes back to Select. |
| Red X, Cancel (Esc) | Drops what you are in the middle of and goes back to Select. Shapes you already placed stay. |
Either way the Sketch panel comes back. If something cannot finish, like a size that does not fit, the tool stays on and the panel tells you why, so nothing is lost.
Typing in the size boxes#
- While a shape is in progress, the boxes show its live size. Click a box and type to set it, just like typing next to the shape.
- After you draw, type a new size in a box and press Enter to change the shape you just drew. If you dimension that shape by hand, the box shows the new size right away.
- With nothing drawn yet, a size typed in the box draws the shape from the origin.
- The little up and down arrows in each box step the number by 1 inch (or 1 cm, 1 degree, or 1 for a count). In the box, the Up and Down arrow keys do the same, with Shift for steps of 10 and Alt (Option on a Mac) for steps of 0.1. The Fillet Radius and Chamfer Distance step finer: 0.1 at a time, 1 with Shift and 0.01 with Alt. Hold an arrow to keep stepping.
- Sizes show 2 decimal places, like
1.00 inand2.50 in, or 3 when the third one matters, like0.125 in. You can always type fractions and math.
What does Esc do in a sketch?#
Each press of Esc steps back one thing, in this order, so you can always press it again to keep going:
- A dimension value you are typing is dropped.
- A drag in progress is undone.
- The shape you are drawing is dropped. A line chain ends, and the tool stays on.
- The tool is put away, and you are back in Select with the Sketch panel showing.
- Your selection is cleared.
- With nothing left, the sketch is saved and closed. No question is asked, and you can open it again any time.
Only the red X in the Sketch panel throws a sketch away. If you drew anything, it asks Discard this sketch? first, with Keep sketching and Discard.
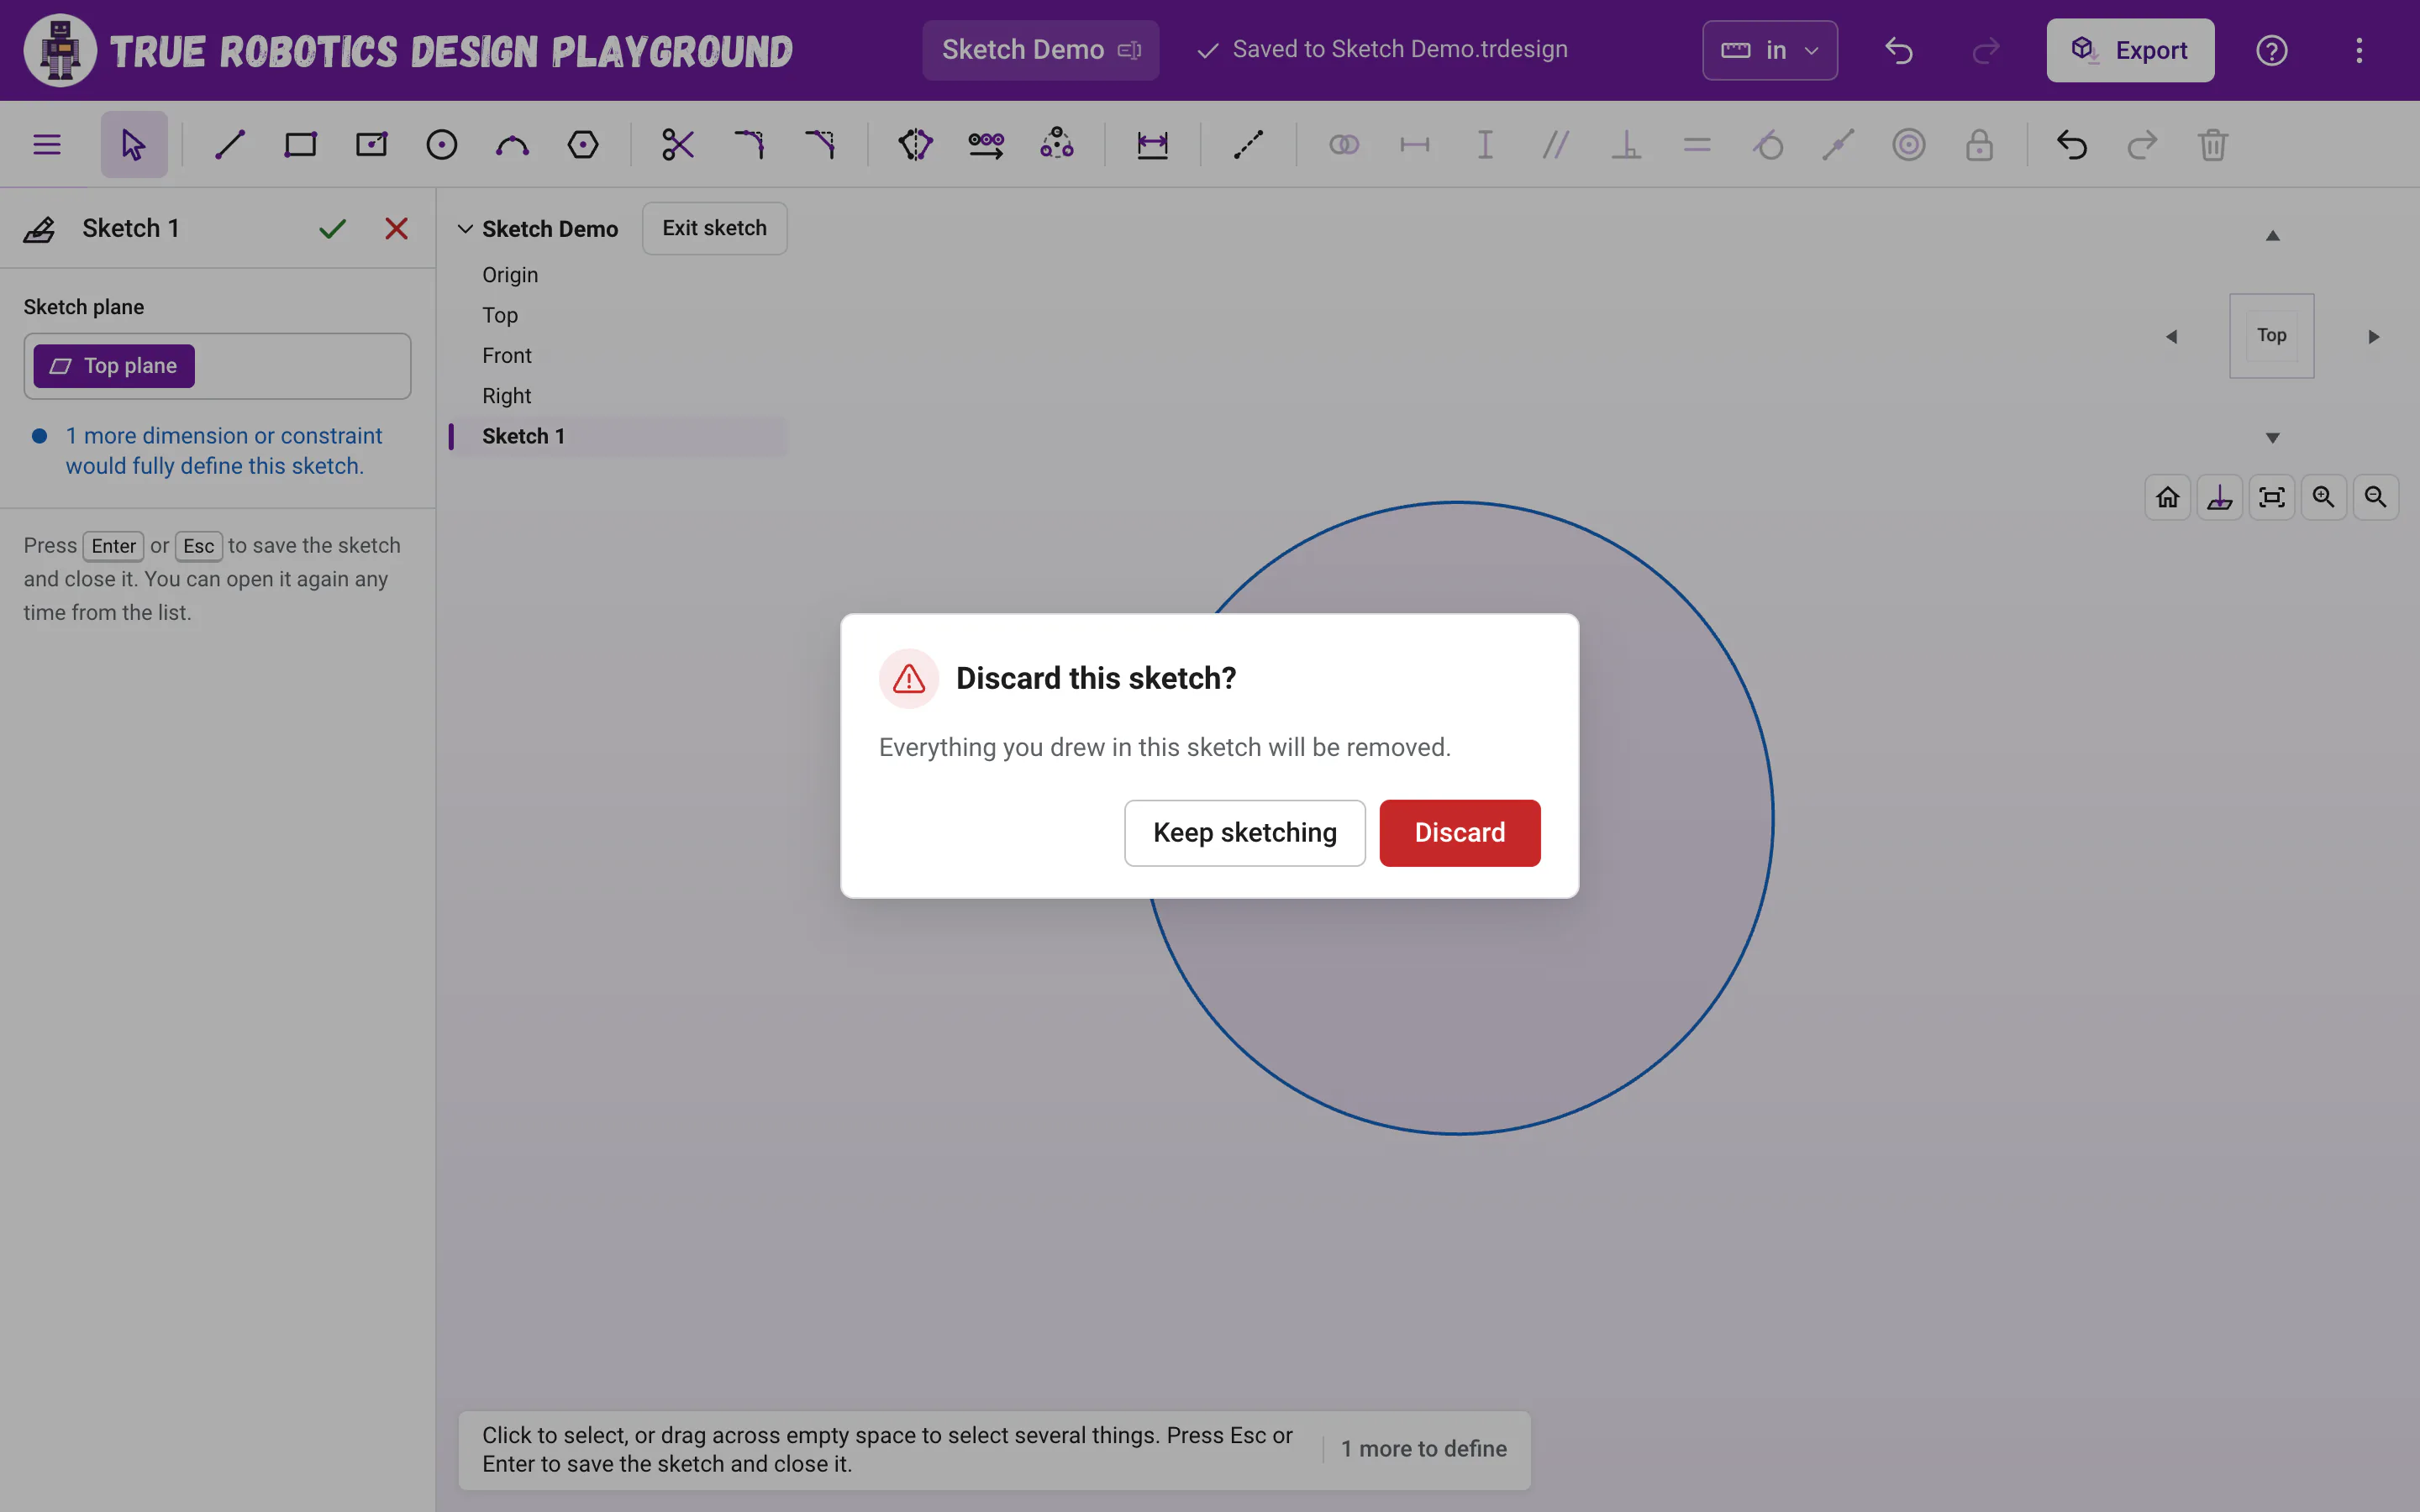
How does the view move while I sketch?#
- The Home button under the view cube looks straight at your sketch and zooms to fit it, so you can always find your drawing again.
- When a dimension makes your sketch bigger than the view, the view zooms out to fit it. If everything still fits, or you zoomed in on purpose, the view stays put.
- When you leave the sketch, the view goes back to the 3D home view, zoomed to fit everything.
Why are some lines blue and some black?#
Blue geometry can still move or change size. Black geometry is fully defined: every size and position is set by dimensions and constraints, so it stays exactly where it is. Dashed lines are construction geometry, and red marks something whose rules can't all be met.
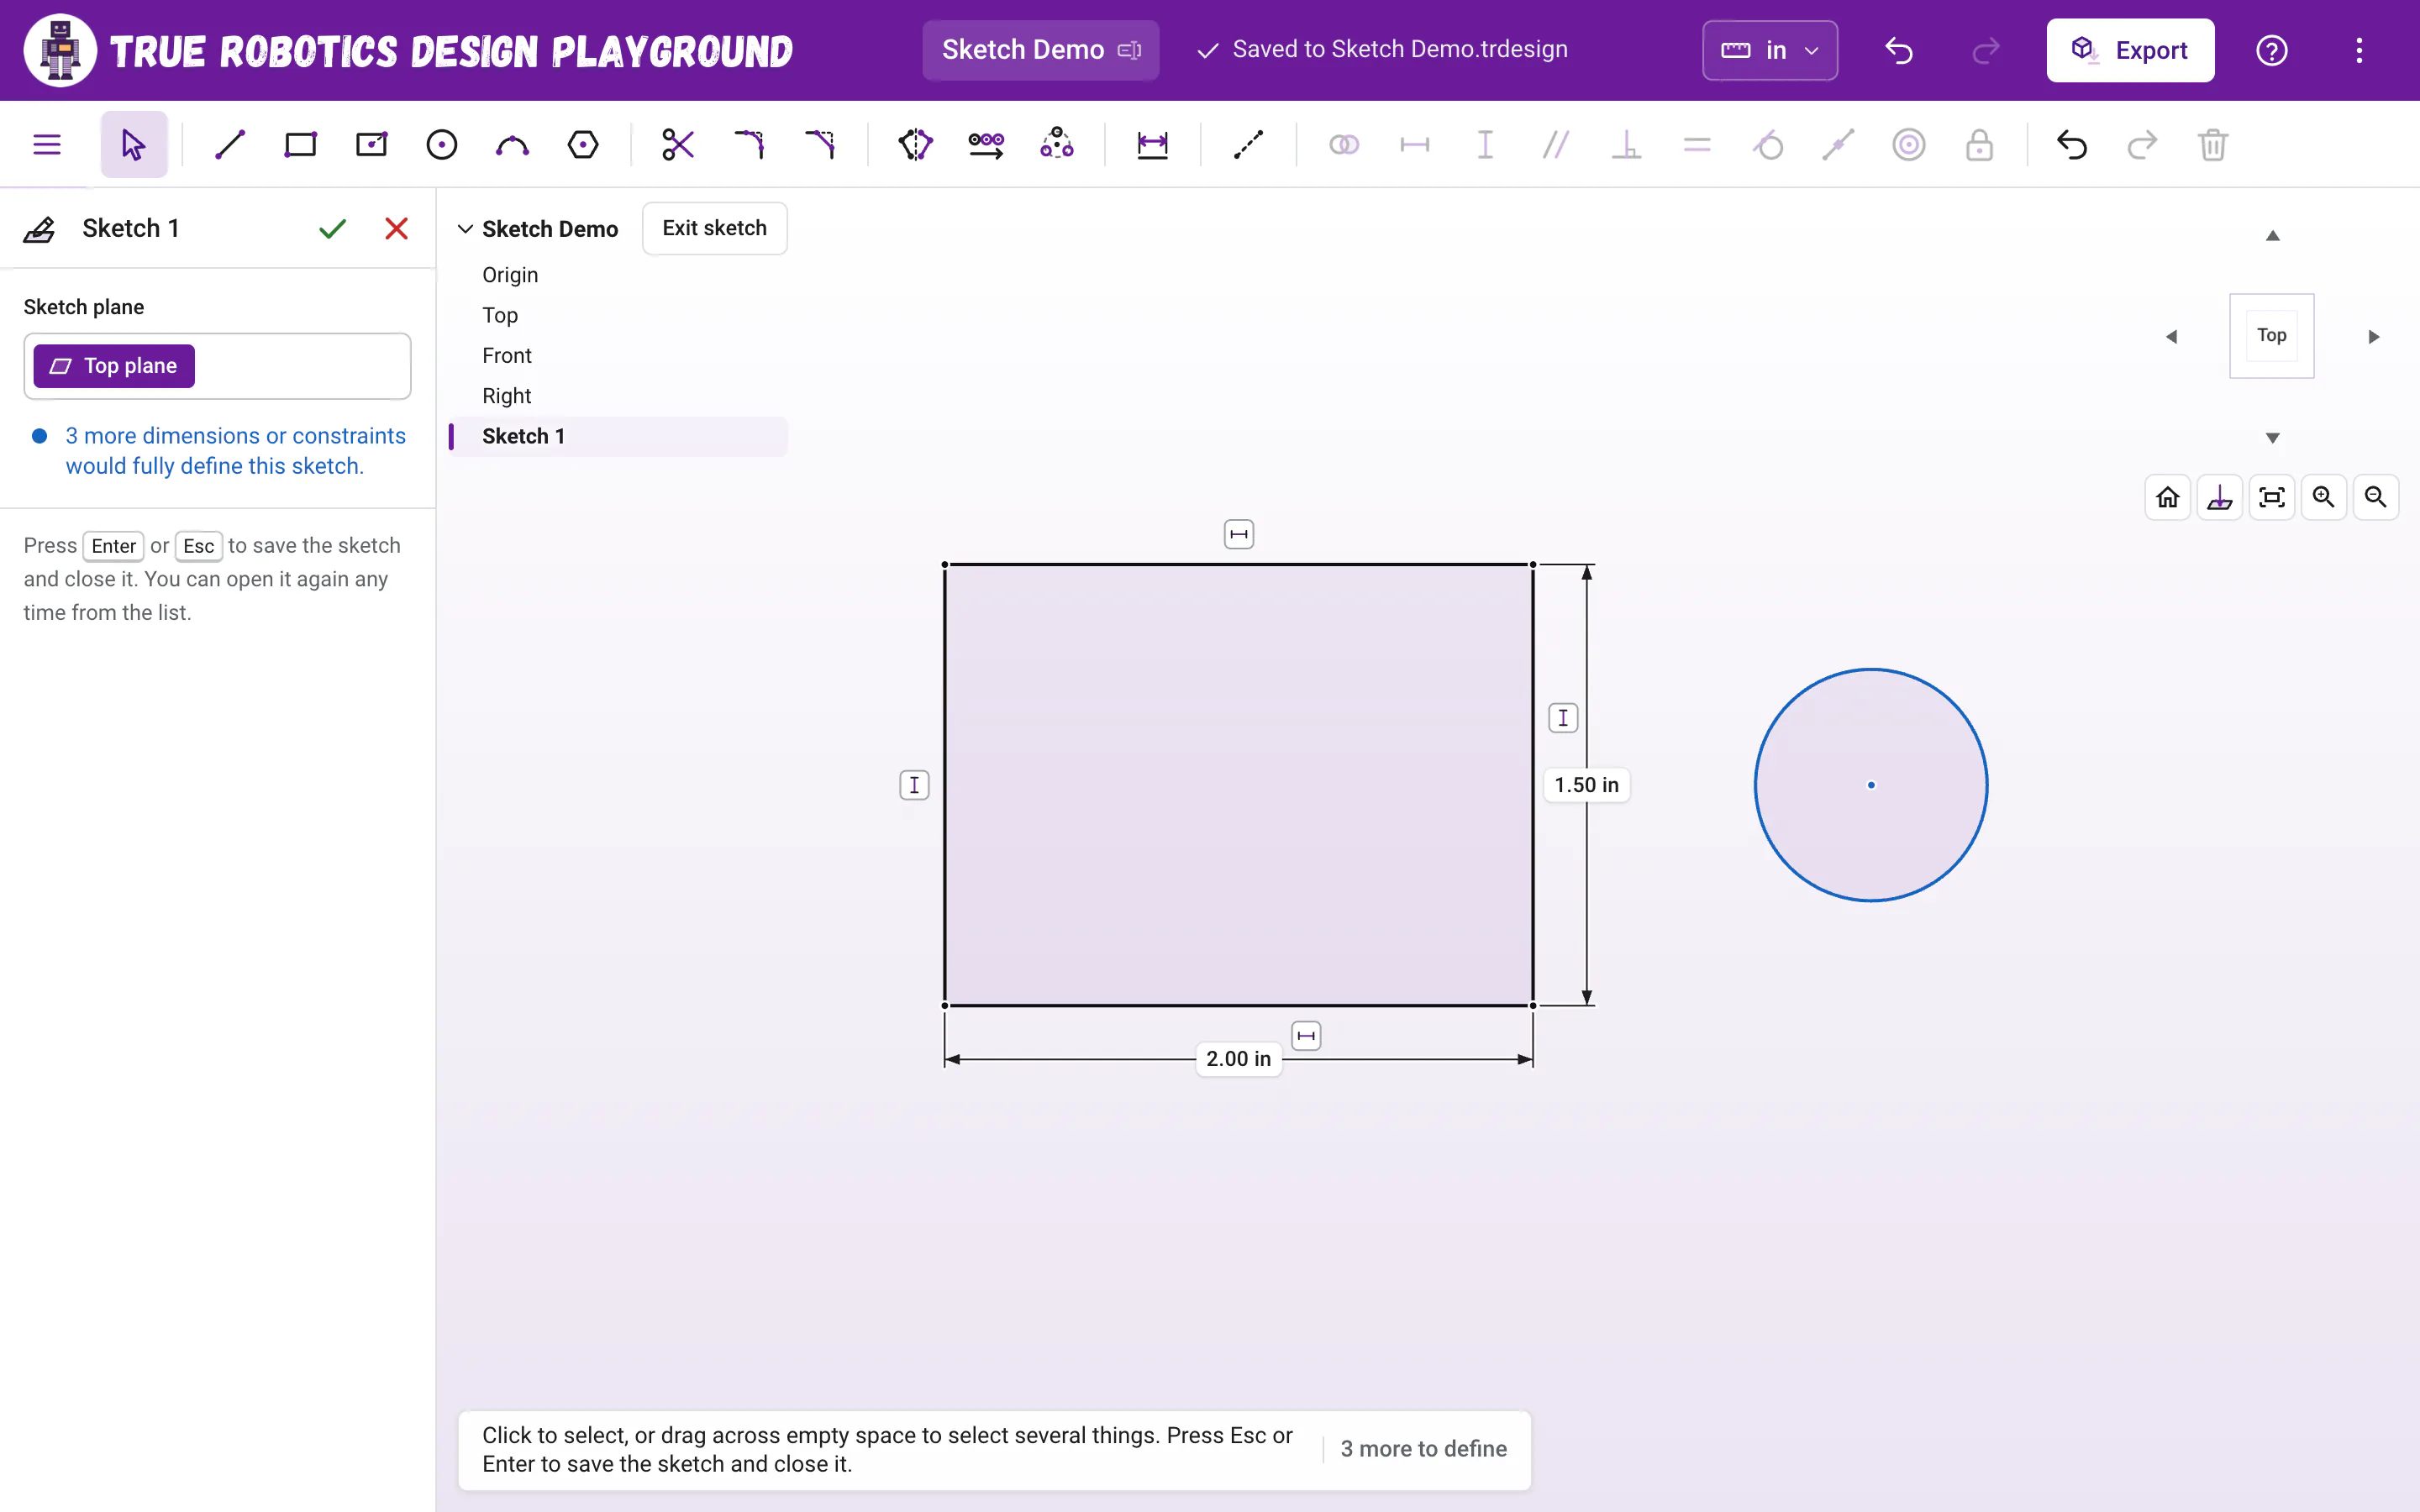
The Sketch panel keeps count for you, with a line like 2 more dimensions or constraints would fully define this sketch, and the hint bar at the bottom says 2 more to define. When everything is set, the panel shows a check and Fully defined.
Tip: Blue is fine to extrude
A sketch does not have to be black to extrude. Black just means your sizes are locked in, so nothing shifts when you drag or edit later. Getting to black is a great habit for parts that need to fit.
What are regions?#
When lines and curves close up into a shape, the inside fills with a light purple tint. Each filled area is a region, and regions are what Extrude turns into 3D. Shapes inside shapes make holes: a rectangle with two circles inside extrudes as a plate with two holes. If a shape has no fill, it is not closed yet, so look for a gap at a corner.
How does snapping work?#
As you draw, small icons appear next to the pointer to show what will happen when you click. The pointer snaps onto points and the origin, onto the middle of a line, and onto lines and curves, and a line that is nearly level or upright snaps straight. Dashed guides show when you line up with another point. Snaps turn into constraints, so your shape stays connected. Hold Shift while you draw to turn snapping off.
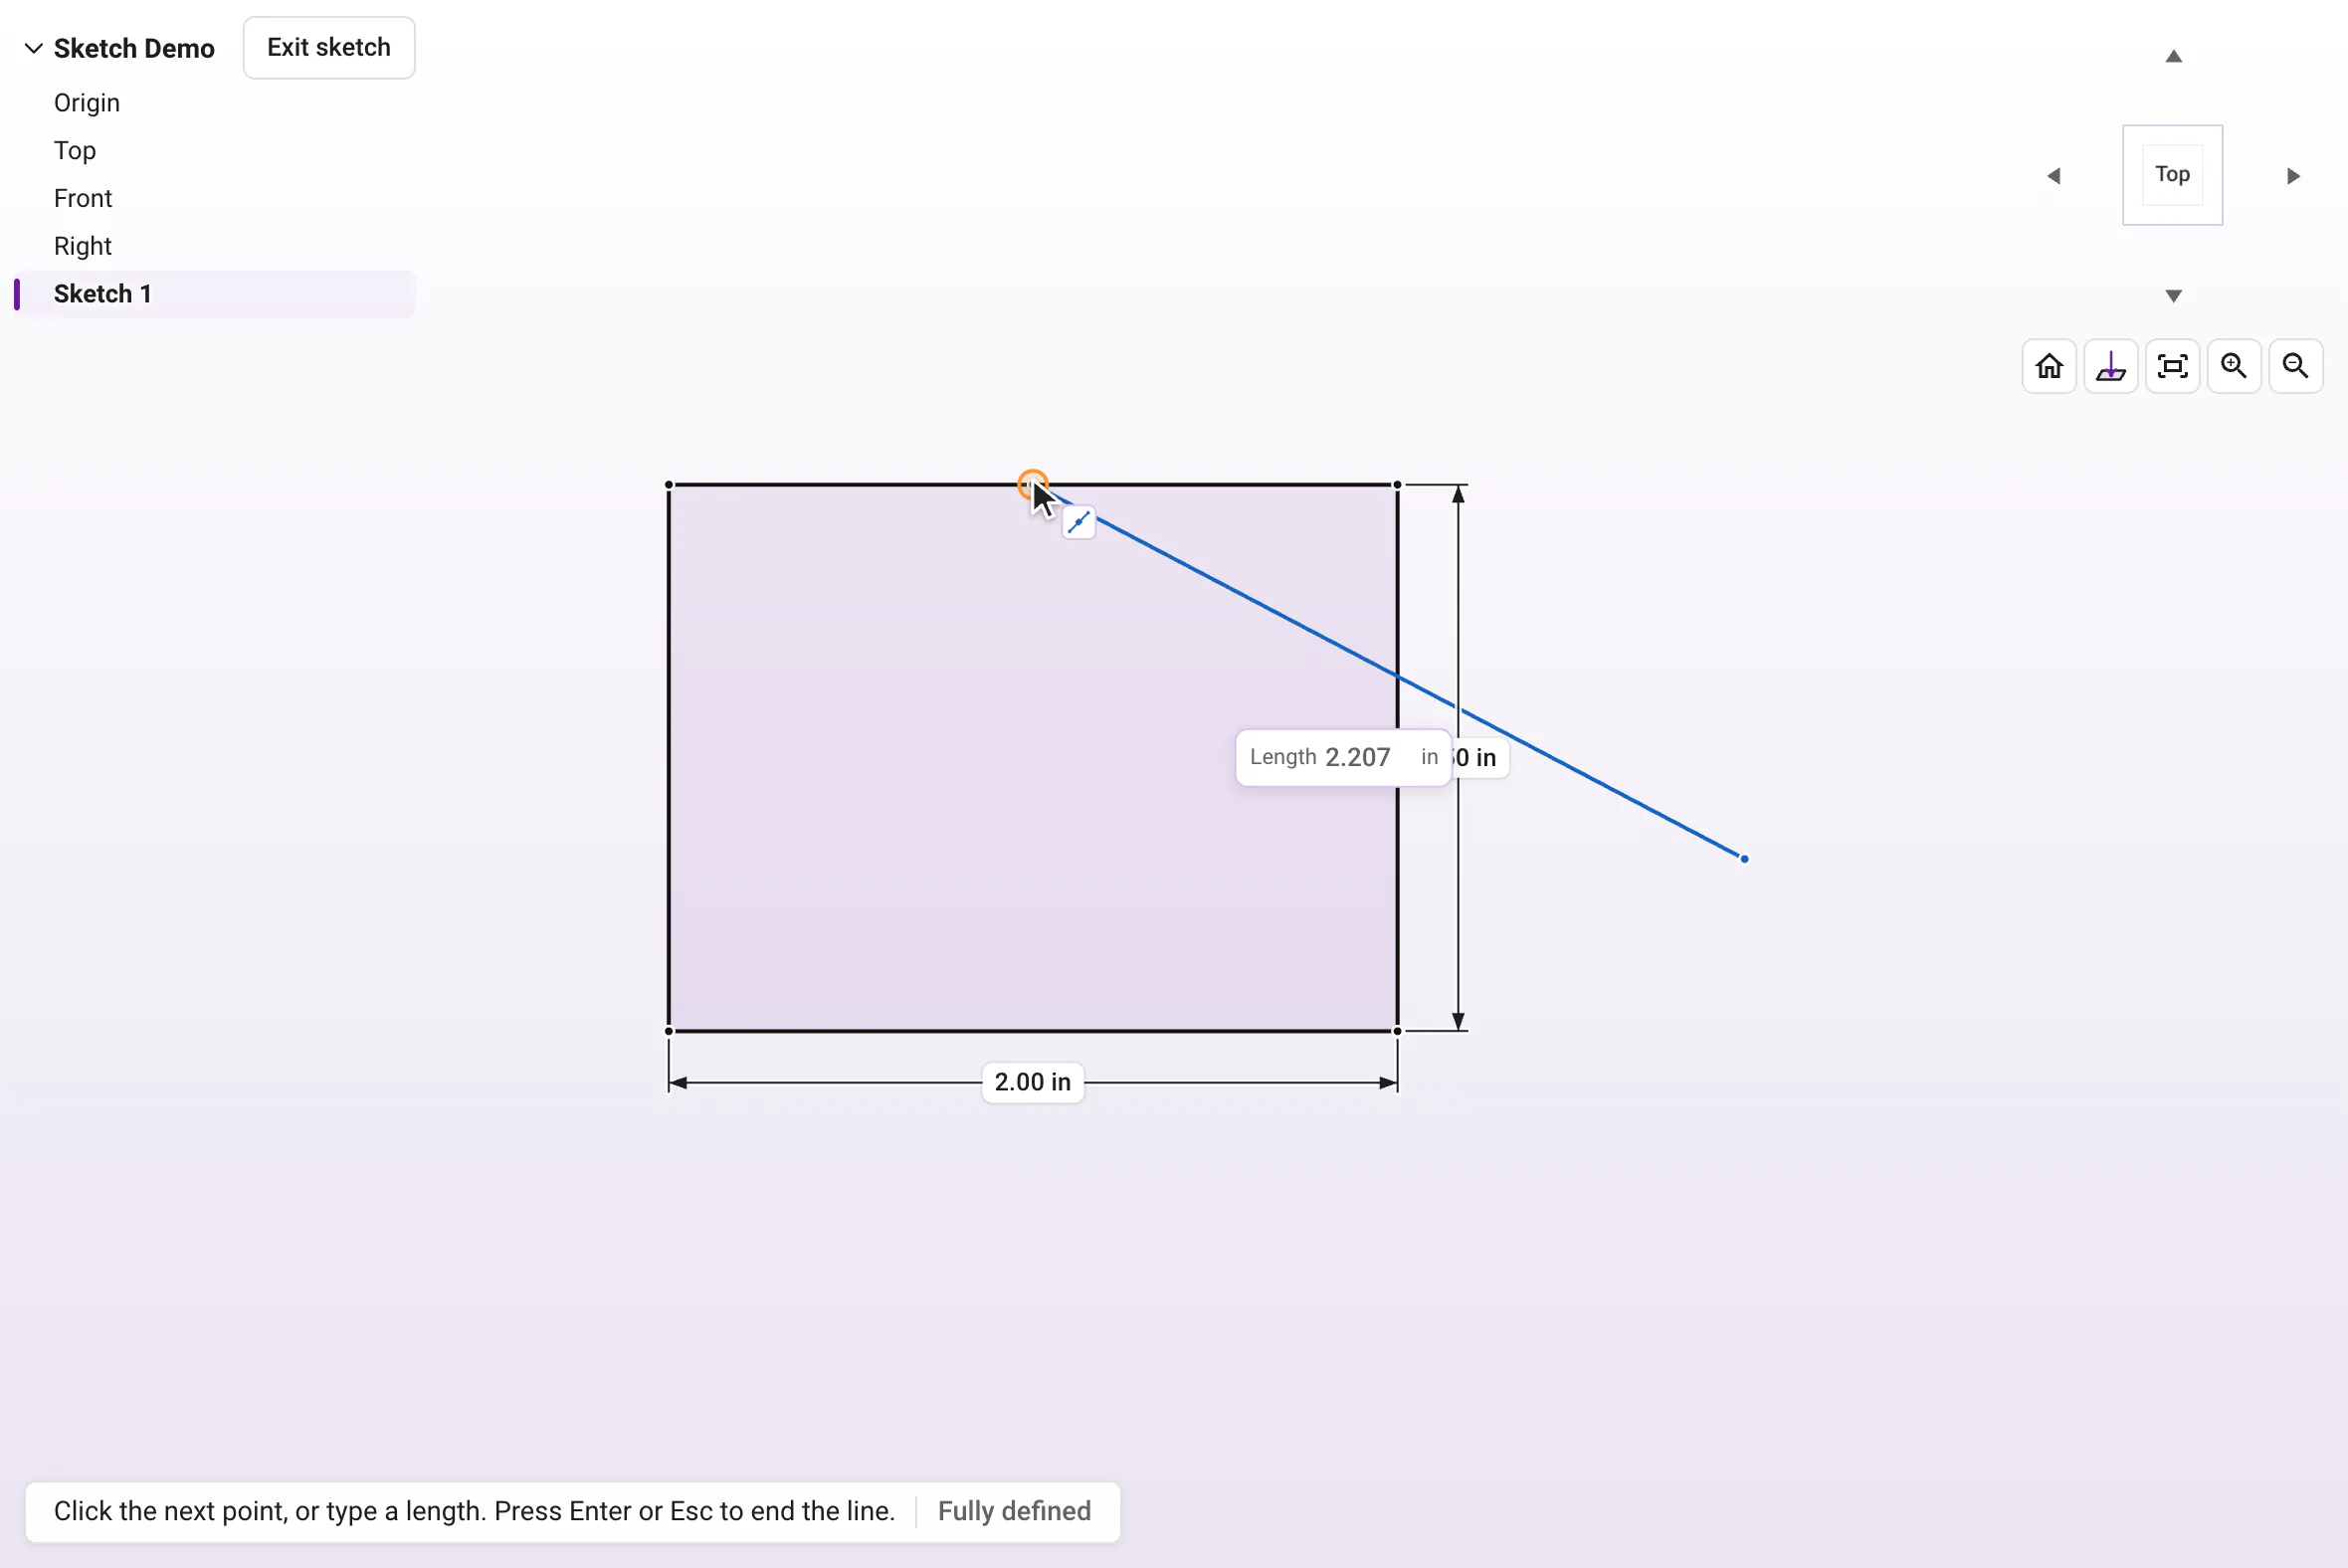
Snapping onto points and center dots#
- Bring the pointer close to a point, like a corner, the end of a line, the middle of a line, the origin or the center dot of a circle, arc or polygon, and it jumps right onto it. An orange ring marks the point it will snap to. With a mouse, close means about 10 pixels; with a finger it is a little farther, so taps land where you mean.
- Points always win. Hover the center dot of a circle and the pointer snaps to the center, not to the circle around it, so a new circle can share a center with an old one in one click.
- Snapping works for the first click and for the point you are dragging out, with every drawing tool: lines, both rectangles, circles, arcs, polygons and splines.
- A dimension label or constraint badge sitting right on top of a point never gets in the way. Near a snap, the pointer reaches through it to the point underneath. Labels away from everything still click as usual, so you can double-click one to change it.
- Each snap becomes a constraint, like Coincident for a shared point or Midpoint for the middle of a line, so the shapes stay stuck together when you change a size later.
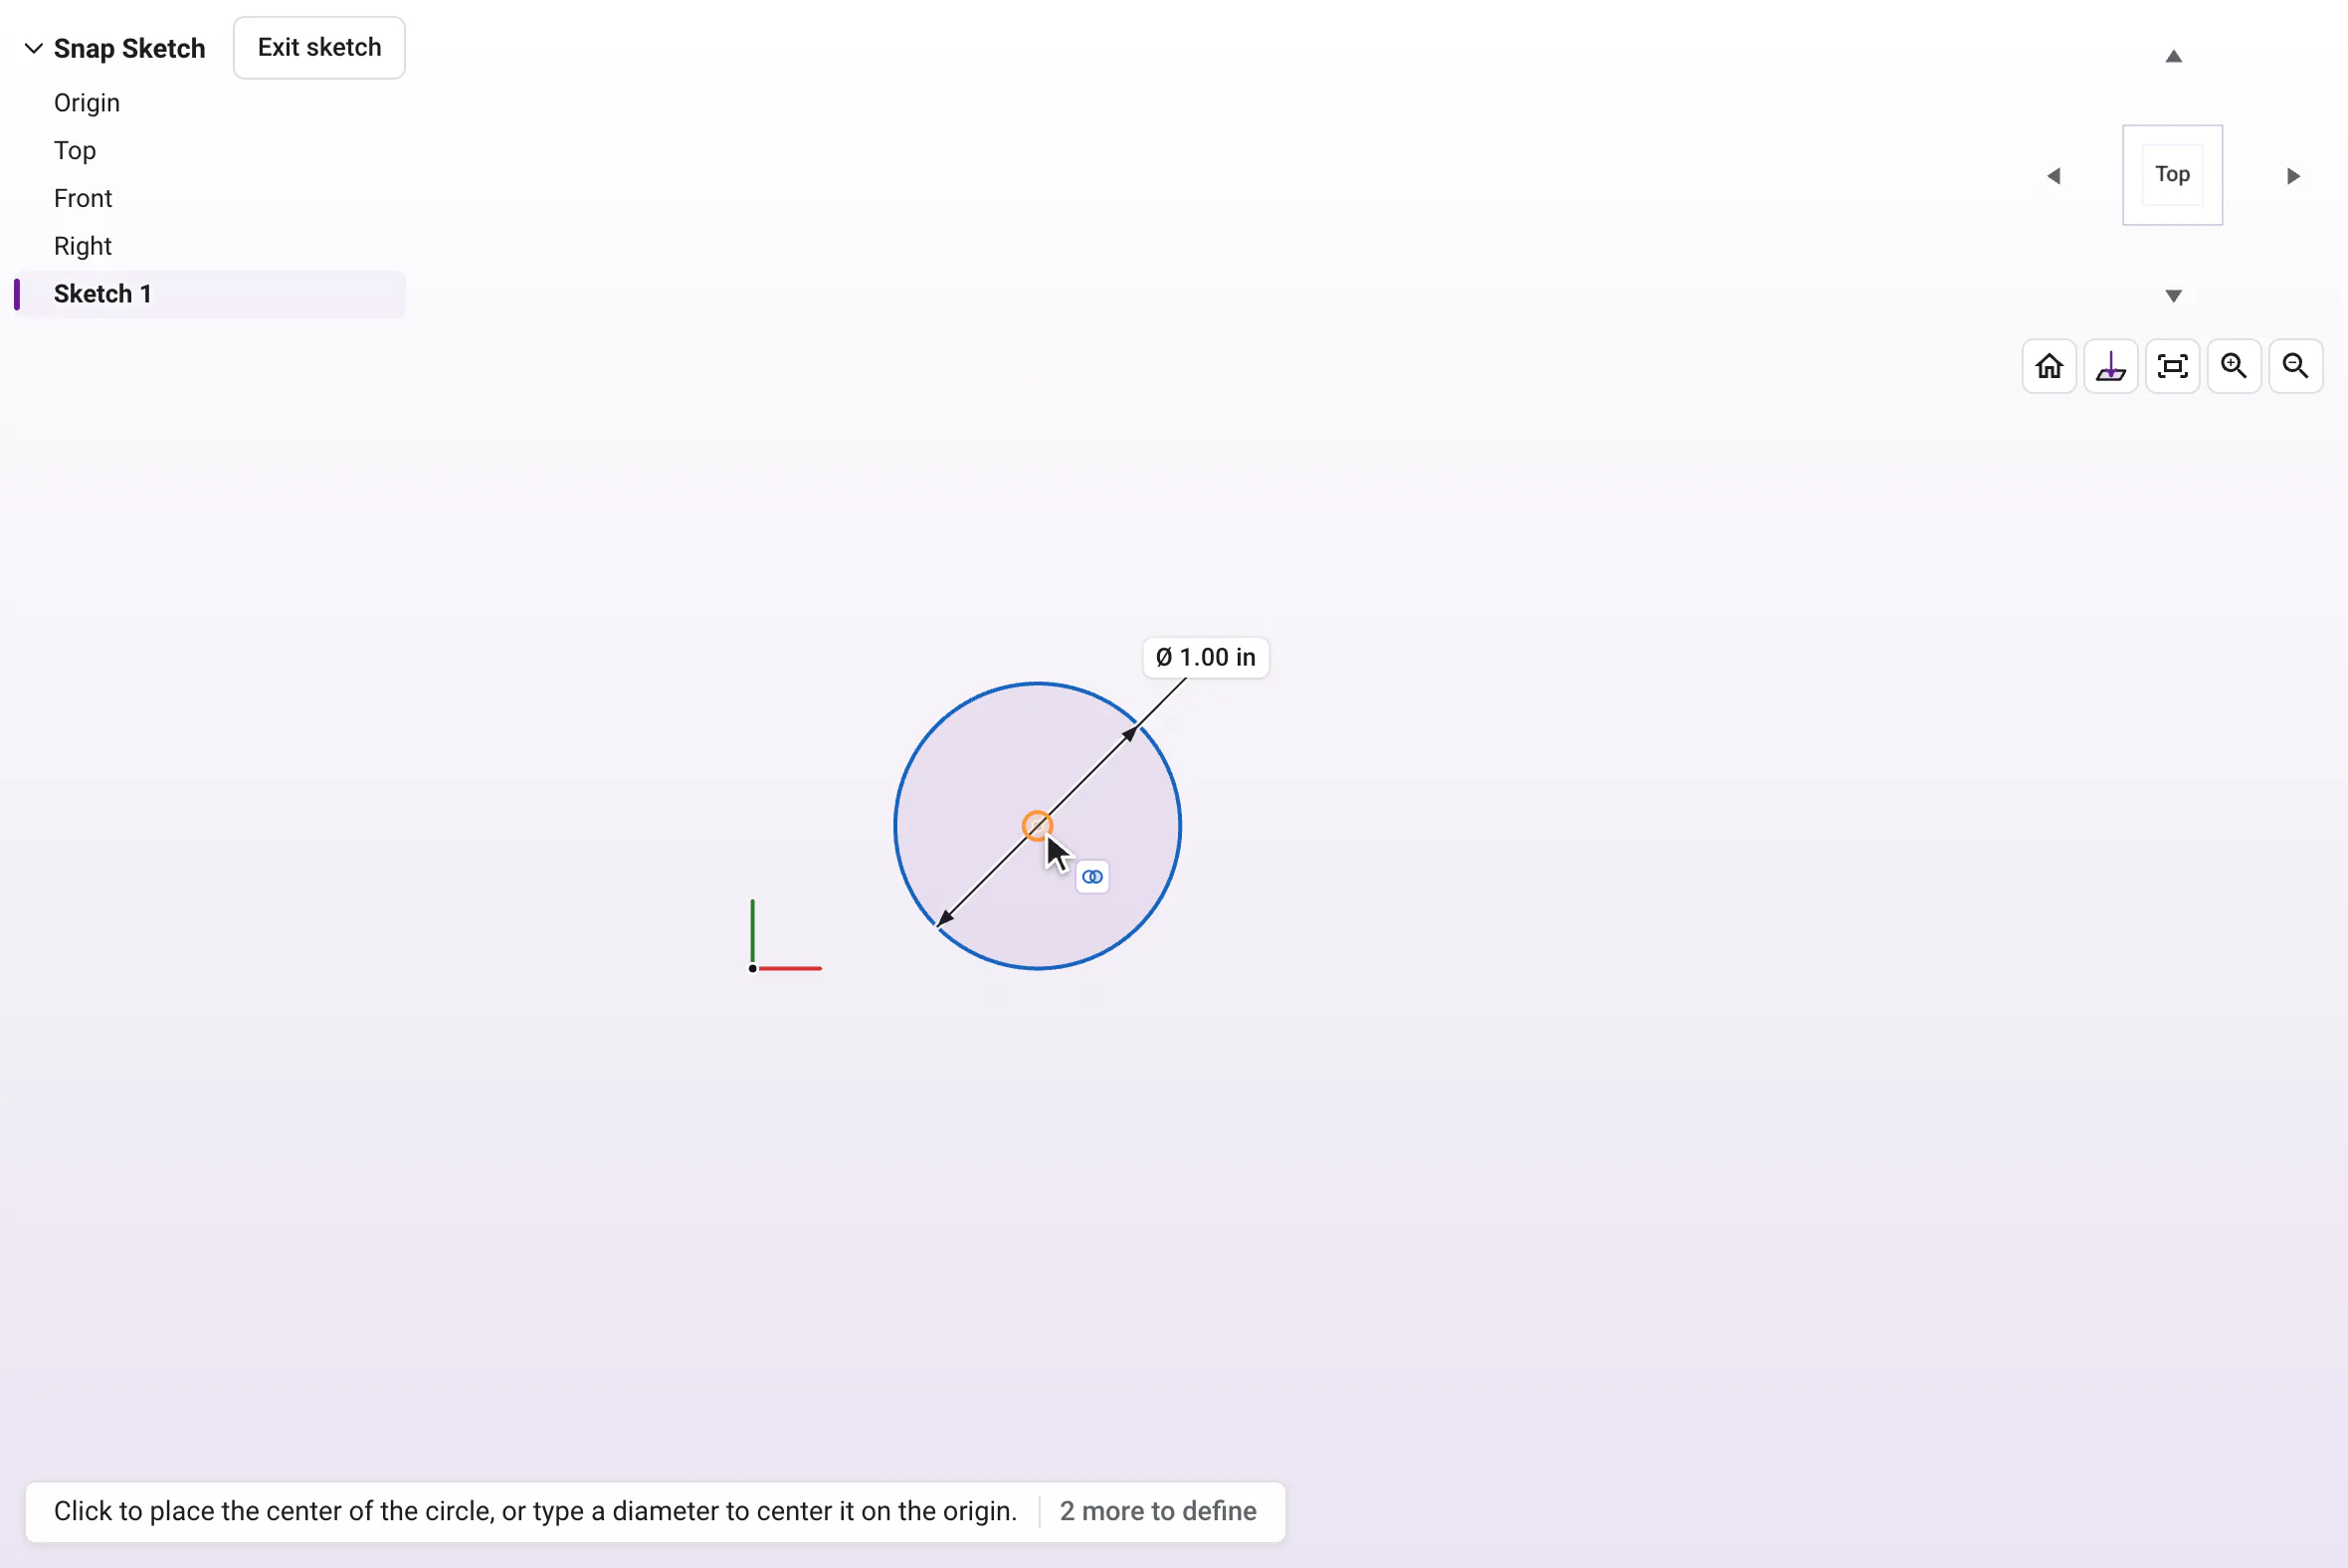
Snapping while you drag#
Shapes you already drew snap too. With the Select tool, drag a circle by its center dot onto the center dot of another circle, and it snaps there with the same orange ring. Let go and the two centers stay together. Drag a whole line or shape by an edge, and it snaps by whichever of its points comes near another point. Hold Shift while you drag to move it freely, with no snapping.
Read what happens in this video
We draw a 2 inch circle with the Circle tool, then point at its center dot until an orange ring shows the snap and click there for a 1 inch circle with the same center. A 1/2 inch circle goes off to the right, and the green check goes back to Select. Dragging the small circle by its center dot onto the big center snaps it there, so all three circles share one center.
The steps in the video:
- Press C for Circle. Click to place a center, type 2 and press Enter.
- Point at its center dot. An orange ring shows the snap. Click.
- Type 1 and press Enter. The two circles share one center.
- Click off to the right for a new center, type 1/2 and press Enter.
- Click the green check in the tool panel to go back to Select.
- Drag the small circle by its center dot onto the big center.
- Let go. It snaps there, and all three circles share one center.
How do I type exact sizes while drawing?#
Just start typing a number. While you draw a line, rectangle, circle or polygon, little boxes by the shape show the live size, like Width and Height. Typing fills the first box, Tab moves to the next one, and Enter places the shape and adds a dimension for every size you typed. Math and units work here too, so 1/4, 1 1/2, 3/8 + 1/16 and even 25 mm are fine.
Click, click or click and drag?#
Both work for the drawing tools. Click once for each point, or press, drag and let go. The Spline tool works best with one click for each point along the curve. Drawing tools stay on after each shape, so you can draw circle after circle, and Esc or the green check takes you back to Select when you are done.
How do I finish a sketch?#
Press Enter with nothing in progress, click the green check in the Sketch panel, press Esc until the sketch closes, or click Exit sketch. The view turns back to 3D. The regions of a brand new sketch come already picked, so pressing Extrude next uses them right away.
How do I edit a sketch later?#
Double-click the sketch in the feature tree, or double-click one of its regions in the view. A sketch that a feature uses sits under that feature in the tree, so click the little arrow beside Extrude 1 to find Sketch 1. Everything after the sketch steps back while you edit, and rebuilds when you finish. A sketch hides itself once you extrude it; click the eye on its row to show it again.
Tip: Start on the origin
Begin your first shape on the origin, the dot where the planes meet. It snaps there and locks that corner in place, so your part starts exactly where you expect it.
You're ready to draw! Pick a tool from the list above, or practice with Draw a square four ways.
Questions and answers#
Do I have to fully define a sketch before I extrude it?
No. Any closed shape can be extruded, even with blue lines. Fully defining it, so it turns black, simply locks your sizes in place so nothing shifts later.
Can I sketch on a curved face?
No. Sketches go on the Top, Front or Right plane, on a plane you made with Plane, or on a flat face of a part. If you click a curved face, the True Robotics Design Playground asks you to pick a plane or a flat face.
Why can I not see the Top, Front and Right planes?
New projects keep them hidden so they stay out of the way. They appear whenever you need to pick one, like when you click Sketch with nothing selected. To keep one showing, click the eye on its row in the feature tree.
Does pressing Esc throw my sketch away?
No. Esc steps back one thing at a time, and with nothing left it saves the sketch and closes it. Only the red X in the Sketch panel throws a sketch away, and it asks first if you drew anything.
How do I get out of a sketch quickly?
Click Exit sketch next to your part name at the top left of the view. It works from any tool, saves the sketch and closes it in one click.