
Basic mode
Move, Resize and Rotate Shapes
In Basic mode of the True Robotics Design Playground, click a shape to show its handles. Drag the shape to move it, drag the square handles to resize it, drag the cone to lift it and the curved arrows to turn it. Click a size label to type an exact size. Arrow keys nudge by the snap grid, and Align, Mirror and Duplicate are on the toolbar.
Read what happens in this video
We drag a box in and click its width label. Typing 3 and pressing Enter makes it exactly 3 inches wide, and the depth and height labels take 2 and 1/2 the same way. The arrow keys nudge the box one snap step at a time. Ctrl and Up lifts it off the workplane, and Ctrl and Down sets it back down.
The steps in the video:
- Drag a Box from the catalog onto the workplane.
- Click the width label, type 3 and press Enter.
- Click the depth label, type 2 and press Enter.
- Click the height label, type 1/2 and press Enter.
- Press the Right arrow key four times to nudge the box over.
- Press Ctrl + Up twice to lift it, then Ctrl + Down twice to set it back down.
How do I select shapes?#
- Click a shape to select it. It turns purple, and anything under the pointer glows orange.
- Shift+click adds a shape to the selection, or takes it out again.
- Select several on the toolbar does the same with no Shift key: while it is on, every click or tap adds a shape or takes it out again. Tap it again (or press Esc with nothing selected) to turn it off.
- Hold Shift and drag across empty space to draw a selection box. Drag from left to right to pick the shapes fully inside the box, or from right to left to pick every shape the box touches. Hold Ctrl as well to add to what is already selected. A plain drag on empty space turns the view instead.
- Ctrl+A selects every shape. The
]and[keys pick the next or the previous shape, one at a time, with no mouse at all. - Click empty space or press Esc to select nothing.
- On a touch screen, tap a shape to select it, and use Select several to pick more than one. One finger on empty space turns the view.
What do the handles do?#
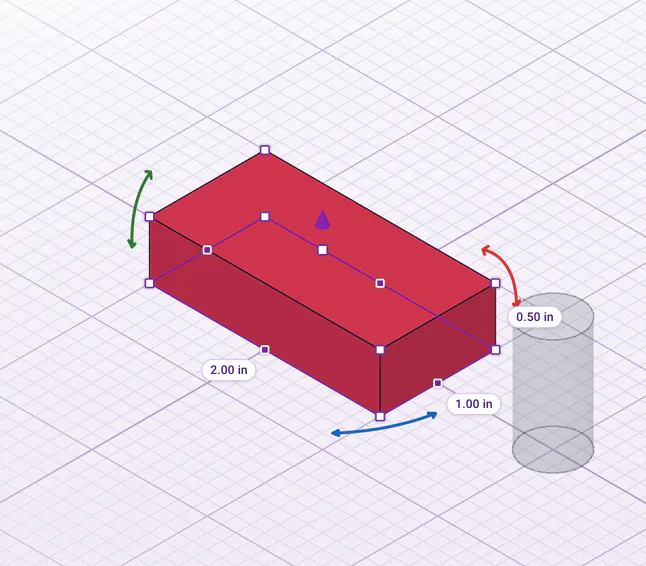
- Square handles on the corners resize the width and depth together. The opposite corner stays put. Hold Shift to keep the proportions.
- Square handles on the sides resize in one direction only.
- The square handle on top changes the height.
- The purple cone above the shape lifts it off the workplane, or lowers it back down. While a shape is off the workplane, a label shows how far up it is.
- The three curved arrows turn the shape around each direction in 15 degree steps. Hold Shift for single degrees.
- The size labels show the width, depth and height as you go. Click one to type a size.
Everything snaps to the grid while you drag, and the hint at the bottom of the view tells you what the handle you are holding does. Press Esc in the middle of a drag to put the shape back where it was.
How do I type an exact size?#
Select the shape Click it so its handles and size labels show.
Click a size label Click the label you want to change, like 1 in along the front. A small box opens with the size in it, ready to type over.
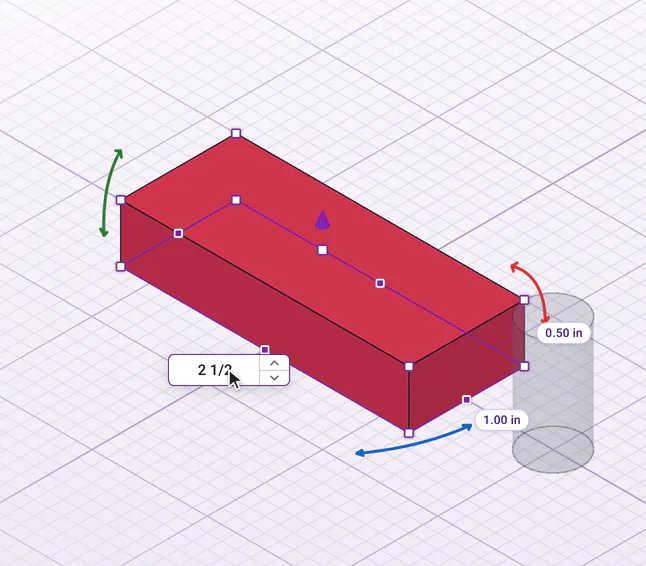
Click a size label and type the exact size you want. Fractions, math and units all work. Type and press Enter Type the size, like
2 1/2, or click the little up and down arrows beside the box. The shape and its handles grow or shrink as you go, so you can see the new size before you keep it. Press Enter or click away to keep it, or Esc to put it back. Fractions, math like3/4 + 1/8, and other units like25 mmall work.
Typed sizes are exact, so a box you type as 2 inches is exactly 2 inches when it prints. Units and typing math has every way to write a size.
How do I use the settings panel?#
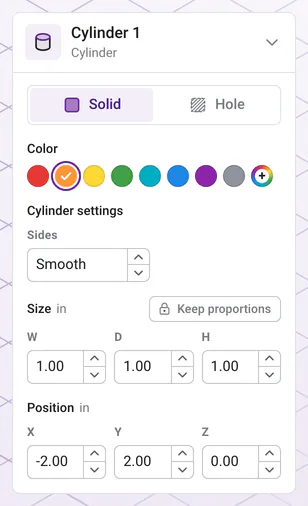
- Size: W is the width, D the depth and H the height. Turn on Keep proportions and changing one changes the others to match.
- Position: X and Y place the middle of the shape's footprint, measured from the middle of the grid. Z is how high its bottom sits above the workplane, so 0 means it rests right on it.
- Type a value and press Enter, or click the little up and down arrows beside it (or press Up and Down in the box) to step it 1 in at a time, or 1 cm in a centimeter project. Hold Shift for 10, or Alt for a tenth. The shape changes with every step.
Tip: Back to the view
After you type in the settings panel, the keyboard stays in that box. Click the 3D view (or the shape) before you use the arrow keys, H or Ctrl+Z.
How do I move a shape?#
- Drag it. Press on the shape itself, away from its handles, and drag. It slides along the workplane and snaps to the grid.
- Nudge it with the arrow keys. Each press moves it one snap step. Hold Shift for ten steps.
- Lift it with Ctrl+Up and lower it with Ctrl+Down, one snap step at a time, or drag the purple cone.
- Type it. Type X, Y and Z in the settings panel for an exact spot.
| Keys | What it does |
|---|---|
| Arrow keys | Move one snap step |
| Shift+Arrow keys | Move ten snap steps |
| Ctrl+Up or Ctrl+Down | Lift or lower |
On a Mac, use Cmd wherever this page says Ctrl.
With nothing selected, the arrow keys turn the view instead, just like in Standard mode. To turn the view with the mouse, drag on empty space with the left button; drag with the right button to pan. Moving around the 3D view has every way to turn, pan and zoom.
How do I change the snap grid?#
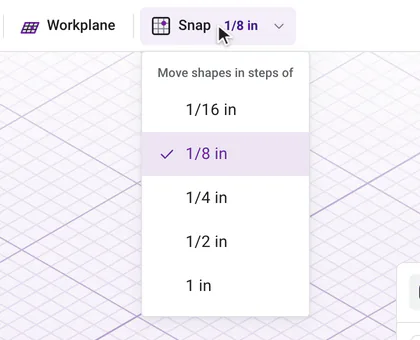
Click Snap in the toolbar and pick a step. Inch projects offer 1/16 in, 1/8 in (the default), 1/4 in, 1/2 in and 1 in. Centimeter projects offer 1 mm, 2 mm (the default), 5 mm and 10 mm. The step sets how far a drag, an arrow key or a lift moves, and the light grid lines show it.
How do I line shapes up?#
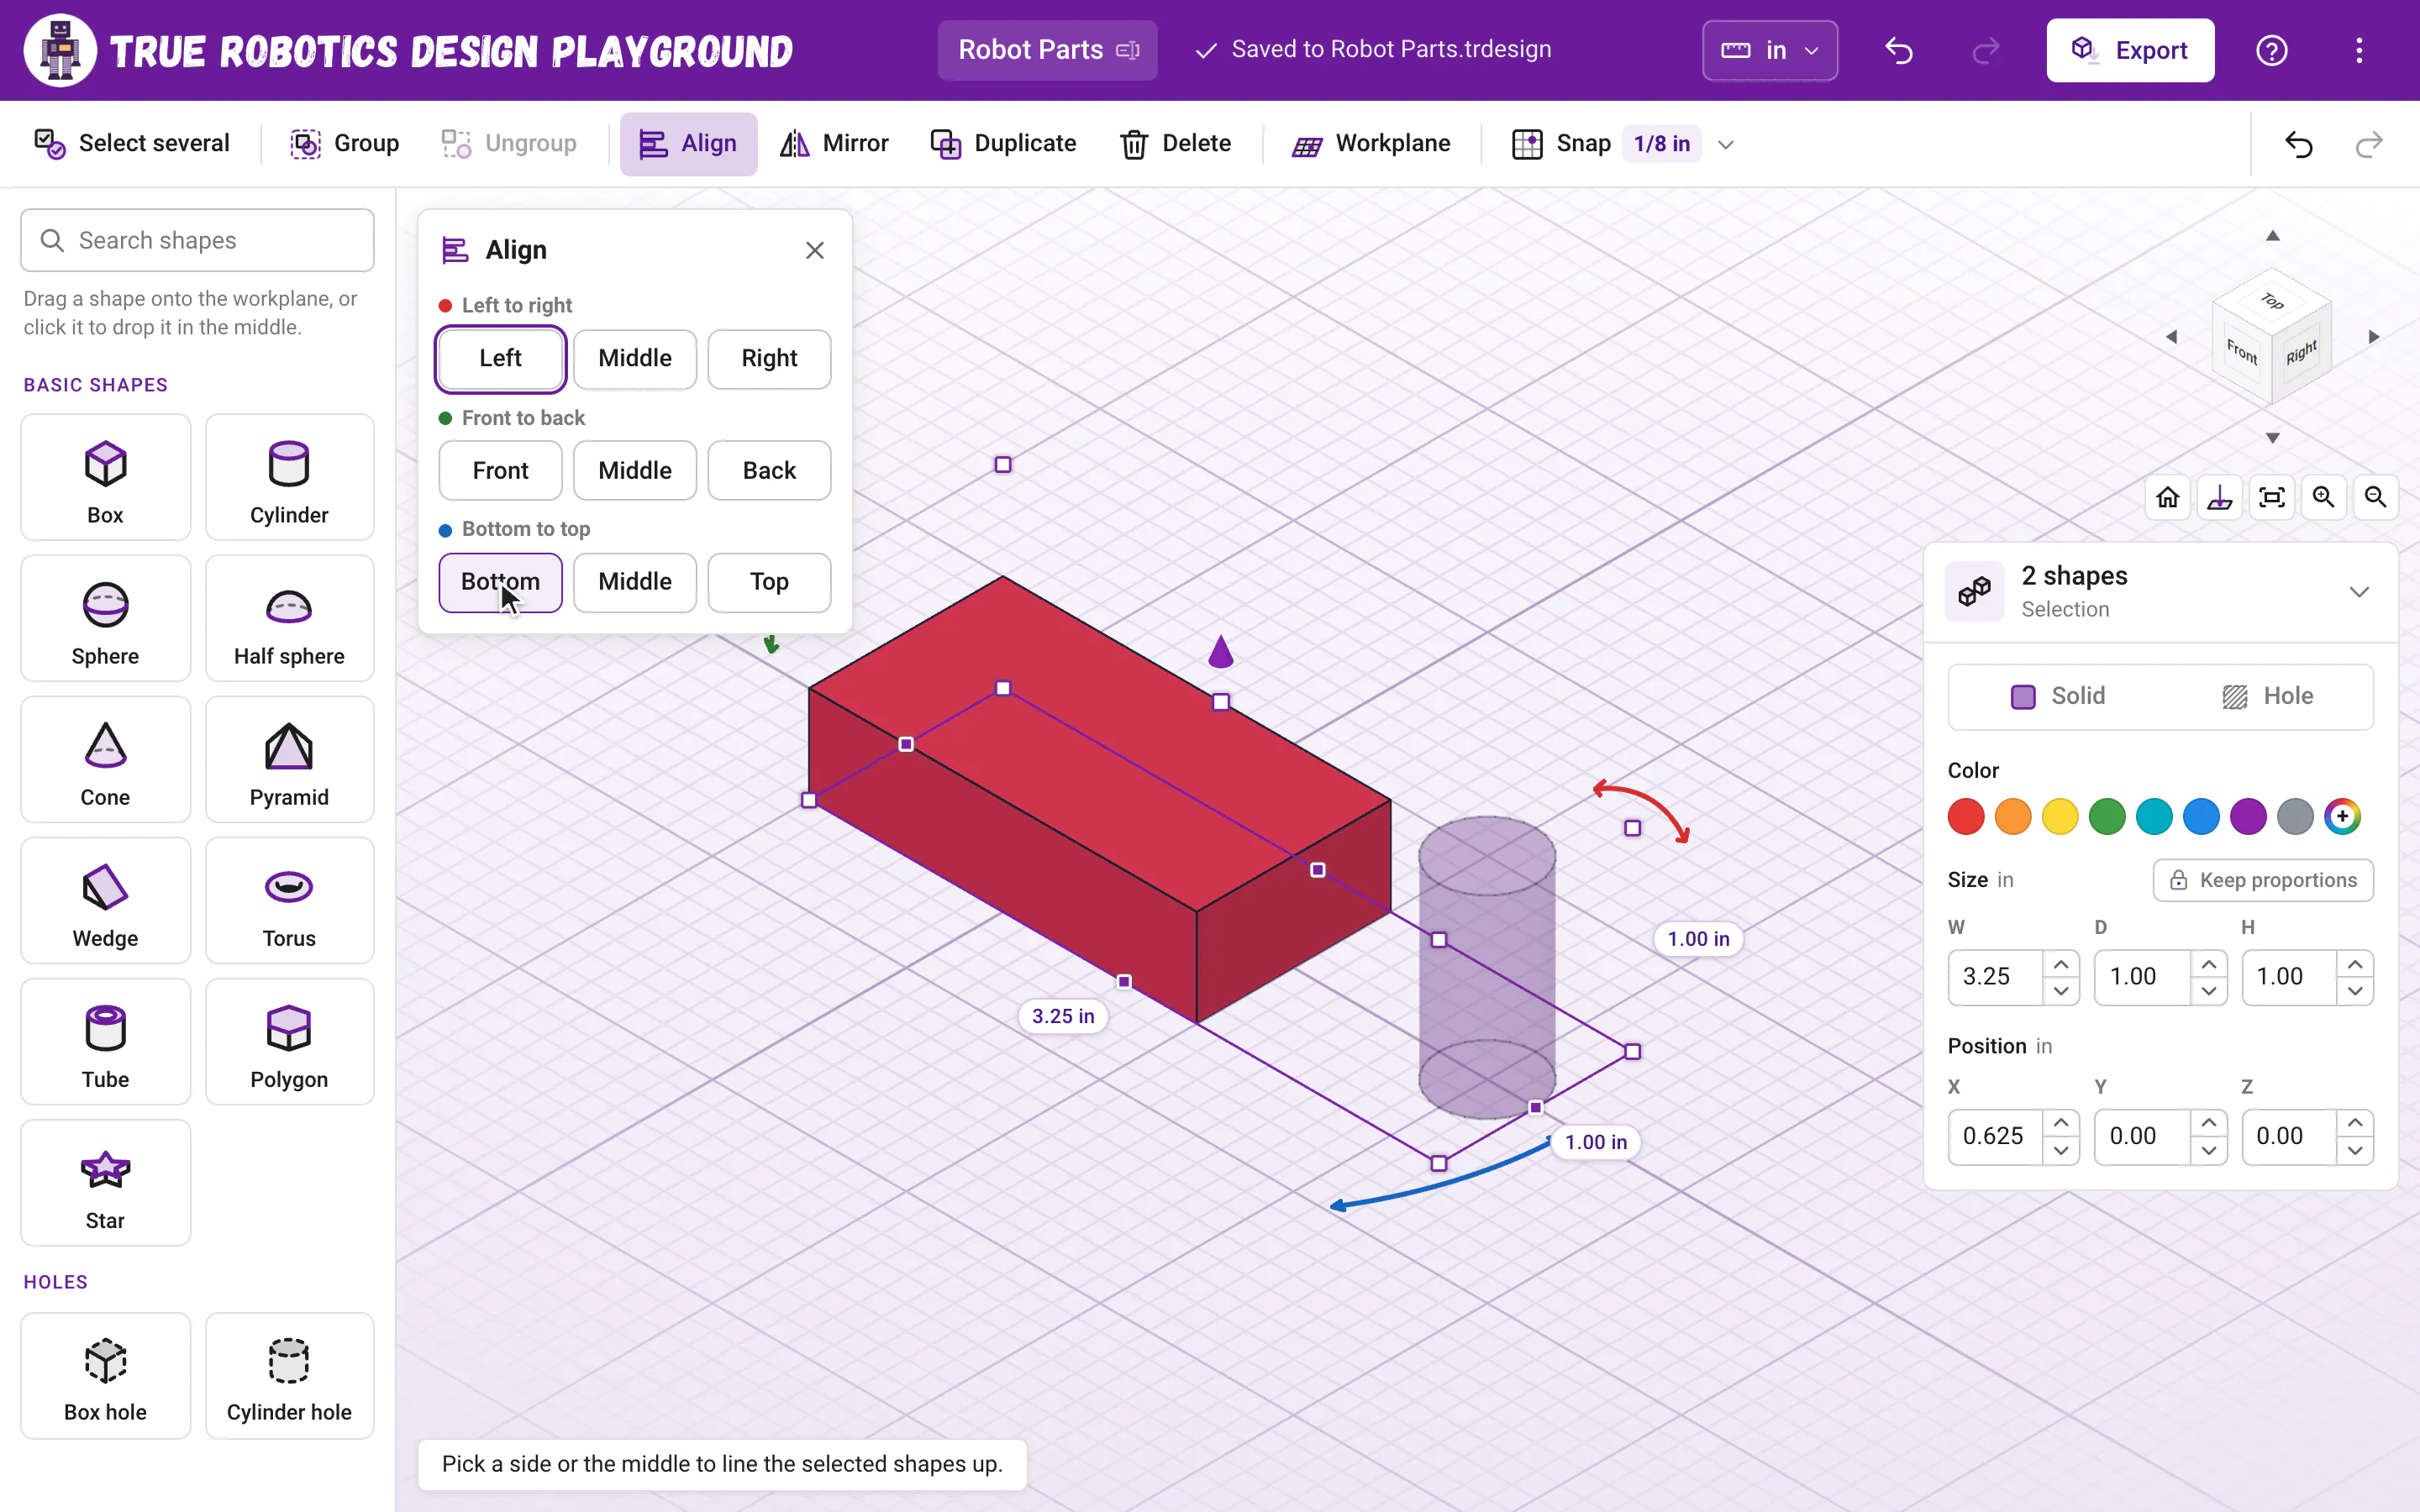
Select two or more shapes and click Align (or press L). The Align card offers three rows: Left, Middle and Right; Front, Middle and Back; and Bottom, Middle and Top. Click a button and the selected shapes line up that way. Bottom lines up their bottoms with the lowest one, so if one shape rests on the workplane, they all come down to it.
How do I flip a shape?#
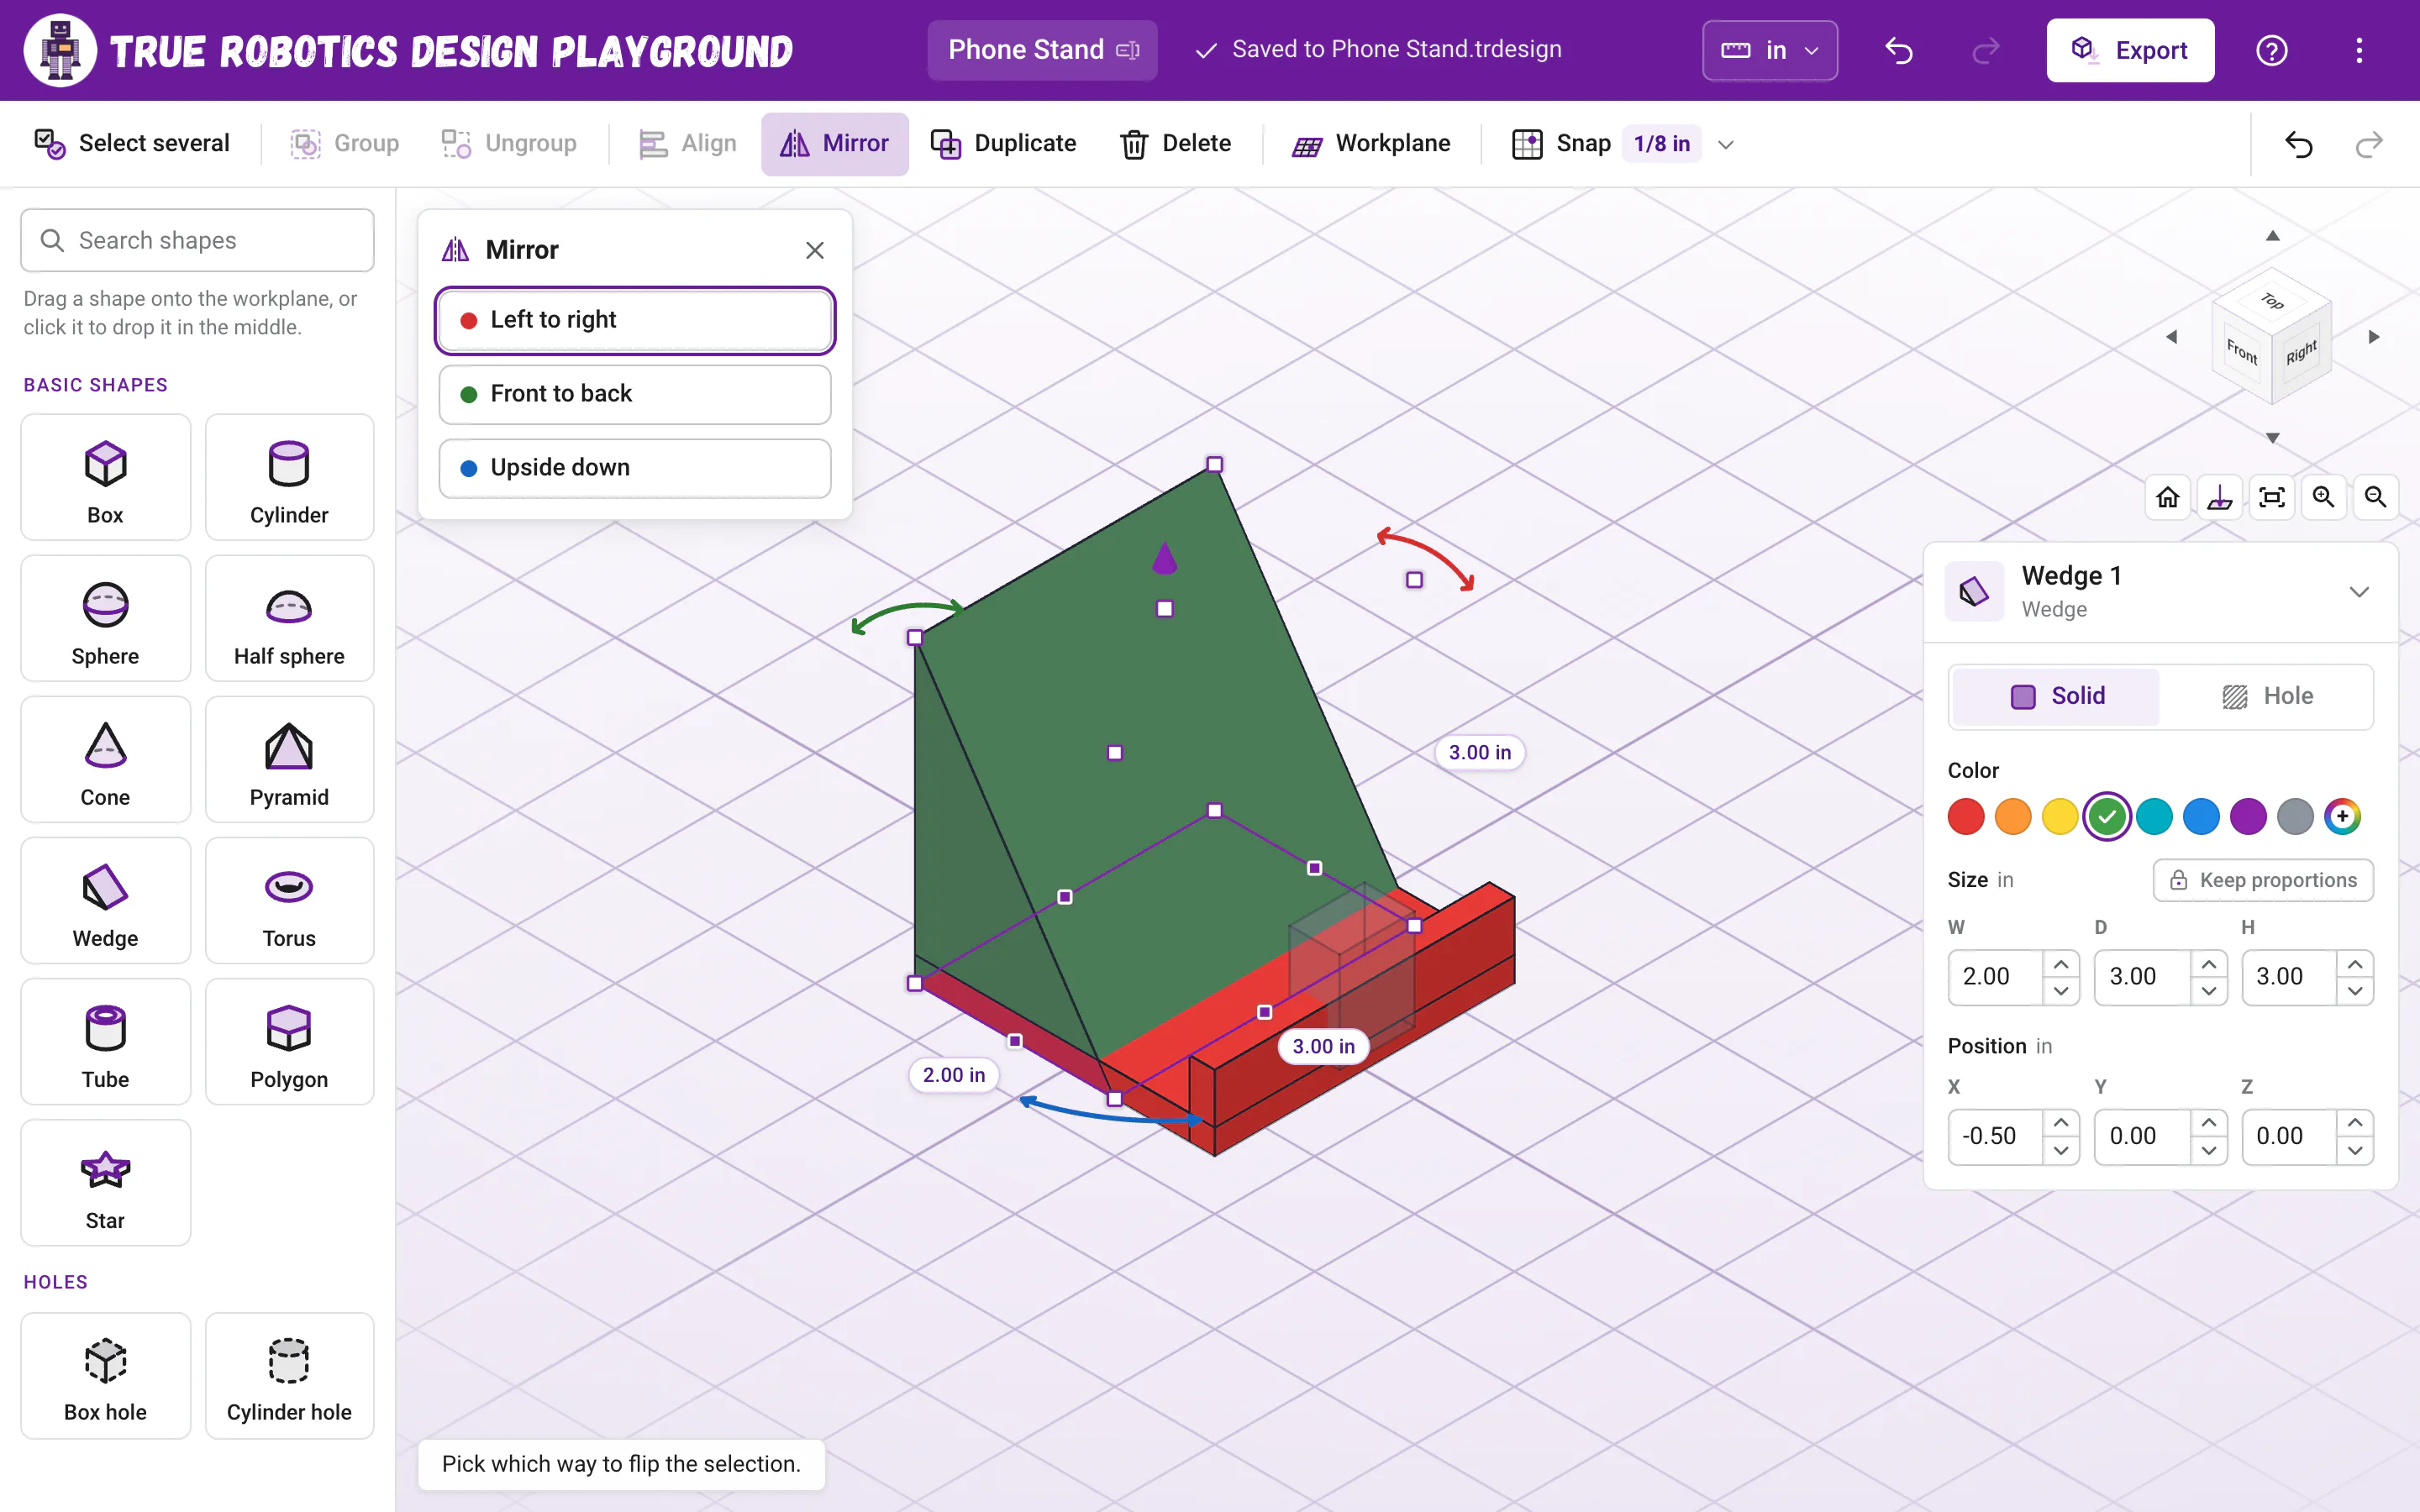
Select it and click Mirror (or press M), then pick Left to right, Front to back or Upside down. Mirroring a group flips everything in it, holes too.
How do I copy or delete a shape?#
Duplicate (Ctrl+D) makes a copy in the very same spot and selects it, so move it right away with a drag, the arrow keys or the Position boxes. Delete removes the selection; Delete and Backspace both work.
How do I build on top of another shape?#
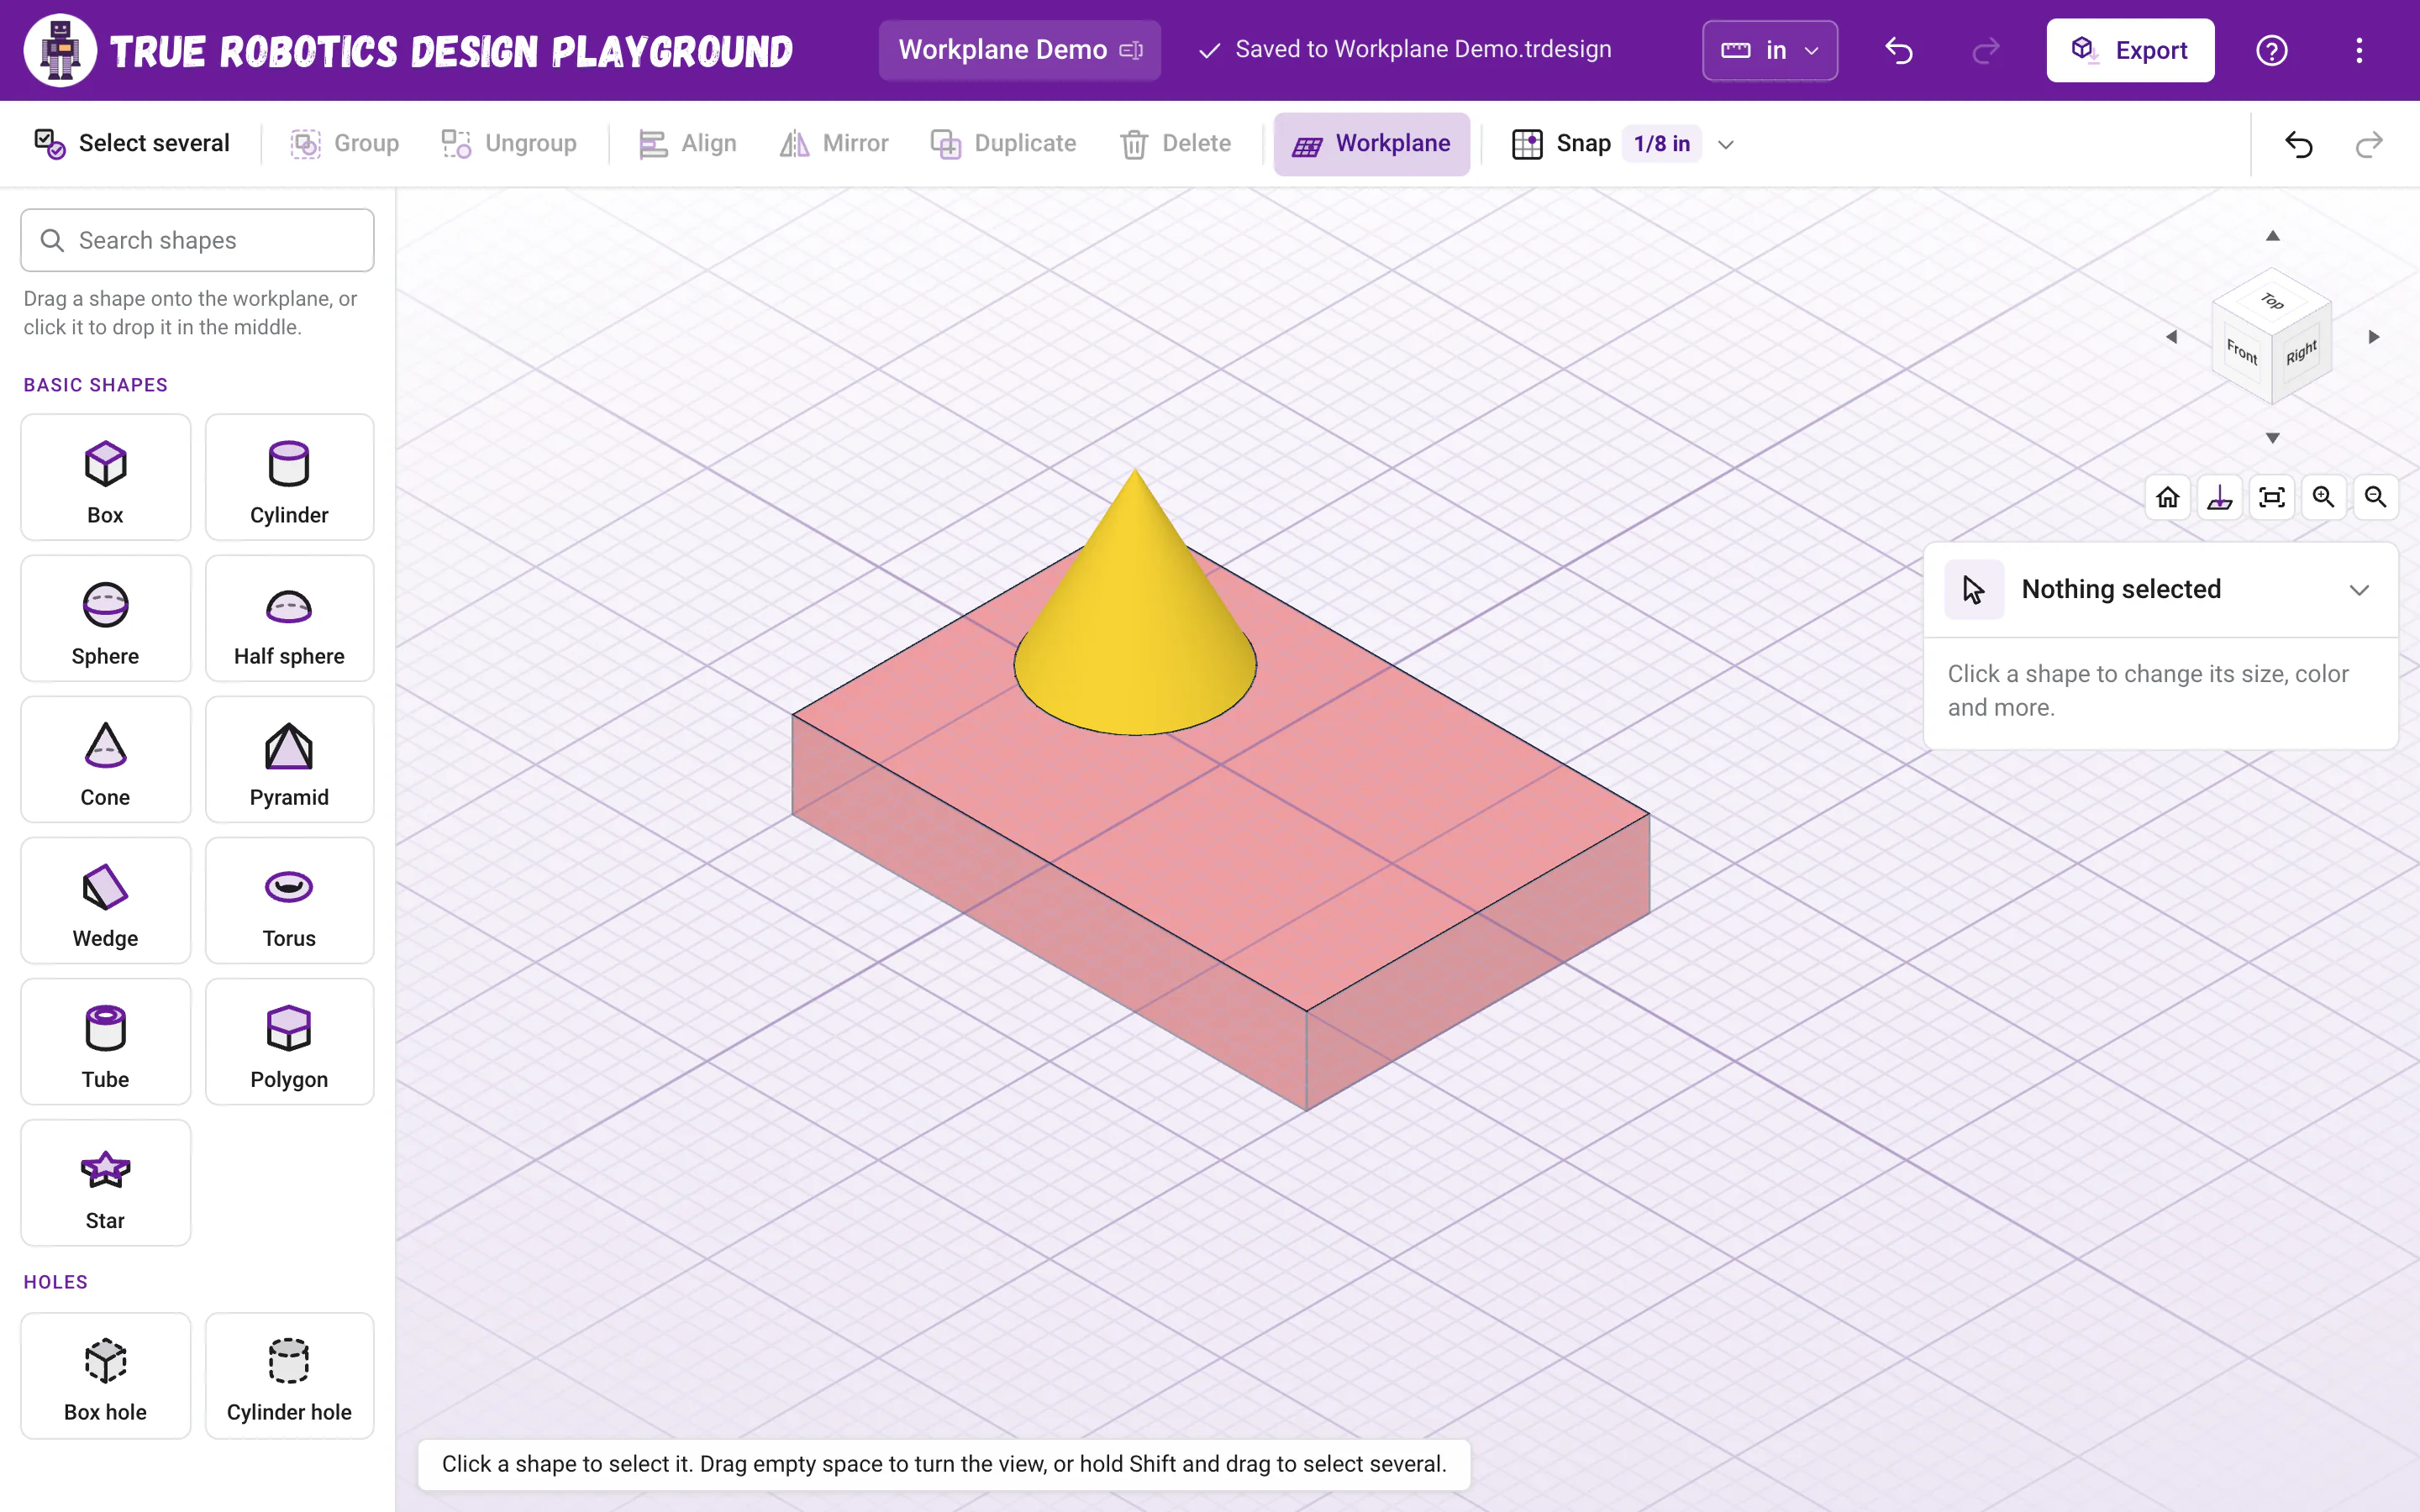
A shape you drag onto another shape lands right on the face under the pointer. To keep building on that face, point at it and press W (or click Workplane, then click the face). The grid moves onto the face, new shapes land there, and Z in the settings panel measures from it. Point at empty space and press W to put the workplane back on the ground.
When your shapes are sized and in place, group them and cut holes.
Questions and answers#
Why do the arrow keys not move my shape?
The arrow keys move the selected shape when the 3D view has the keyboard. If you just typed in the settings panel, click the view or the shape first. With nothing selected, the arrow keys turn the view.
How do I make a shape exactly the size I want?
Click the shape, click one of its size labels, type the size and press Enter. You can also type W, D and H in the settings panel.
How do I put a shape back on the workplane?
Select it and type 0 in Z in the settings panel. Z is how high the bottom of the shape sits above the workplane.