
Building parts
Circular Pattern: Repeat Features Around an Axis
Circular pattern in the True Robotics Design Playground repeats features or whole parts around an axis, like bolt holes around a wheel hub. Press Circular or Shift+O, pick what to copy, click a round face such as a center hole, or an edge or axis, then set Count and Angle and click the green check. At 360 degrees the copies spread evenly all the way around.
How do I make a circular pattern?#
Start Circular pattern Click Circular in the toolbar, or press Shift+O (O for a circle). The Circular pattern panel opens on the left.
Pick what to copy Click the feature to repeat, like the cut that made one bolt hole, in the feature list at the top left of the view or on the model.
Pick the axis Click the Axis box, then click the round wall of a center hole or a shaft. Its middle becomes the axis. A straight edge, a sketch line, an Axis you made or one of the red, green and blue origin axes works too.
Set the count Count is how many there are in all, the original included. Type it, or click the up and down arrows, and watch the red preview copies spread around.
Finish Click the green check at the top of the panel. Circular pattern 1 joins the feature list.
Read what happens in this video
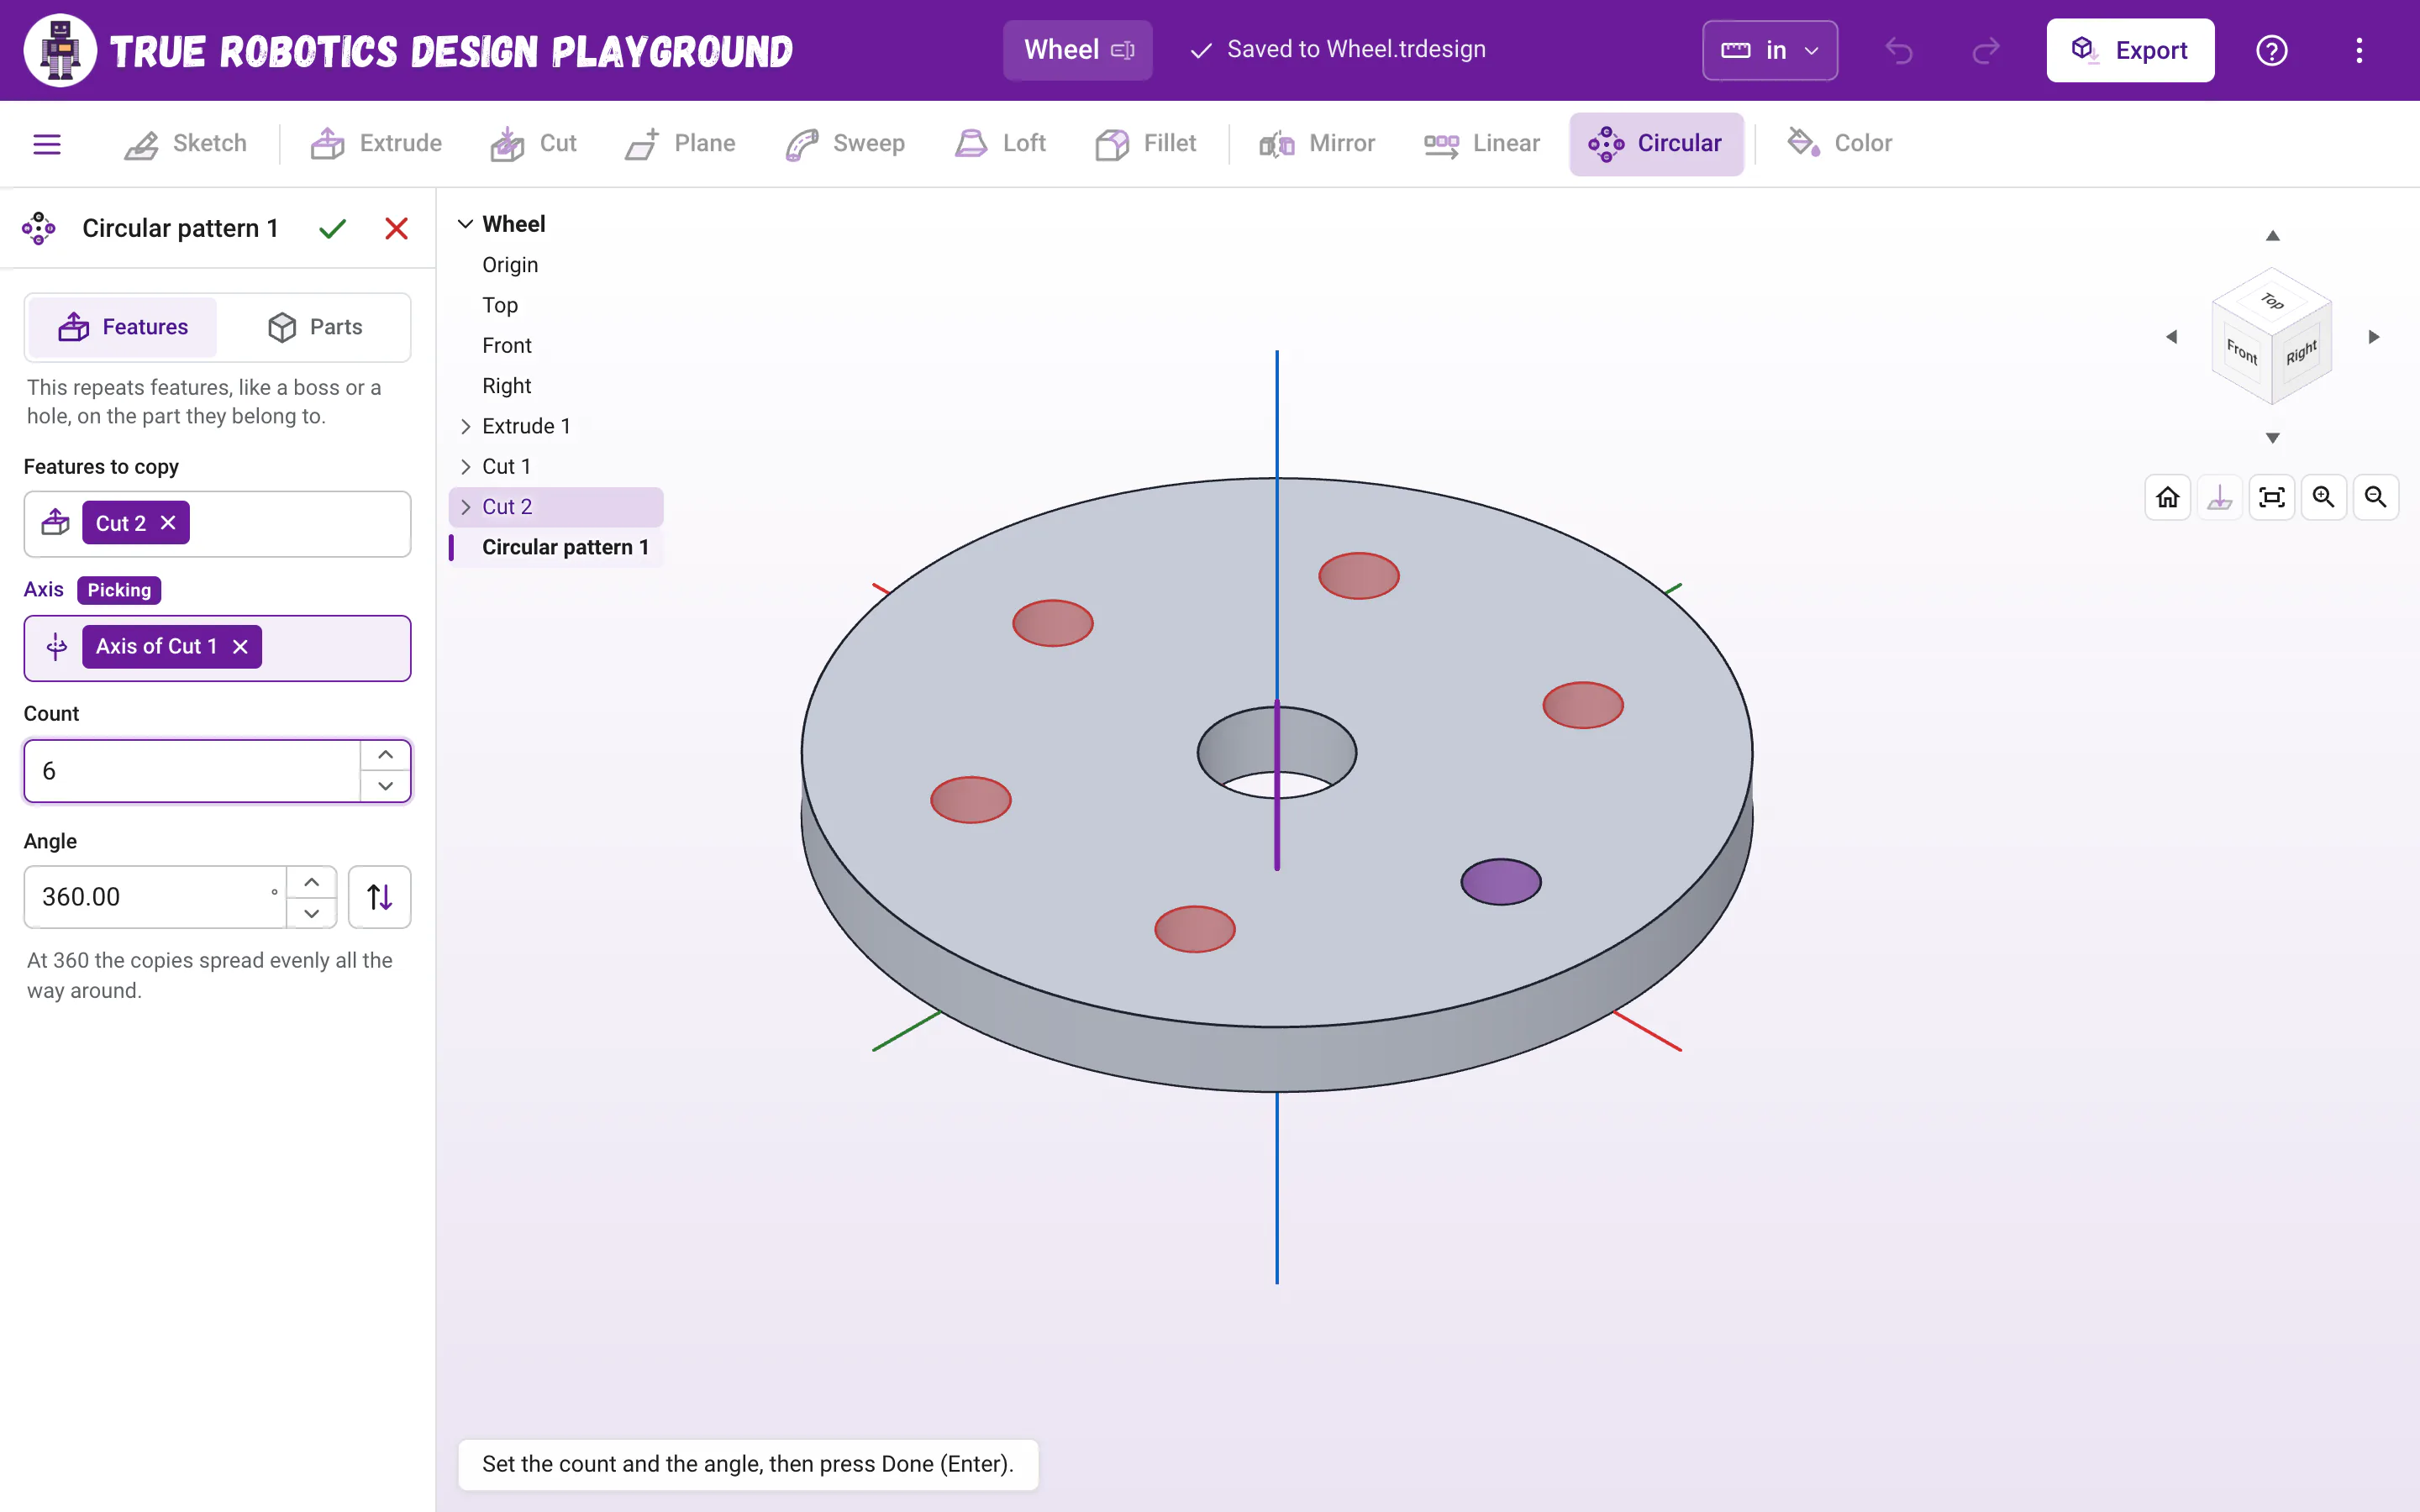
We press Shift and O for Circular pattern and click Cut 2, the bolt hole, in the feature list. We click the Axis box and then the inside of the center hole, so the copies turn around its middle. Clicking the Count arrow up to 6, with the angle at 360, spreads six holes evenly around the disc, and the green check finishes it.
The steps in the video:
- Press Shift + O to start Circular pattern.
- Click Cut 2 in the feature list. That is the bolt hole to copy.
- Click the Axis box, then click inside the center hole.
- Click the up arrow next to Count until it reads 6.
- The angle stays at 360, so the holes spread evenly.
- Click the green check to finish Circular pattern 1.
How does the Angle box work?#
| Angle | Where the copies go | Example |
|---|---|---|
| 360 (the default) | Evenly all the way around, 360 divided by the count apart. | Count 6 puts a hole every 60 degrees, like the bolts on a wheel. |
| Less than 360 | Spread from the original to the last copy, which lands exactly that many degrees away. | Count 3 and Angle 90 puts holes at 0, 45 and 90 degrees, a quarter of the way around. |
The flip button next to Angle (its tooltip says Turn the other way) sends the copies around the other way. The arrows next to the box step by 1 degree, and the box reads math too, so 360/8 works.
What can be the axis?#
- A round face, like the inside of a hole or the outside of a shaft. This is the handiest choice for a wheel or a hub, because the axis is right in the middle of it.
- A straight edge of a part, for copies that swing around a corner or a hinge.
- A sketch line, if you drew one where you want the axis.
- An Axis you made, shown as a long dashed line with its name. Click it in the view or click its row in the feature list. It is the way to go when the center is not a hole, like the line where two faces meet.
- The X, Y or Z axis, which show as red, green and blue lines while the Axis box waits. The blue Z axis goes straight up through the origin, perfect for a disc you drew on the origin on the Top plane.
Tip: Robot wheel hub in a minute
Extrude a disc on the origin, cut a center hole, then cut one small bolt hole off to the side. A circular pattern of the bolt hole around the center hole, with a count of 6, gives six evenly spaced bolt holes. Change the count later and they space themselves out again.
Features or Parts?#
With Features, each copy does what the original does on the same part: copies of a cut make holes, copies of a boss or a revolve add spokes, teeth or pegs, and copies of a fillet or chamfer round or bevel the same edge on every copy. Copies of the feature that started a part, like its first extrude, join that part where they touch it and become parts of their own where they don't. With Parts, whole parts go around the axis. A copy that touches a part joins it, and a copy that touches nothing becomes a new part.
Can I pattern a hole with a rounded rim?#
Yes. Pick the bolt hole and the fillet on its rim, like Cut 2 and Fillet 1, and every hole around the hub gets the same smooth rim, so a bolt finds its way into each one. The copies go in the order the features were made, so each copied hole is there before its rim is rounded. A copy with no matching edge is left out, and the panel says how many.
How do I change a circular pattern later?#
Double-click Circular pattern 1 in the feature list, change the count, the angle or the axis, and click the green check. Change the original hole, say to make it bigger, and every copy follows.
Good to know: Patterns in a sketch
To repeat circles or lines around a point while you draw, use the sketch Circular pattern tool (U). The Circular pattern feature here repeats features that are already built.
What do the circular pattern messages mean?#
| Message | What to do |
|---|---|
| Pick an axis to turn around: a straight edge, a sketch line, a round face or an axis. | Click the Axis box, then the wall of a hole, an edge or an axis. |
| That face is not round like a hole or a shaft. Pick a round face, a straight edge, a sketch line or an axis. | You clicked a flat or curvy face. Click the round wall of a hole instead. |
| Use an angle more than 0 and up to 360 degrees. | Angles go from just above 0 up to 360. |
| The copies do not touch the part. | The copies swing off the part. Check the axis: a hole in the middle of the part is usually the one you want. |
| 2 copies of Fillet 1 had no matching edge, so they were left out. | Copied fillets landed where there is no edge like the one they round. Add the hole or boss the fillet rounds to the pattern too. |
| That's one of the copies this makes. Click the original to change what gets copied. | Click the original feature, not a preview copy. |
| The line this uses is gone. Edit it and pick another edge, sketch line or axis. | The axis was deleted or changed. Double-click the pattern and pick it again. |
Circular patterns turn one hole into a hub, a gear blank or a spoked wheel. Pair them with Mirror and Linear pattern and you can build almost any robot plate.
Questions and answers#
How do I put holes evenly around a circle?
Cut one hole, press Circular pattern, pick that cut, click the round wall of the center hole as the axis, and set the count. With the angle at 360, the holes spread evenly all the way around.
What does the Angle box do in a circular pattern?
At 360, the copies spread evenly all the way around. Less than 360 spreads them from the original to the last copy, which lands exactly that many degrees away.
Can I pattern a fillet or a chamfer around a circle?
Yes. In Features mode, pick the fillet or chamfer along with the hole or boss it rounds, and every copy around the axis gets the same rounded or chamfered edge. A copy with no matching edge is left out, and the panel says so.
Can I turn copies around a line that is not a hole?
Yes. Make an Axis first, like where two faces meet or through two corners, then click its dashed line or its row in the feature list while the Axis box waits. A straight edge, a sketch line or the X, Y or Z axis works too.
Can I use the center hole as the axis?
Yes. Click the round wall of the hole while the Axis box waits, and the middle of the hole becomes the axis.