
Building parts
Planes: Picking a Plane and Making New Ones
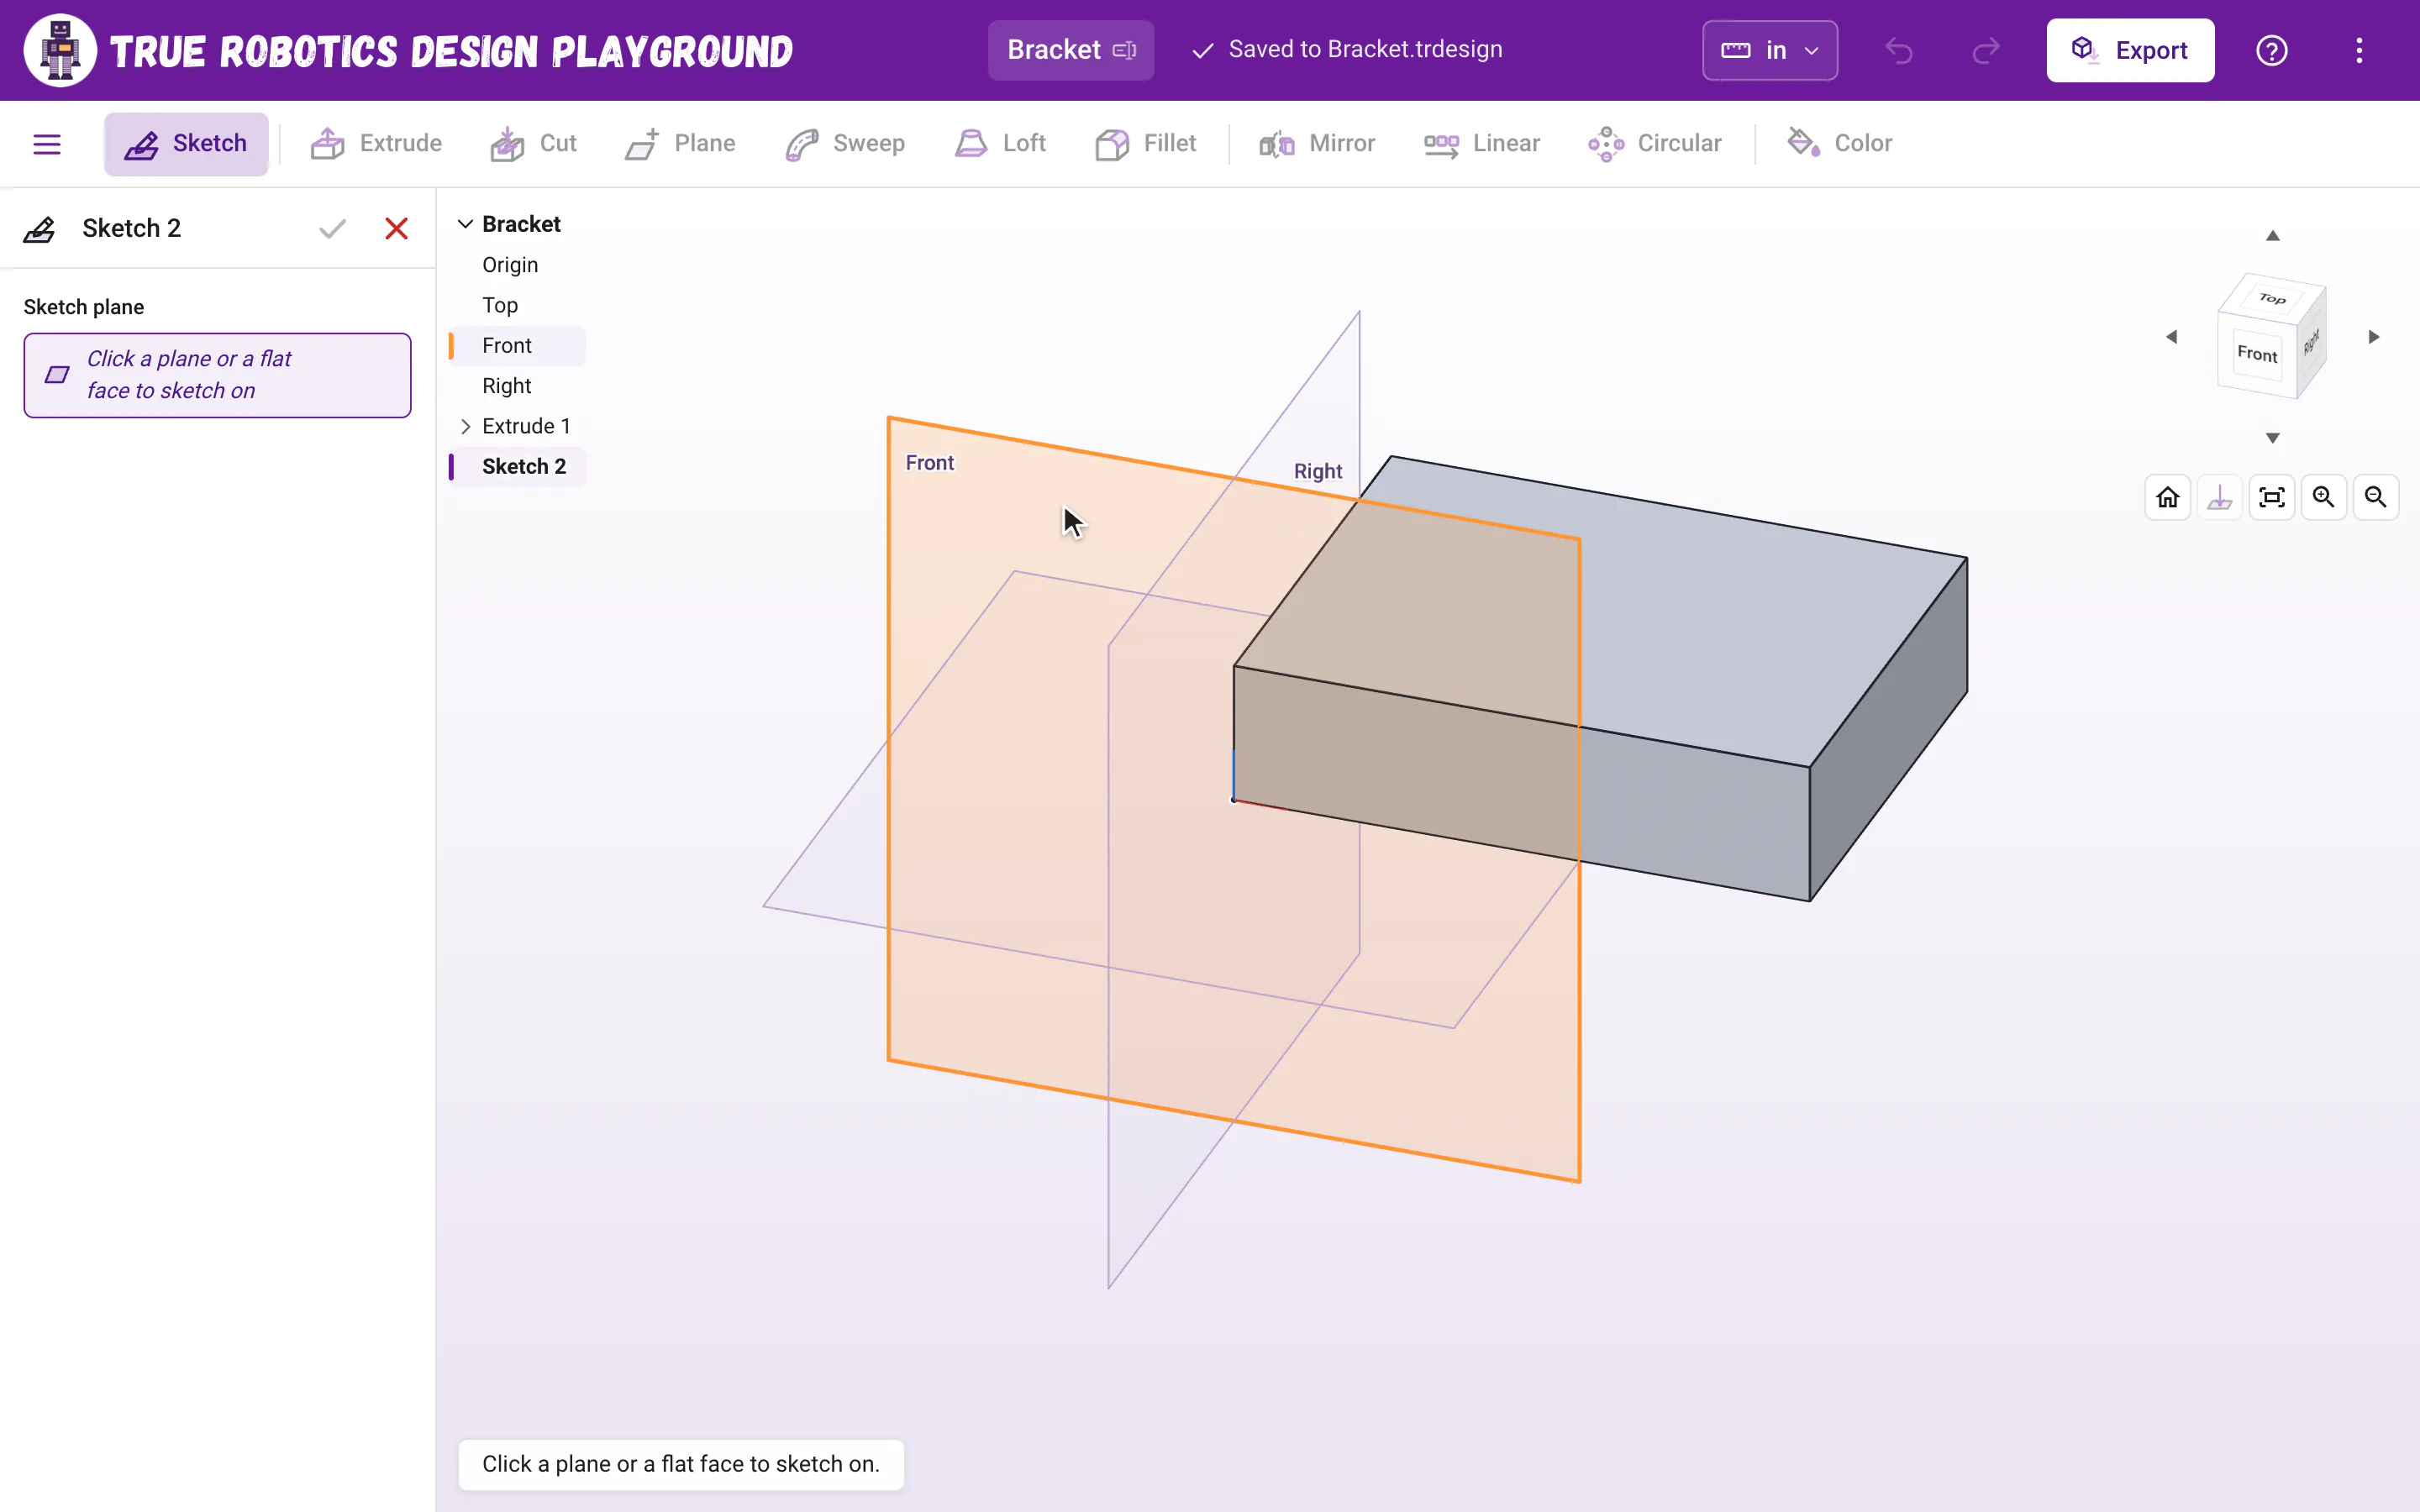
In the True Robotics Design Playground, the Top, Front and Right planes stay hidden until you need one: press Sketch, and they appear so you can click one. Plane, or Shift+P, makes a new plane of your own: Offset for a set distance from a plane or face, Midway for halfway between two, or Angle to tilt one around a line.
Where are the Top, Front and Right planes?#
A new project keeps its three planes hidden, so your part has the view all to itself. They show up on their own whenever you need to pick one, and hide again once you have:
Press Sketch Click Sketch with nothing picked, or press Shift+S. Top, Front and Right appear, and the Sketch panel says Click a plane or a flat face to sketch on. The view turns to a tilted angle and zooms so all three planes fit, each one easy to tell apart with its name in its own outer corner.
Click a plane Click a plane in the view, its row in the feature list, or a flat face of your part.
Start drawing The view turns to look straight at the plane and zooms to fit, and the planes hide again. Draw away!
- The same thing happens every time something asks for a plane: Extrude with nothing to extrude, the Plane or face box in the Plane panel, and the Mirror plane box in Mirror.
- Changed your mind? Press Esc and the planes hide again.
- Want a plane to stay on screen? Click the eye next to Top, Front or Right in the feature list. Click it again to hide it. A plane you click in the list also shows while it is selected.
- Projects made before planes started hidden keep showing their planes, just as they were saved.
Why make a new plane?#
Top, Front and Right are great for a first sketch, but some shapes need a sketch somewhere else: a circle floating two inches up for a loft, a profile at the end of a sweep path, or a slanted face for a ramp. A plane you make sits exactly where you say, shows in the view like the default planes, and stays put through every change, so the sketches on it stay put too.
How do I make a plane?#
Select where the new plane starts: click Top, Front or Right in the feature list, or a flat face of a part. This step is optional, since you can pick it in the panel too.
Click Plane in the toolbar, or press Shift+P. The Plane panel opens on the left with your pick already in Plane or face. With nothing picked, the planes appear so you can click one.
Choose Offset, Midway or Angle at the top of the panel.
Click the other plane, face, axis or line the method asks for. The hint at the bottom of the view always says what comes next.
Type a distance or an angle, or click the up and down arrows next to the box, and watch the purple preview move. Press Enter or click the green check, and your plane joins the feature list as Plane 1.
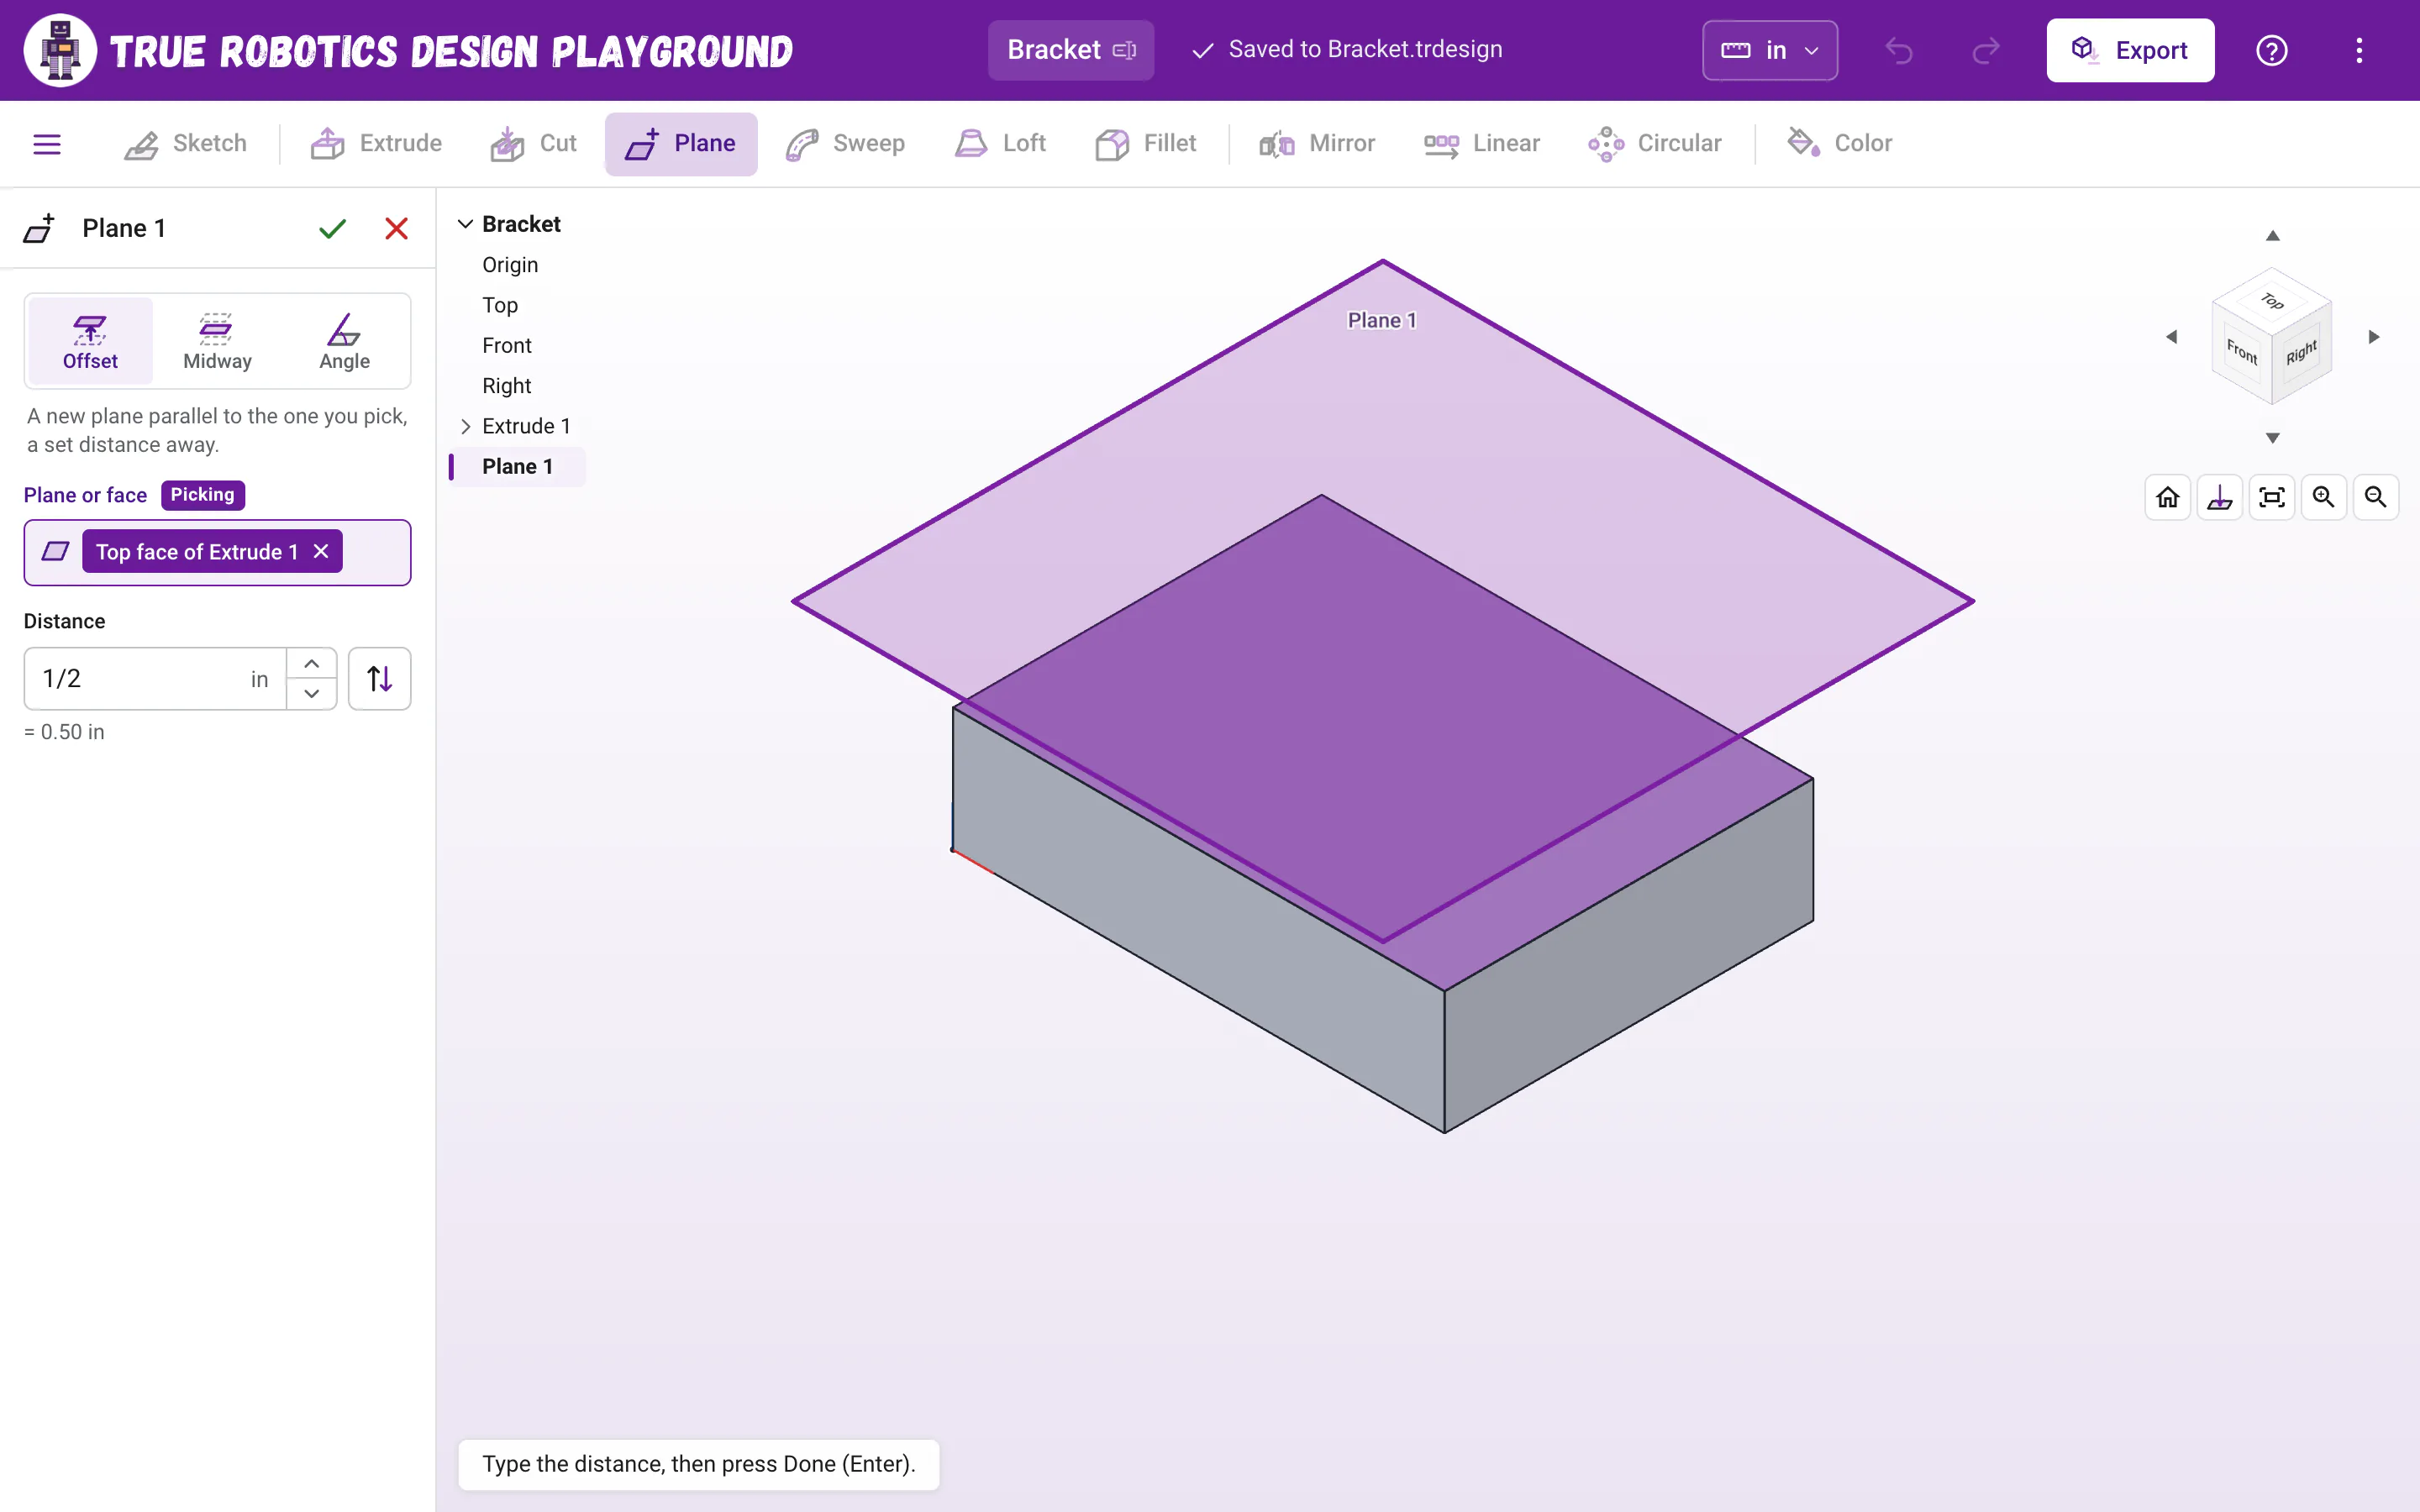
- OffsetA new plane parallel to the one you pick, a set distance away.
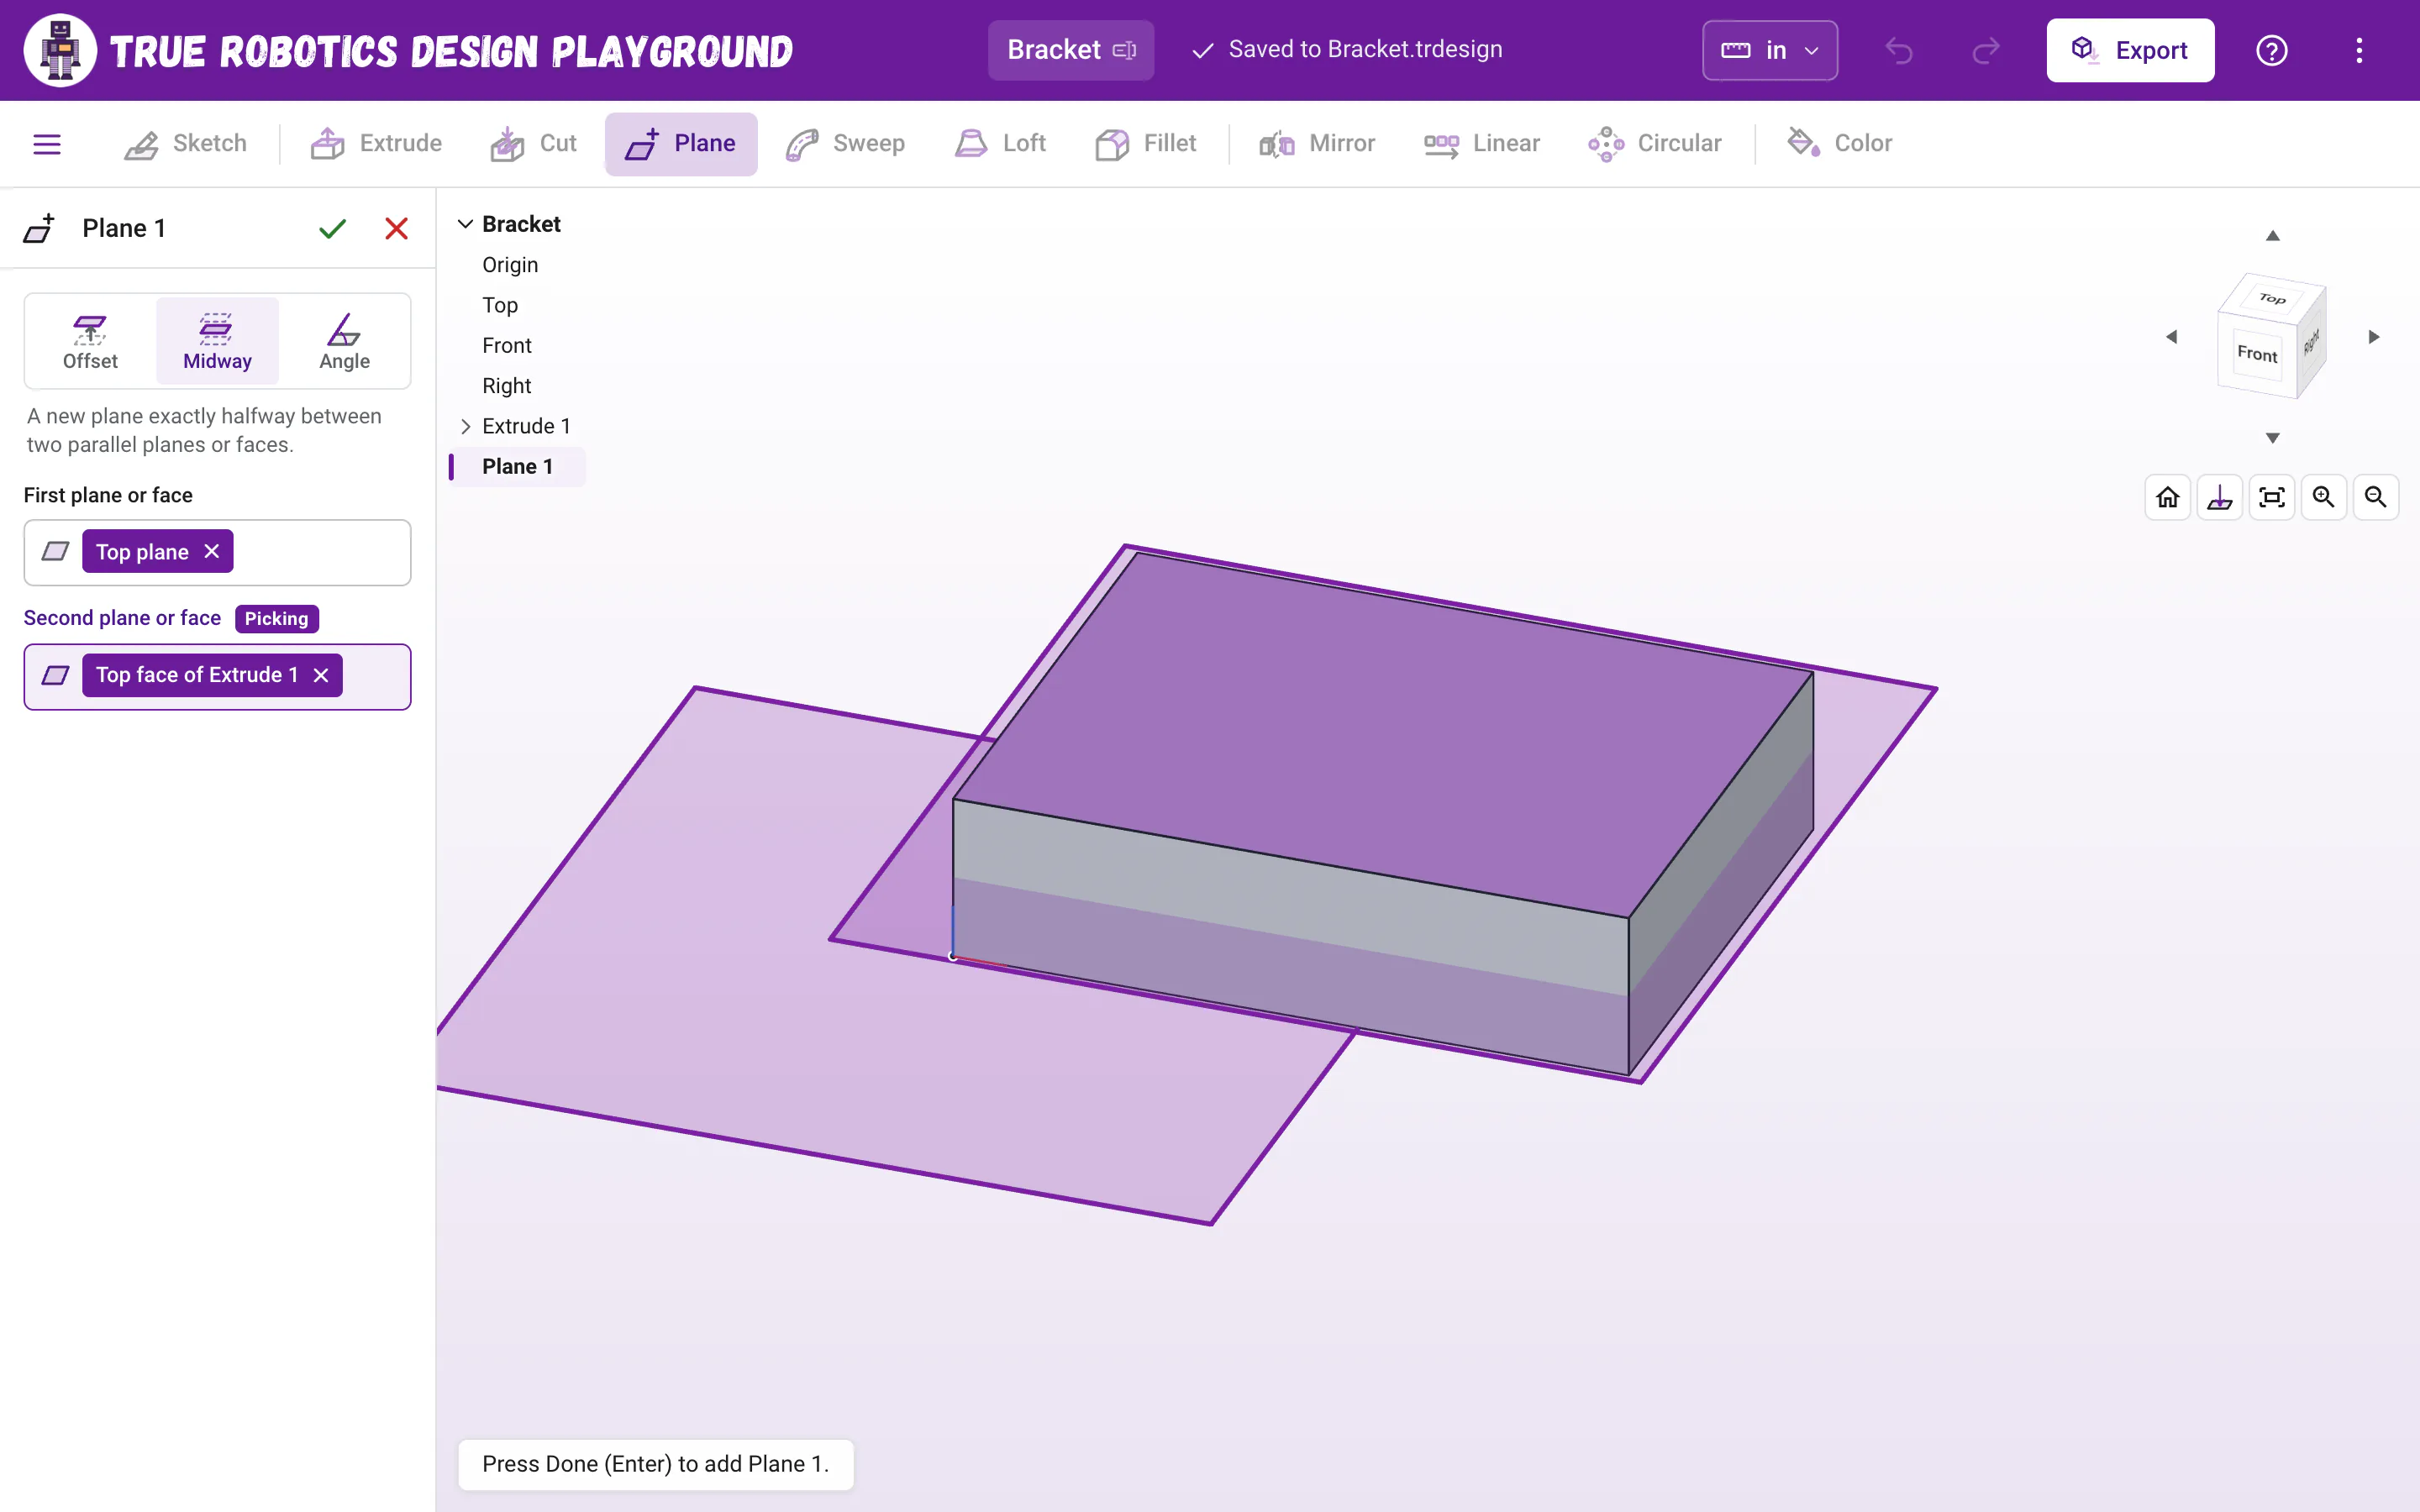
- MidwayA new plane exactly halfway between two parallel planes or faces.
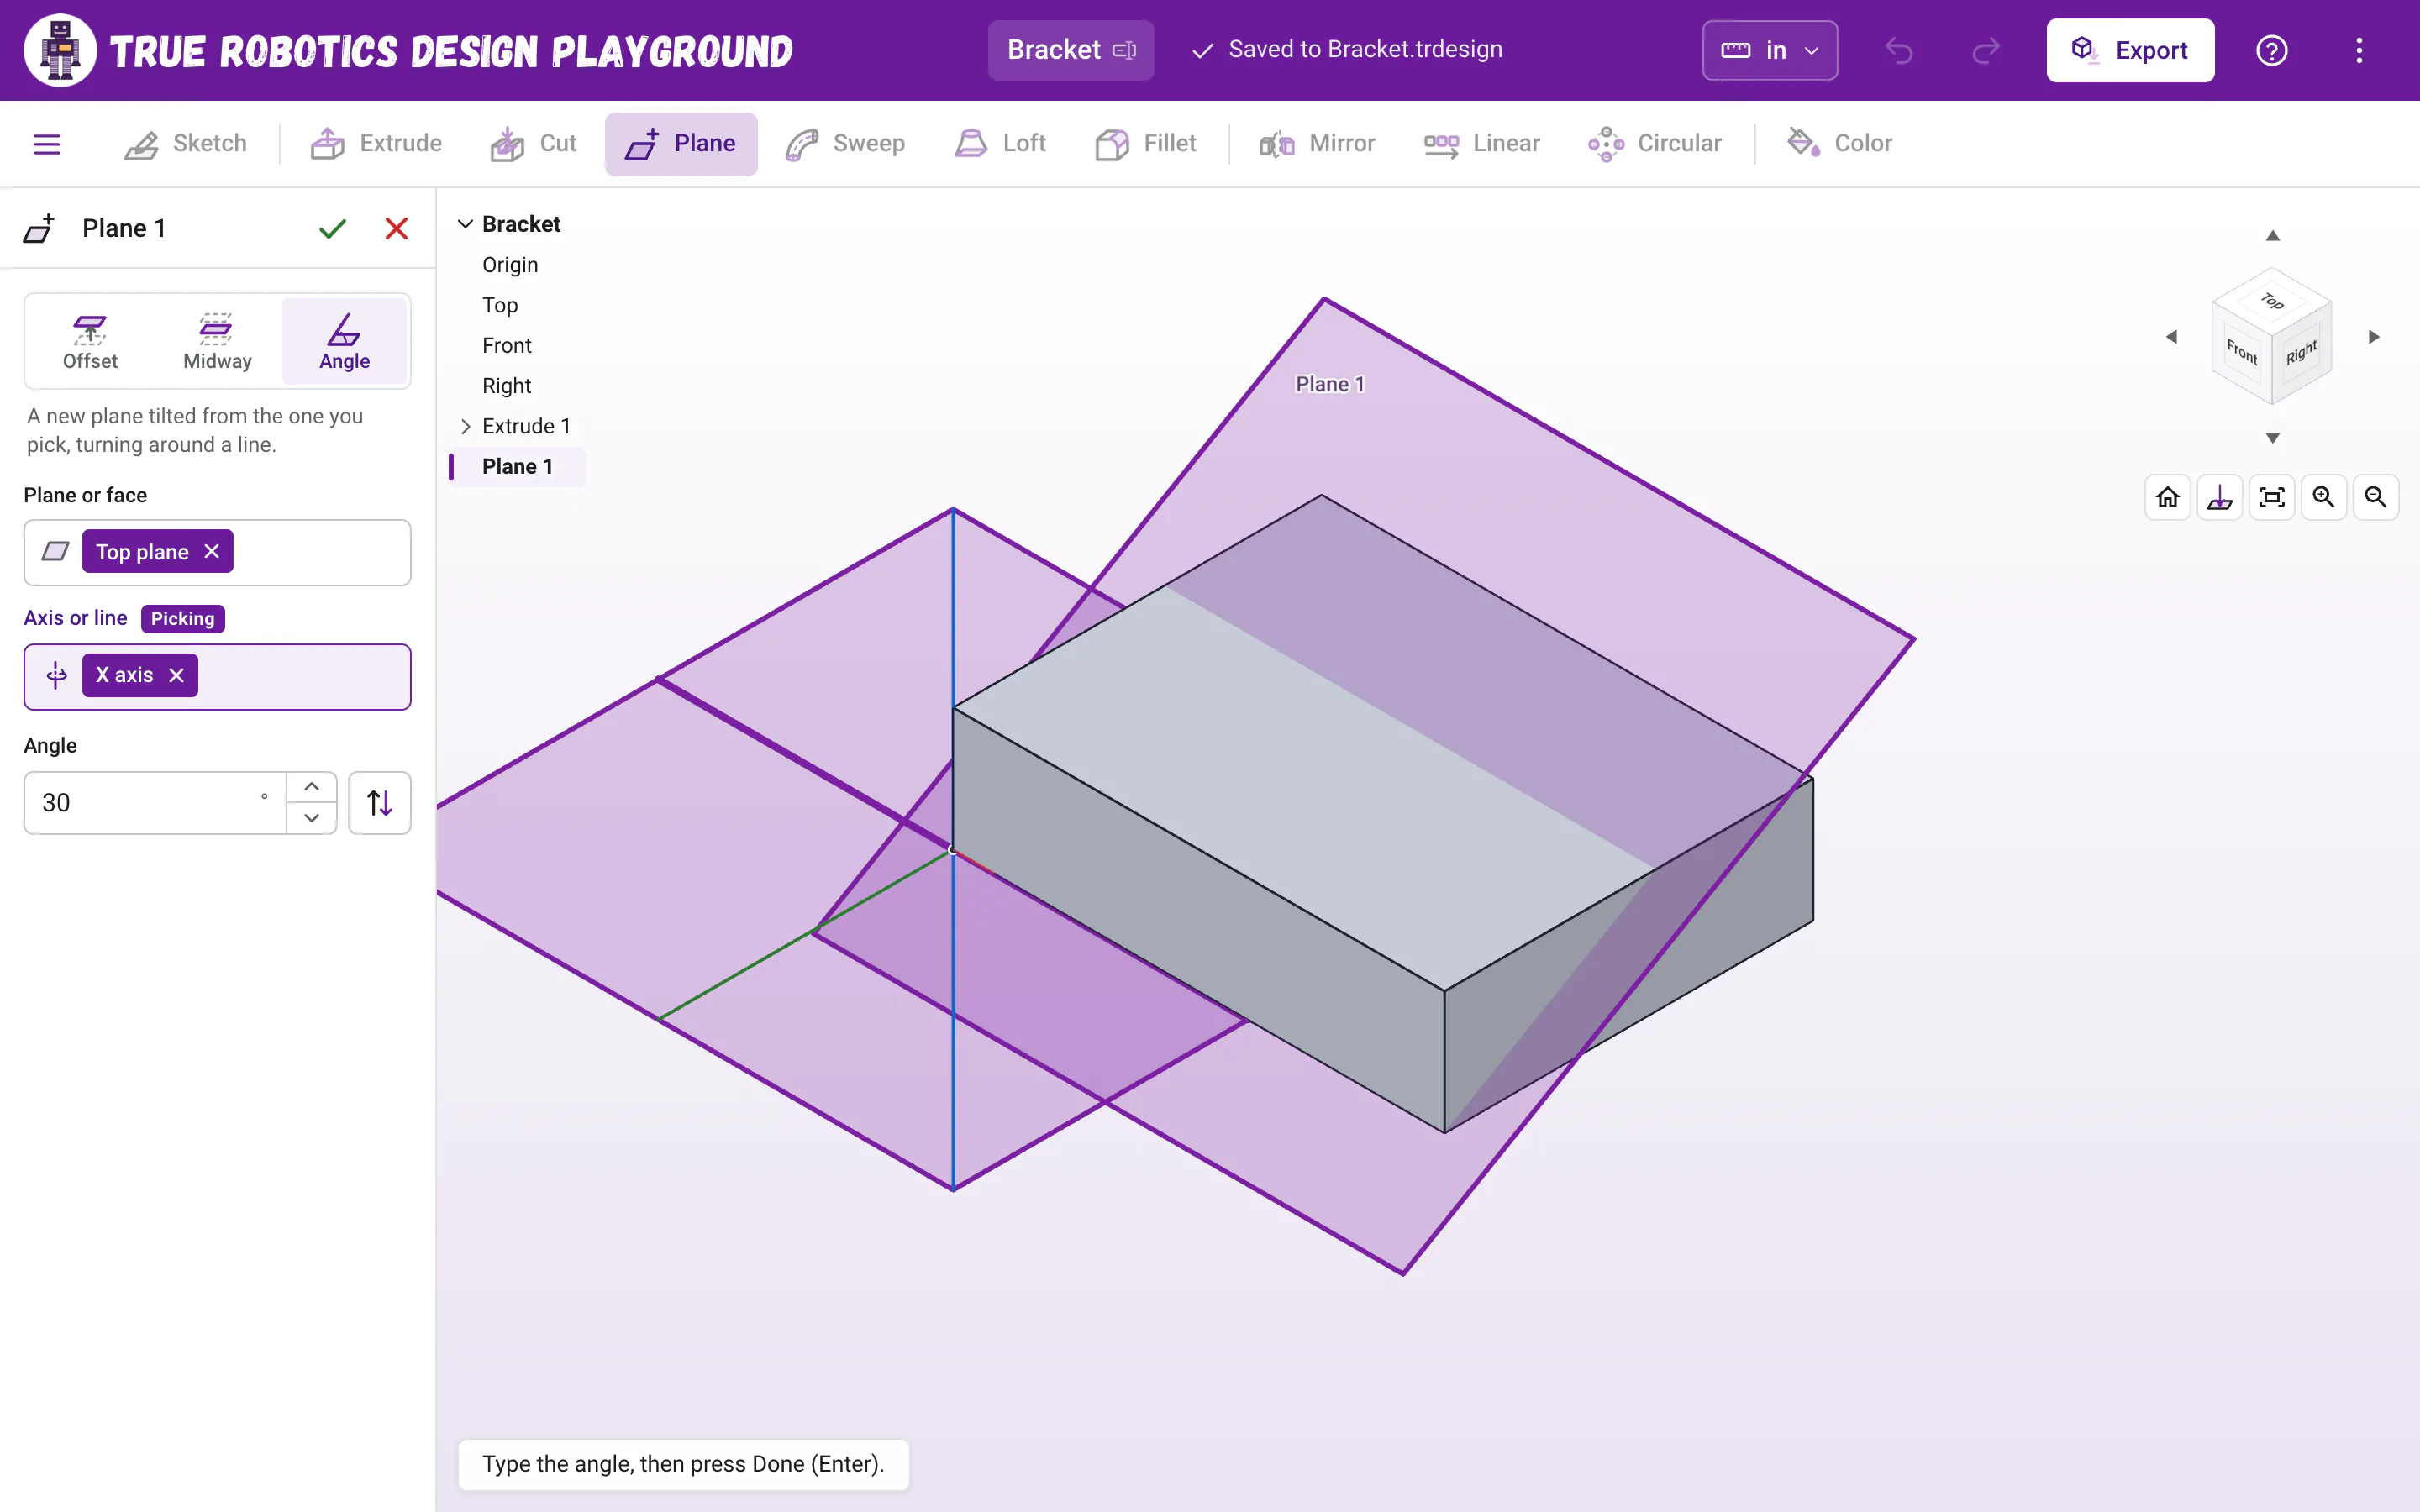
- AngleA new plane tilted from the one you pick, turning around a line.
How does an Offset plane work?#
Pick a plane or a flat face, then type how far away the new plane goes. It starts at 1.00 in (1.00 cm in a centimeter project), and the box understands math and units, like 3/4, 1 1/2 or 25 mm, with the result shown right under it. Each click on the arrows moves the plane 1 in (or 1 cm), and holding Alt while you click moves it a tenth of that. Flip to the other side puts the plane on the other side, and a negative distance does the same. A distance of 0 is fine too, and gives you a plane right on the face.
How does a Midway plane work?#
Pick two planes or flat faces that face the same way, like the Top plane and the top face of a block. The new plane goes exactly halfway between them, so there is nothing to type. If the two are not parallel, the dialog says Pick two flat faces or planes that face the same way. Midway planes are handy for the middle of a part, like a center line for holes.
How does an Angle plane work?#
Pick the plane or face to start from, then the line it turns around, like a door on its hinge. While Axis or line waits, the origin's X, Y and Z axes appear in the view, so you can click one of those, click a straight line in a sketch, or click an Axis you made. The line has to lie along the plane you started from. The angle starts at 45 degrees. Type any angle, like 30 or 90-15, or step it 1 degree at a time with the arrows, and Turn the other way tilts it the other direction. Picked the wrong sketch line? Click the X on its chip and click another one. The sketch stays in view while the panel is open, even when it is hidden or tucked under a feature, so its lines are always there to click.
How do I sketch on my new plane?#
Click the plane in the feature list or in the view so it turns purple, then press Sketch, just like sketching on Top. Or press Sketch first and click your plane while the planes show. The view turns to look straight at it. Change the plane later, say from 2 inches up to 3, and every sketch on it rides along, along with everything built from those sketches.
Read what happens in this video
With the Top plane selected, Shift+P opens Plane, and typing 2 makes Plane 1 two inches above Top. We sketch a 3 inch circle on Plane 1 and a 3/4 inch circle on Top. Shift+L opens Loft with the small circle already listed, and clicking the big circle adds it. Enter turns the preview into a solid cone.
The steps in the video:
- Click Top in the feature list, press Shift + P for Plane, type 2 and press Enter.
- Click Home under the view cube and press F. Plane 1 is 2 inches above Top.
- Click Plane 1 in the list, then click Sketch.
- Press C, click the origin, type 3 and press Enter. Press Enter again to finish.
- Click the Top plane in the list, then click Sketch.
- Press C, click the origin, type 3/4 and press Enter. Press Enter again to finish.
- Click Home and press F. Then press Shift + L for Loft.
- The small circle is already listed. Click inside the big circle to add it.
- Press Enter to make the cone. Then click Home and press F.
Can I pick from the feature list instead of the view?#
Yes. While the Plane panel is open, the feature list sits in the top left corner of the view. While a box in the panel waits for a pick, click a plane row there to fill it. With the keyboard, move through the tree with the arrow keys and press Enter on the row you want. Only planes and faces made before the one you are making can be used, so a plane never depends on itself.
How do I hide, edit or delete a plane?#
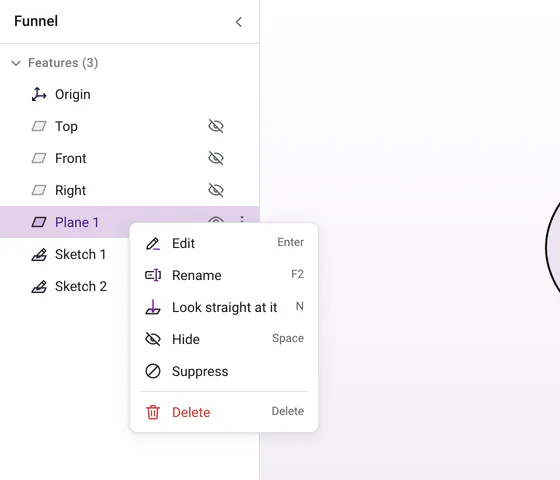
- Click the eye on its row to hide it, and again to show it. Hiding a plane you made is saved with your project, and undo brings it back.
- Double-click it to change its method, picks or distance. Everything after it rebuilds when you press Enter.
- Choose Look straight at it from its menu, or select it and press N.
- Press Delete to delete it. If a sketch sits on it, the app asks first, like Sketch 1 uses this plane.
What do the plane messages mean?#
| Message | What to do |
|---|---|
| Pick a plane or flat face to start from. | Click a plane, a flat face or a plane row in the tree. |
| Pick a second plane or flat face. | Midway needs two. Click the other one. |
| Pick an axis or a sketch line to turn around. | Angle needs a line. Click an origin axis, an Axis you made or a straight sketch line. |
| Pick two flat faces or planes that face the same way. | The two picks for Midway are not parallel. Pick a different pair. |
| The line this plane turns around needs to run along the plane it starts from. Pick a line that lies flat on that plane, or alongside it. | The hinge line points away from the plane. Pick a line that lies on it, like the X axis for the Top plane. |
| That's the plane you're making. Pick another plane or a flat face. | You clicked the preview itself. Click a plane or face that was already there. |
| This plane's reference is gone. Edit the plane and pick another plane or face. | Something the plane was measured from was deleted. Double-click the plane and pick again. |
| The face this plane was measured from is gone, so the plane stayed where it was. | The face changed so much it no longer exists. The plane keeps its last spot until you edit it. |
Planes open up a whole new world of shapes. Try one with Loft in the funnel tutorial!
Questions and answers#
Why can I not see the Top, Front and Right planes?
New projects keep them hidden so the part has the view to itself. They appear on their own whenever you need to pick one, like after you press Sketch, and hide again once you pick. Click the eye next to a plane in the feature list to keep it showing.
Can I sketch on a plane I made?
Yes. Click the plane in the feature tree or in the view, then press Sketch. Sketches on it move with it whenever you edit the plane.
Can a plane go below or behind a face?
Yes. Type a negative distance or click Flip to the other side, and an Offset plane goes the other way. A distance of zero puts it right on the face.
Why can I not pick a line for my Angle plane?
The line has to lie along the plane you started from, like a hinge on a door. For the Top plane, the X axis, the Y axis or a line sketched on Top all work.