
Building parts
Loft Between Profiles
Loft in the True Robotics Design Playground builds a solid that blends from one flat shape to the next, like a square base that turns into a round top. Sketch each profile on its own plane, press Loft or Shift+L, click the profiles in order, choose Straight or Smooth sides, and press Enter. It is perfect for cones, funnels and nose cones.
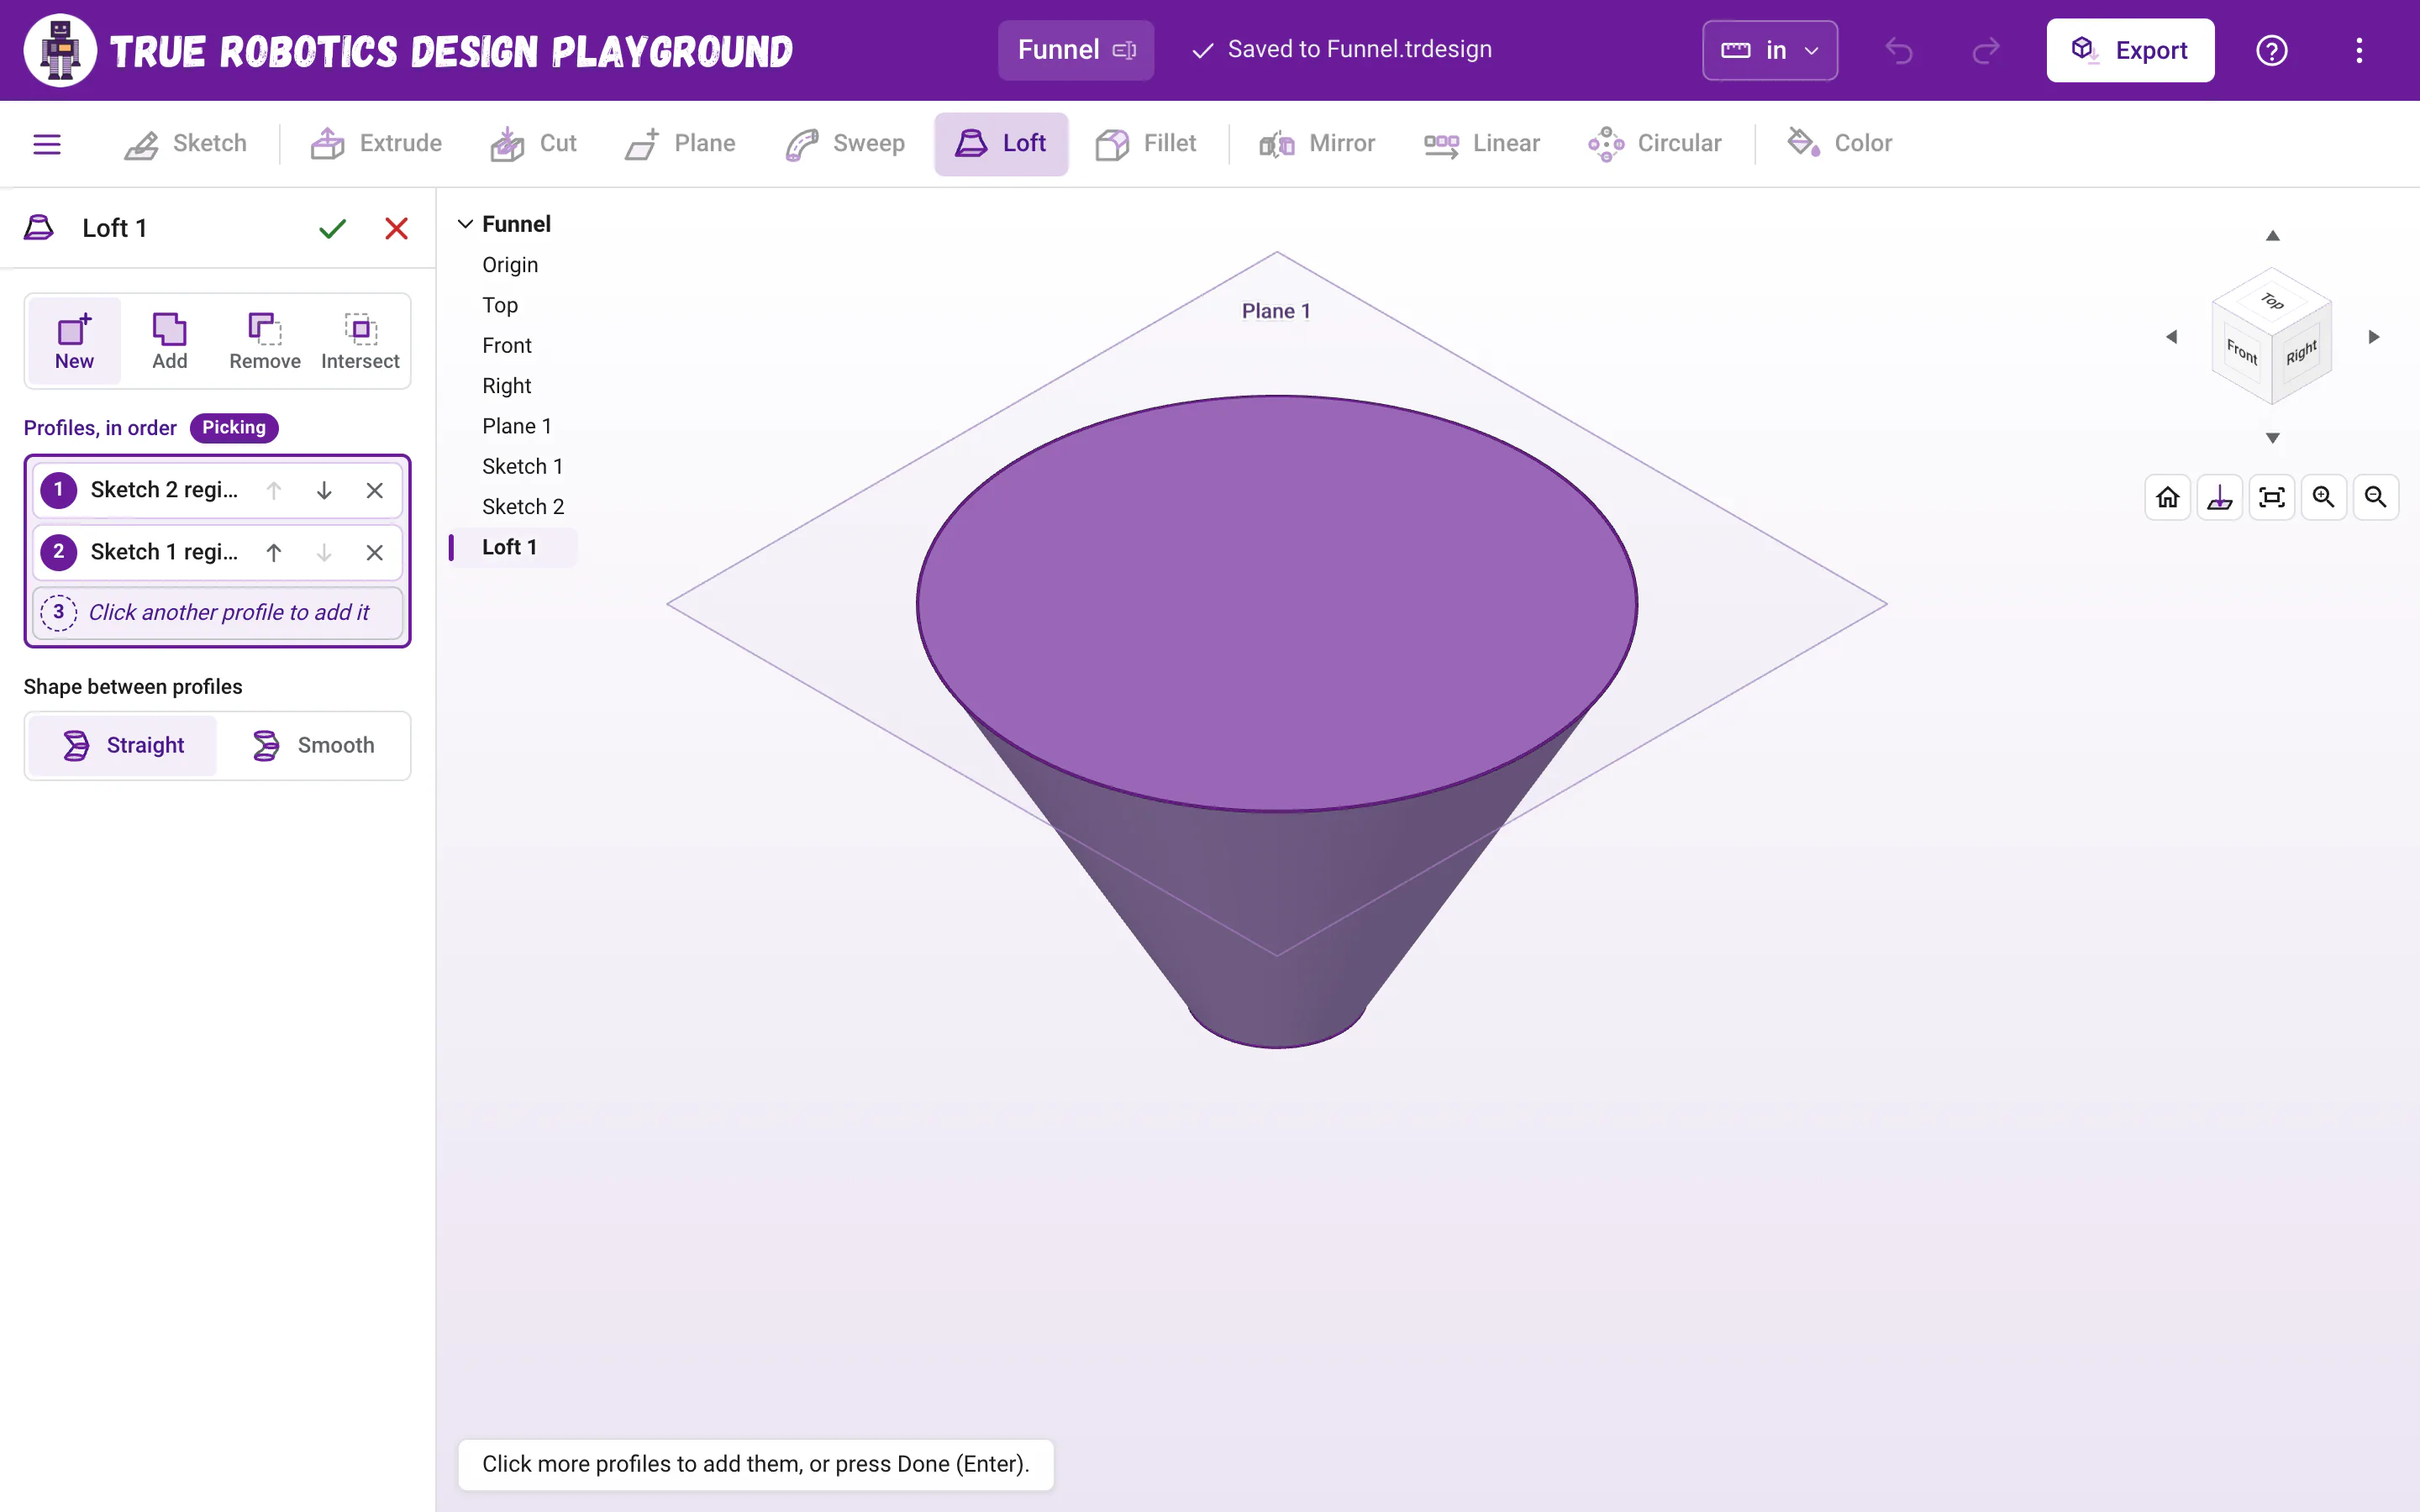
How do I loft?#
Make a place for each profile. The default planes are a start, and Plane with Offset stacks new planes above them, like Plane 1 two inches above Top.
Sketch one closed shape on each plane, like a 3 inch circle on Plane 1 and a 3/4 inch circle on Top. Press Enter to finish each sketch.
Click Loft in the toolbar, or press Shift+L. The Loft panel opens on the left, and a profile you just finished is already listed first.
Click the next profile in the view, or its sketch in the feature list at the top left of the view. Each one joins the list under Profiles, in order, and the preview grows to meet it.
Choose Straight or Smooth and an operation, then press Enter or click the green check. The profile sketches hide themselves once they are used, and they tuck in under Loft 1 in the feature list.
Read what happens in this video
With the Top plane selected, Shift+P opens Plane, and typing 2 makes Plane 1 two inches above Top. We sketch a 3 inch circle on Plane 1 and a 3/4 inch circle on Top. Shift+L opens Loft with the small circle already listed, and clicking the big circle adds it. Enter turns the preview into a solid cone.
The steps in the video:
- Click Top in the feature list, press Shift + P for Plane, type 2 and press Enter.
- Click Home under the view cube and press F. Plane 1 is 2 inches above Top.
- Click Plane 1 in the list, then click Sketch.
- Press C, click the origin, type 3 and press Enter. Press Enter again to finish.
- Click the Top plane in the list, then click Sketch.
- Press C, click the origin, type 3/4 and press Enter. Press Enter again to finish.
- Click Home and press F. Then press Shift + L for Loft.
- The small circle is already listed. Click inside the big circle to add it.
- Press Enter to make the cone. Then click Home and press F.
Why does the order matter?#
The loft travels from profile 1 to profile 2, then on to profile 3, in the order of the list. List them the way they are stacked, from bottom to top or top to bottom, and the loft comes out clean. To fix the order, use the up and down arrows on a row (or Alt+Up and Alt+Down). The X on a row, or Delete while the row has focus, takes a profile out. Clicking a listed profile again in the view takes it out too.
What is the difference between Straight and Smooth?#
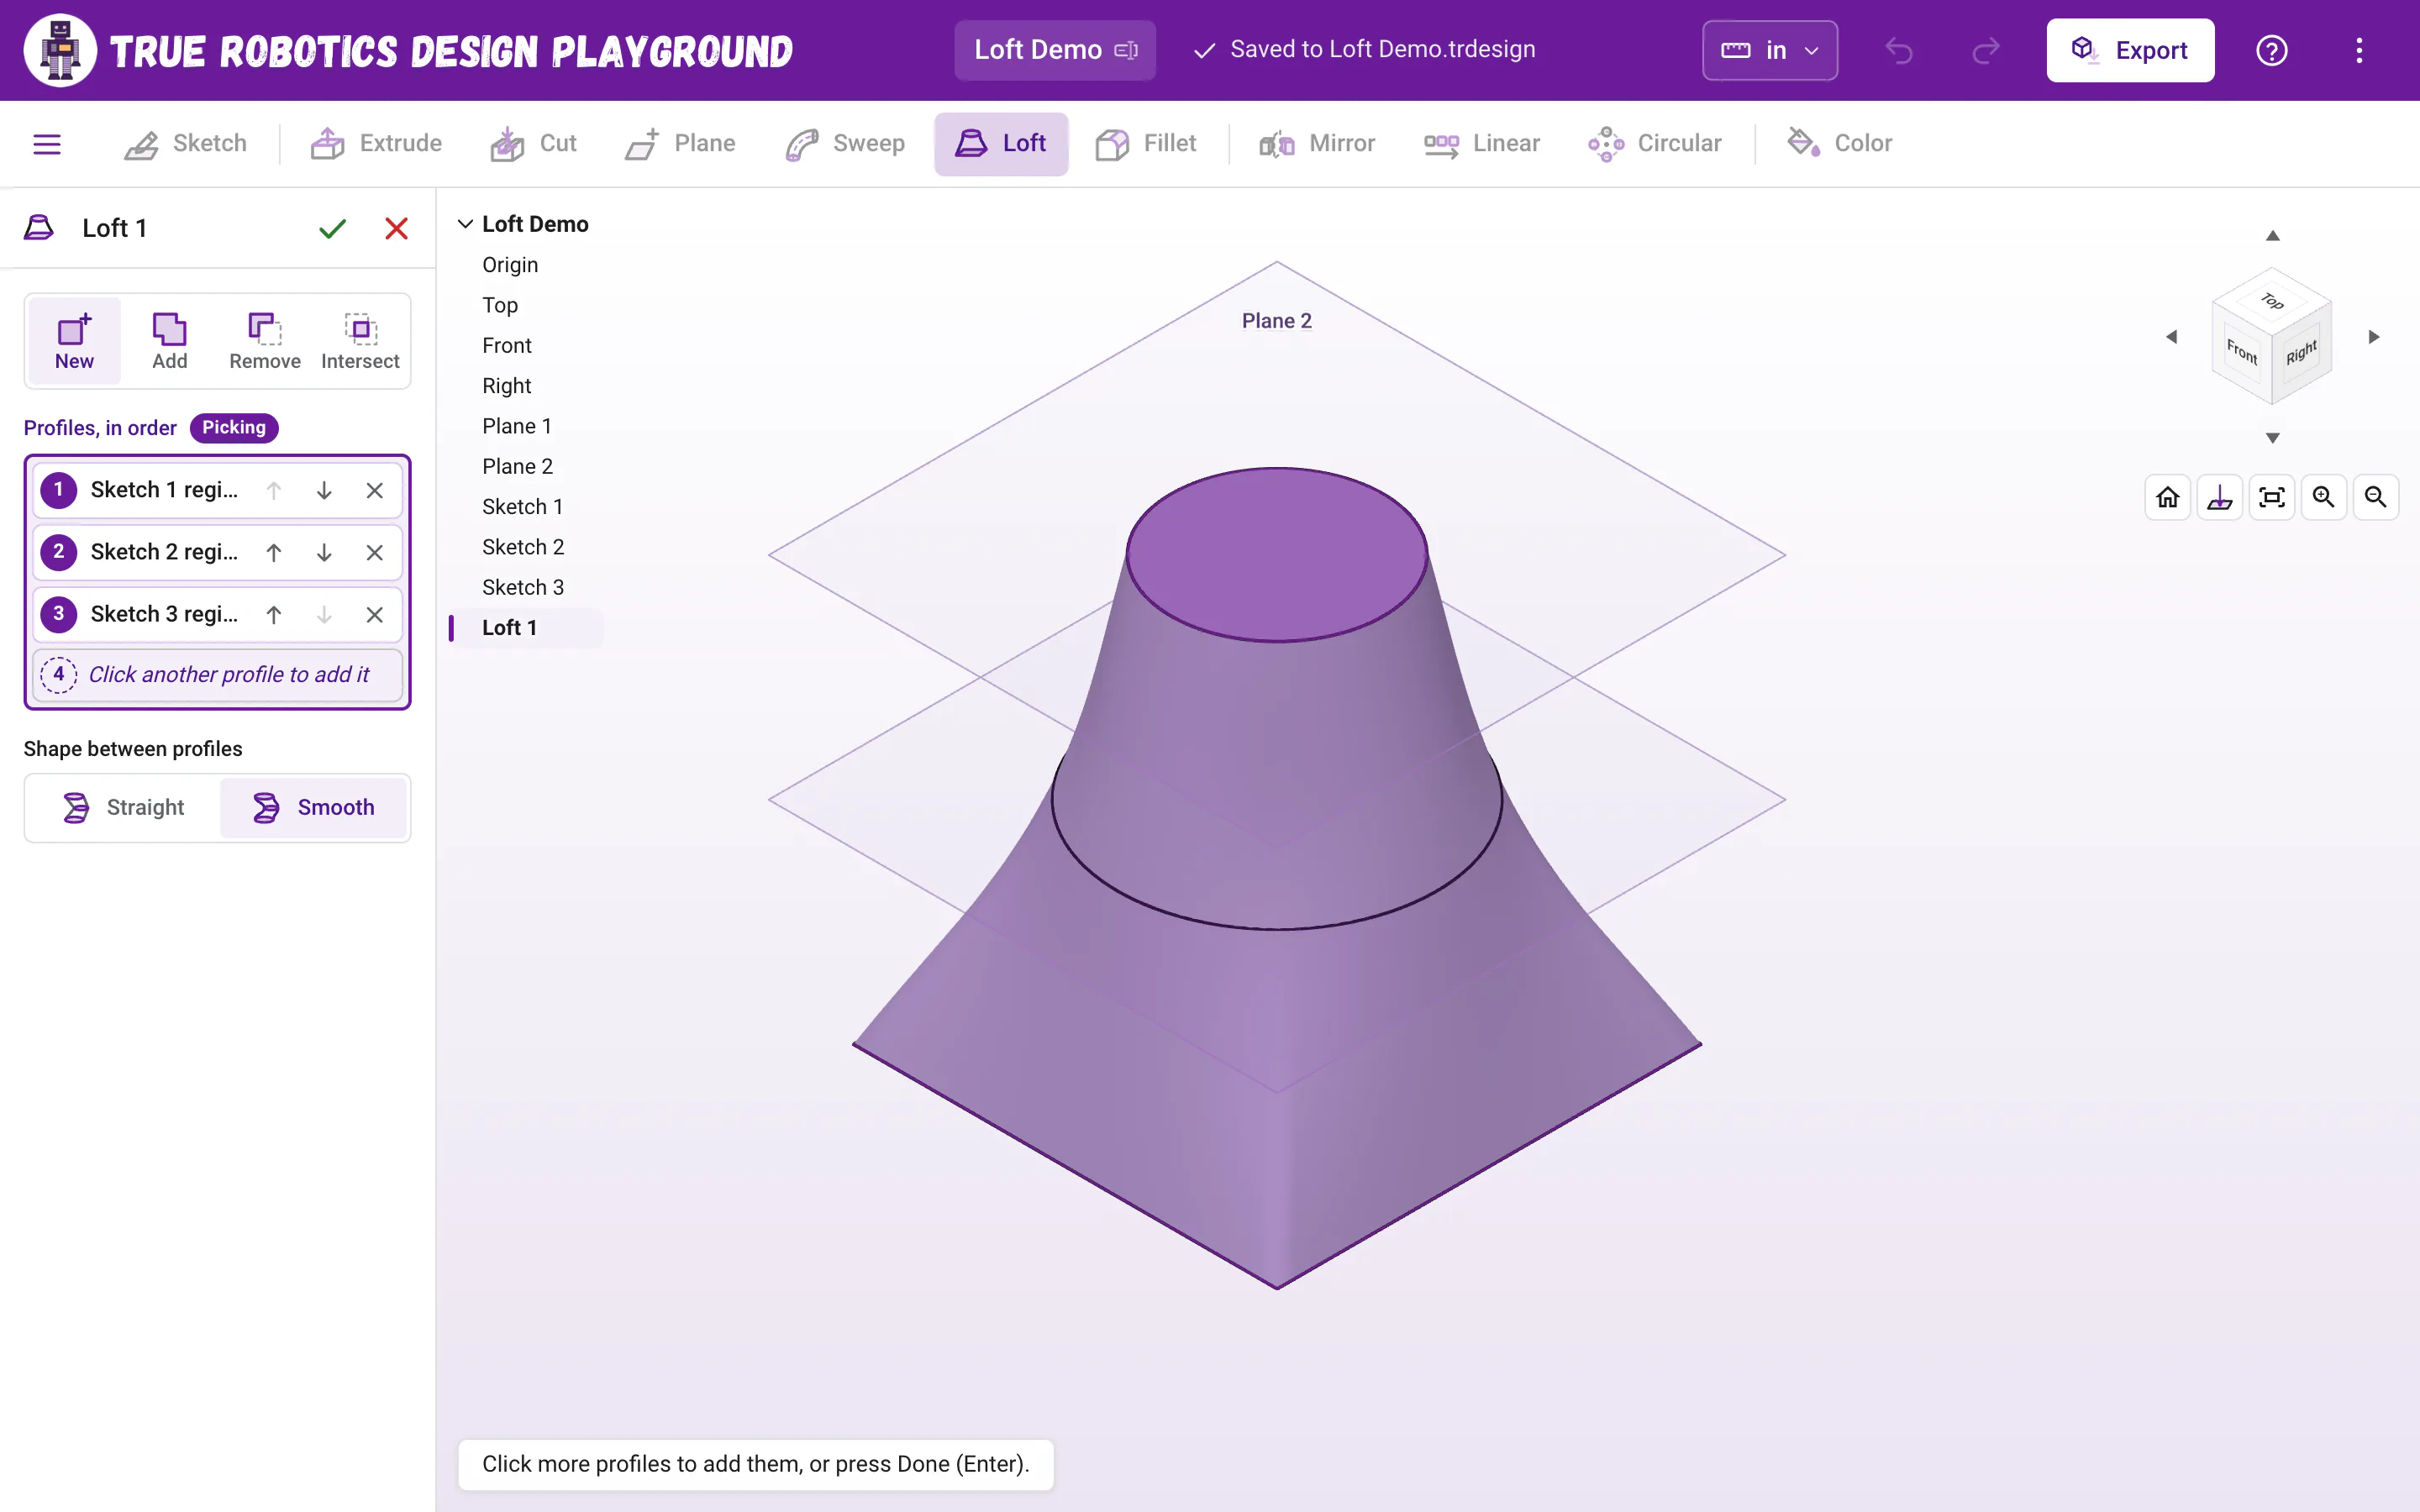
| Shape | What it makes | Use it for |
|---|---|---|
| Straight | Straight sides from one profile to the next, with a crease at each middle profile. | Cones, funnels, pyramids and anything with flat sides. |
| Smooth | One smooth curve through every profile, with no creases. | Nose cones, bottle necks and flowing shapes. It needs three or more profiles to curve. |
What makes a good profile?#
- One closed region with no holes, or one flat face of a part. Hollow parts come from a second loft set to Remove, as in the funnel tutorial.
- At least two profiles, each on its own plane, stacked one after another and facing the same way.
- Different shapes work fine together: a square can loft into a circle, and a circle into a hexagon.
- Keep the planes apart. Profiles that touch or cross each other cannot be joined.
What do New, Add, Remove and Intersect do in a loft?#
The same as in Extrude. The first solid in a project starts as New, and later lofts start as Add, which joins the parts they touch. Remove carves the lofted shape out of your parts, which is how you hollow out a funnel or a cup, and Intersect keeps only the overlap.
How do I change a loft later?#
Double-click it in the feature tree to change its profiles, their order, the shape or the operation. To change the height, edit the plane a profile sits on instead: make Plane 1 three inches up, and the loft stretches to follow.
What do the loft messages mean?#
| Message | What to do |
|---|---|
| Pick at least two profiles to loft between. | Click another profile in the view or the tree. |
| Loft works with shapes that have no holes for now. | Pick a region without a hole, then hollow the part with a second loft set to Remove. |
| Each profile needs to face the next one for the loft to join them. Try profiles on planes stacked one after another. | Two profiles sit side by side or on the same plane. Sketch them on stacked planes. |
| Two of these profiles cross each other, so the loft cannot join them. Space them farther apart. | Check the order of the list first, then space the planes farther apart. |
| One of these profiles crosses itself. Pick a simple closed region instead. | Redraw that shape so its sides never cross. |
| One of these profiles has no area. Pick closed regions or flat faces. | A profile is not a closed shape. Close it up in its sketch. |
| The smooth loft folds back on itself here. Try Straight, or space the profiles more evenly. | Switch to Straight, or move the planes so the profiles are evenly spaced. |
| One of this loft's profiles no longer exists. Edit the loft and pick it again. | A profile was changed or deleted. Double-click the loft and pick it again. |
| This cut didn't touch any part. | A Remove loft missed every part. Check that its profiles sit inside the part. |
Loft turns a few simple sketches into shapes that look amazing. Build one yourself in the funnel tutorial!
Questions and answers#
How many profiles can a loft have?
Two or more. Two profiles make a simple transition, and three or more let Smooth bend the sides into a flowing curve.
Can a loft go from a square to a circle?
Yes. Any closed shapes without holes can loft into each other, as long as each sits on its own plane, stacked one after another.
How do I make a hollow loft?
Loft the outside first. Then sketch slightly smaller profiles on the same planes and loft between them with Remove, which carves out the inside.