
Building parts
Extrude and Cut Sketches into 3D Parts
Extrude in the True Robotics Design Playground pulls closed sketch regions or flat faces straight out into 3D. Press Extrude, pick the regions, choose New, Add, Remove or Intersect, set the end type and type a depth or drag the arrow. Cut is the same dialog, already set to Remove and Through all, for holes and slots in a single click.
How do I extrude a sketch?#
Finish your sketch with Enter. Its closed regions come already picked.
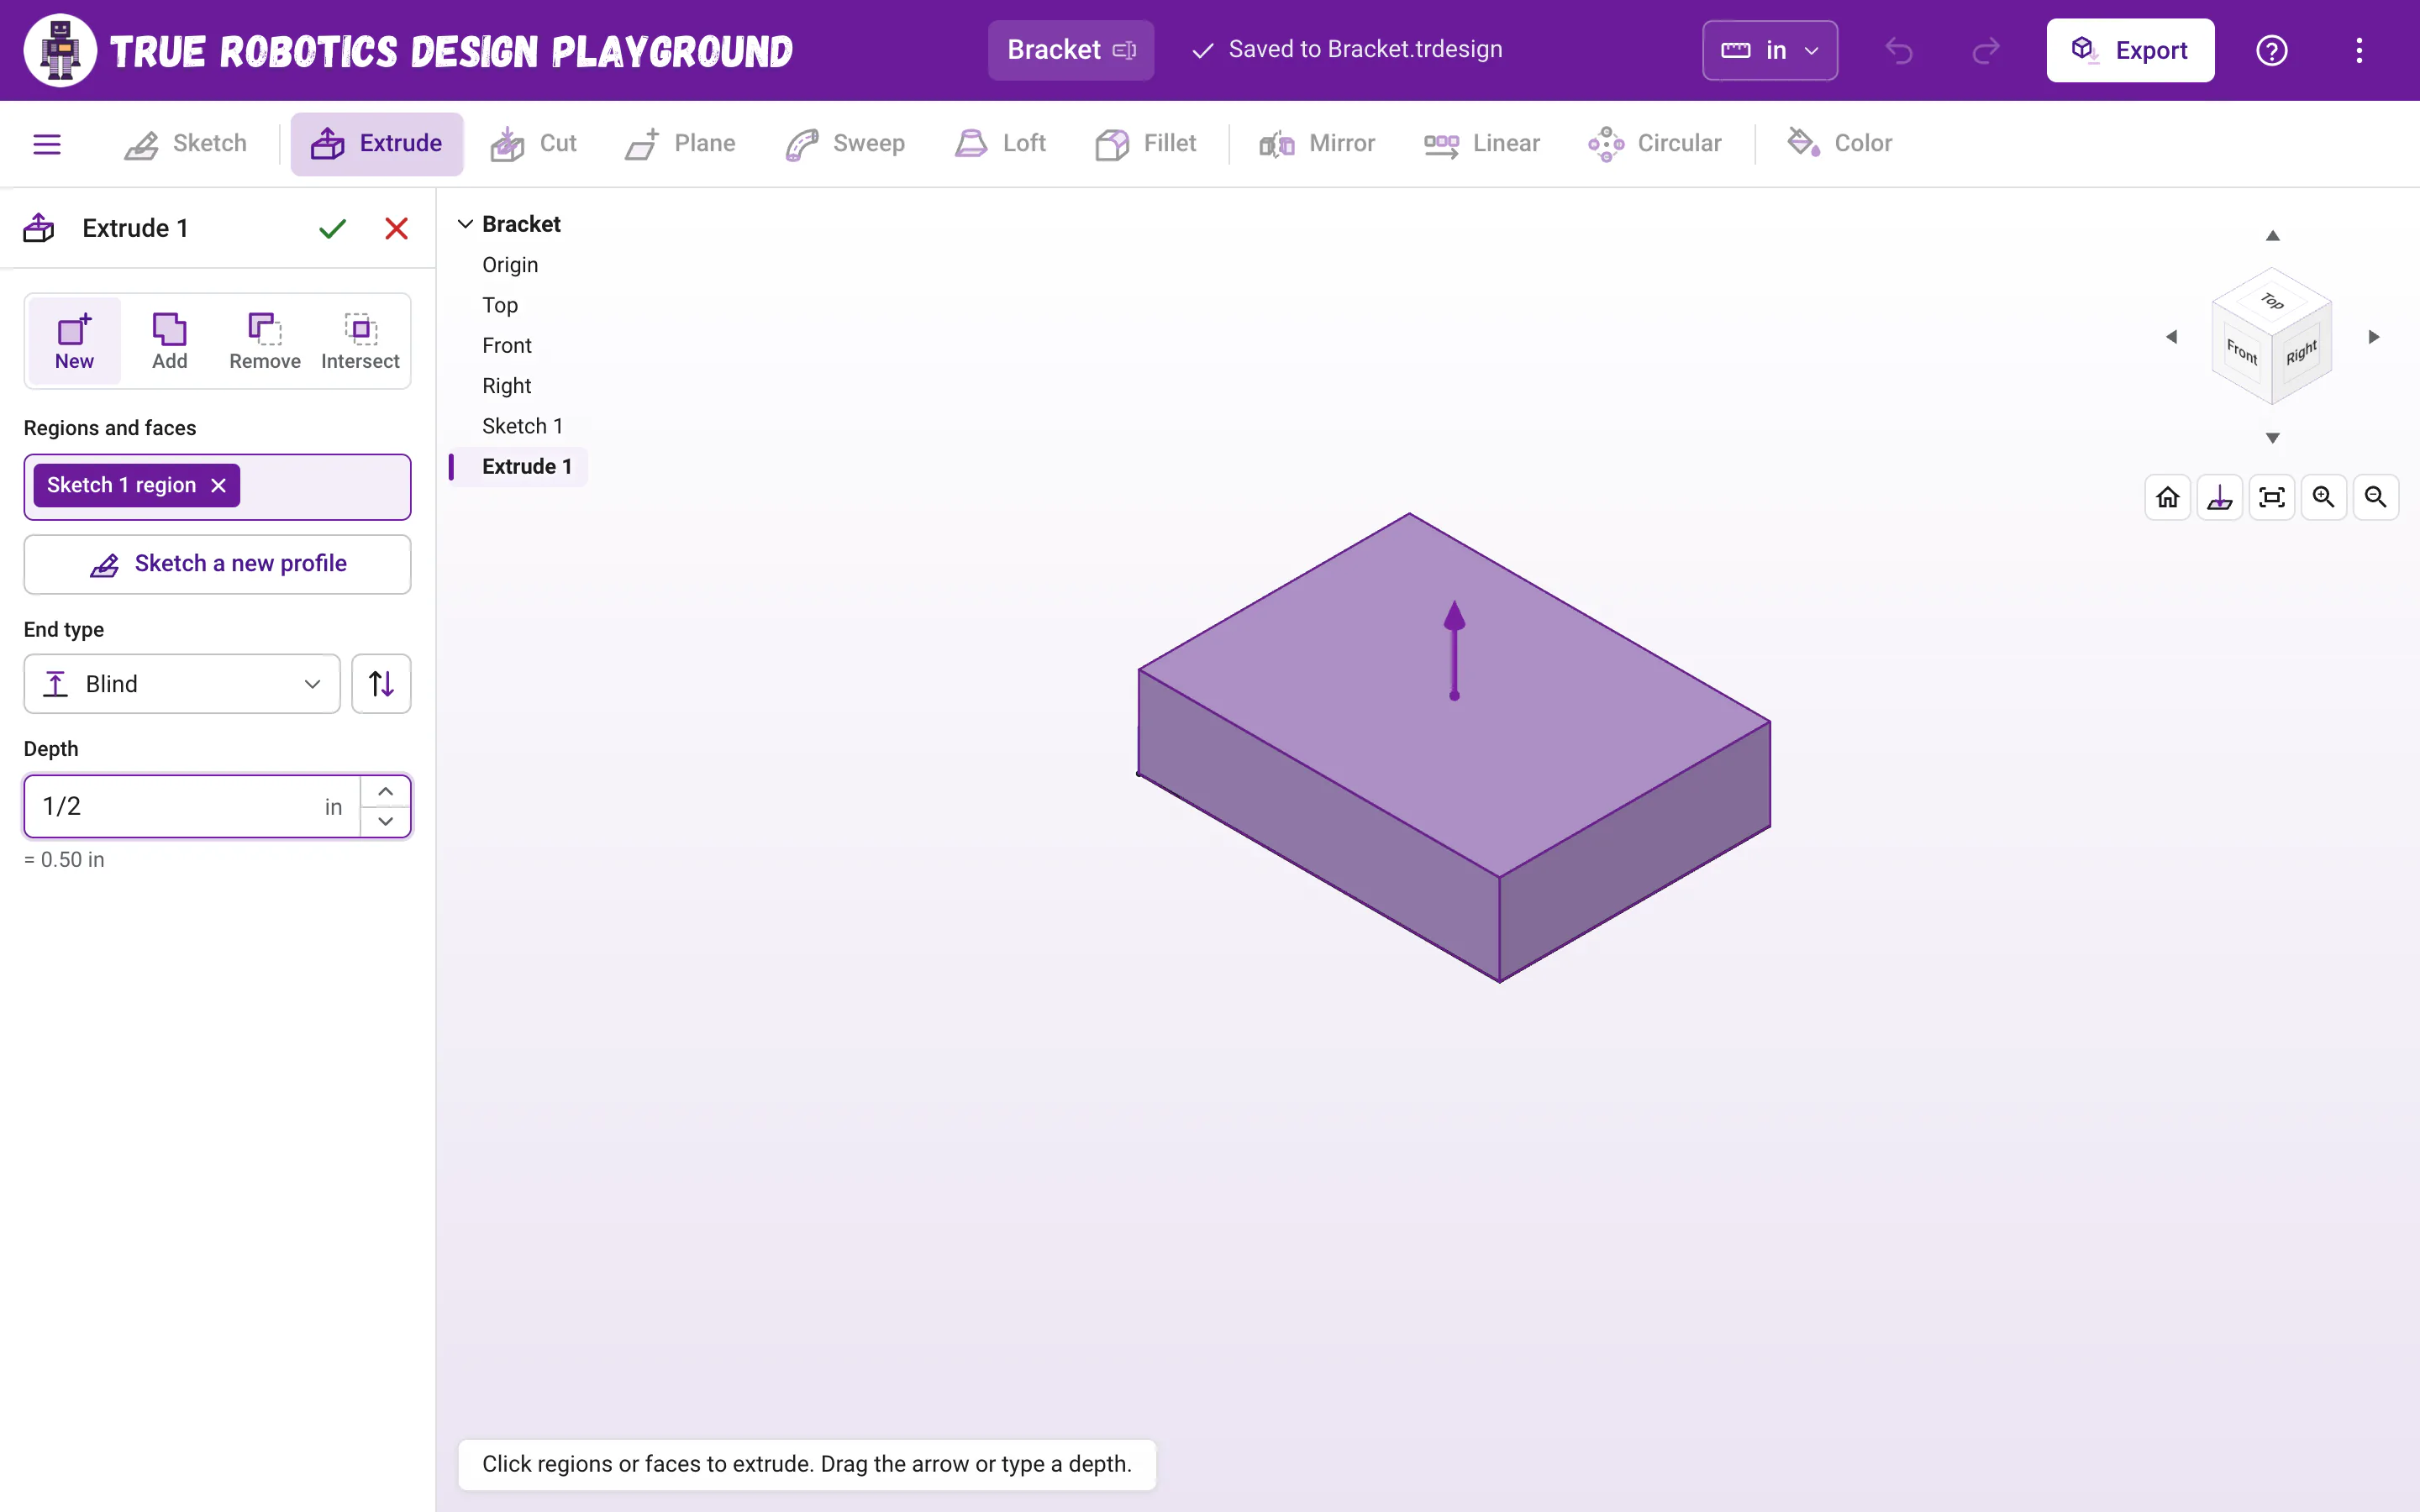
Click Extrude in the toolbar, or press Shift+E. The Extrude panel opens on the left with your regions in Regions and faces and the Depth box ready for typing.
Type a depth. The purple preview grows as you type. You can drag the arrow, or click the little up and down arrows next to the box, instead.
Press Enter or click the green check. Extrude 1 joins the feature list, and the sketch hides itself and tucks in under it.
The depth starts at one of your units: 1 in, or 1 cm in a centimeter project (an older millimeter project starts at 10 mm). Type fractions and math right in, like 1/2 or 3/8 + 1/16, and the line under the box shows the result, like = 0.50 in. The arrows step the depth 1 in (or 1 cm) at a time, and so do Up and Down while you type in the box. The first extrude in a project starts as New, and later ones start as Add.
Tip: Where did the feature list go?
While Extrude is open, it fills the panel on the left, and the feature list moves into the top left corner of the 3D view as a short list of names. You can still click those rows to pick sketches and faces. Click My Part (your project name) at the top of that list to fold it away. When you finish, the list goes back into the panel. On a phone, the Extrude panel docks along the bottom of the screen instead, and the Tree button opens the list.
What do New, Add, Remove and Intersect do?#
| Operation | What it does | Preview color |
|---|---|---|
| New | Makes a new part, even if it touches other parts. | Purple |
| Add | Adds material and joins it to the parts it touches. If it touches nothing, it becomes a new part. | Purple |
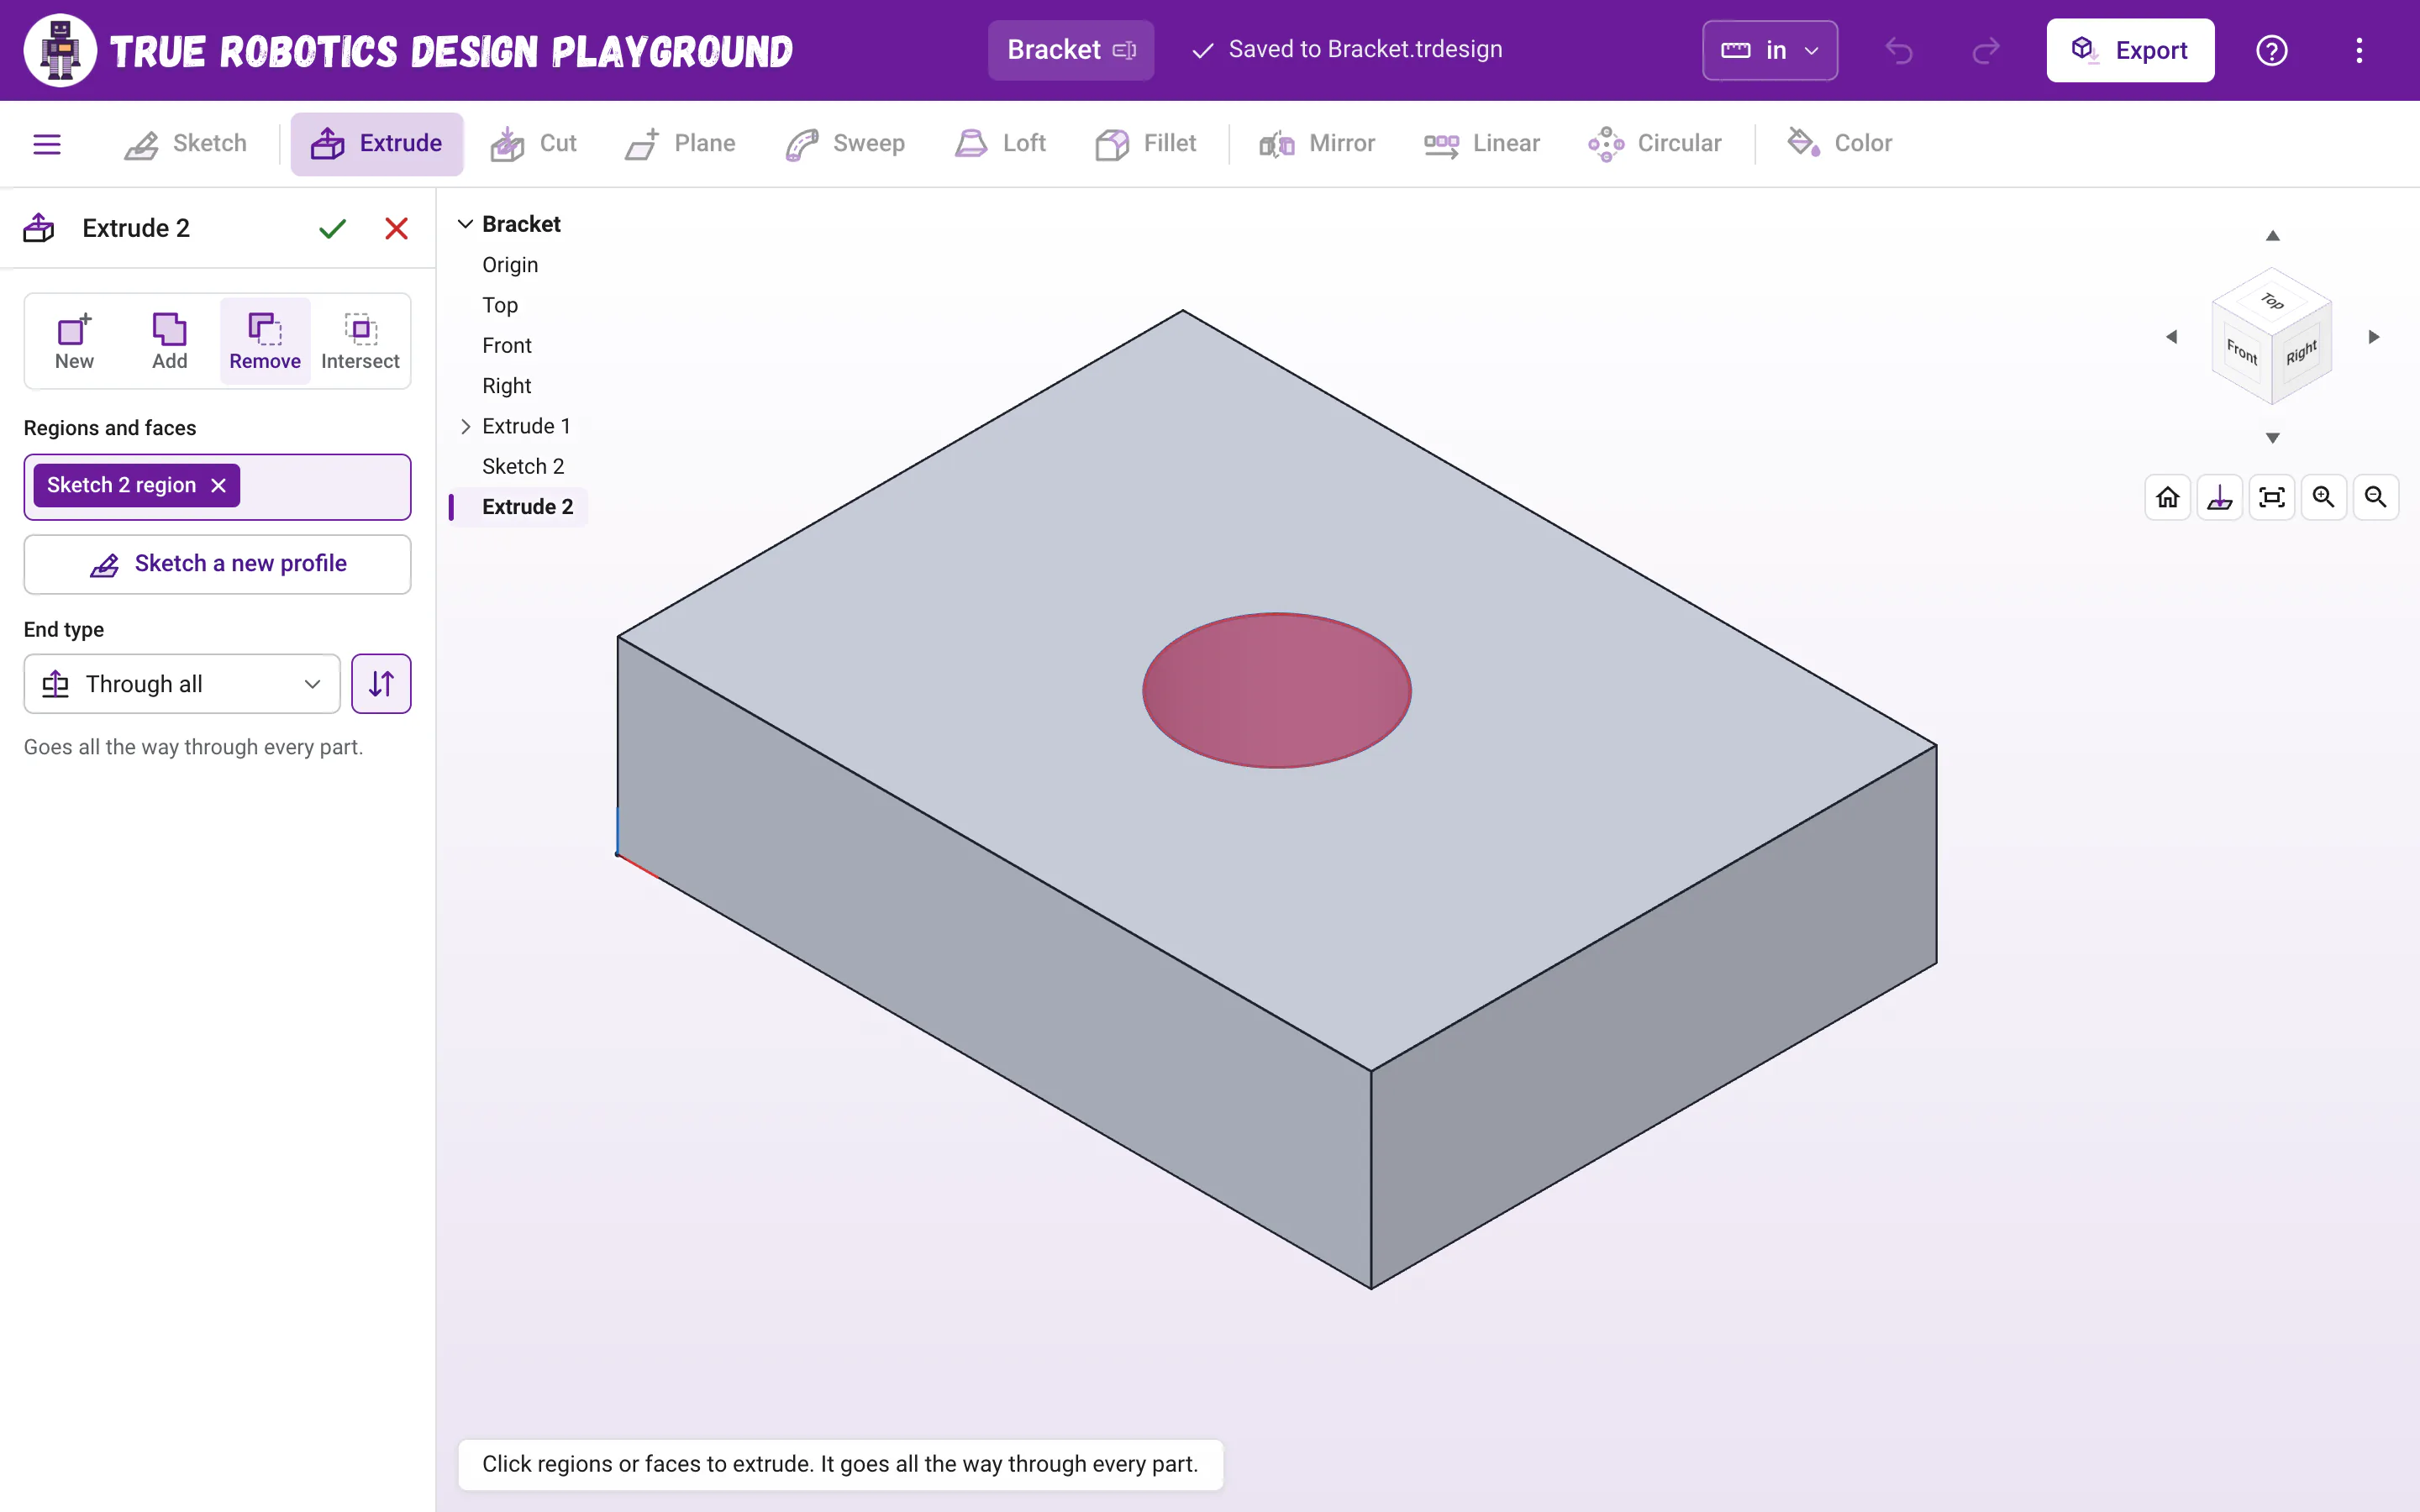
| Remove | Cuts material away from every part it passes through. A cut that splits a part leaves two parts. | Red |
| Intersect | Keeps only the material where the extrude and your parts overlap. | Orange |
What are Blind, Symmetric and Through all?#
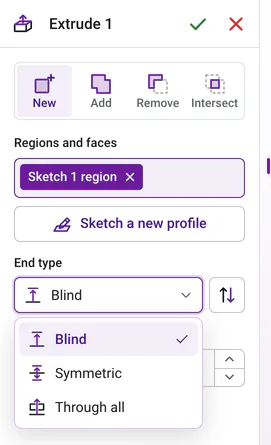
| End type | How far it goes | Use it for |
|---|---|---|
| Blind | Exactly the depth you type, in one direction. | Most plates and blocks. |
| Symmetric | The depth you type, split evenly on both sides of the sketch. | Parts centered on a plane. |
| Through all | All the way through every part. There is no depth to type. | Holes and slots that must go all the way through. |
How do I flip the direction?#
Click the Flip direction button next to the end type, and the extrude goes the other way. With Symmetric there is nothing to flip, so the button turns off. A Remove or Intersect from a sketch on a part's face already points into the part, so cuts go the right way on their own.
How do I use the arrow?#
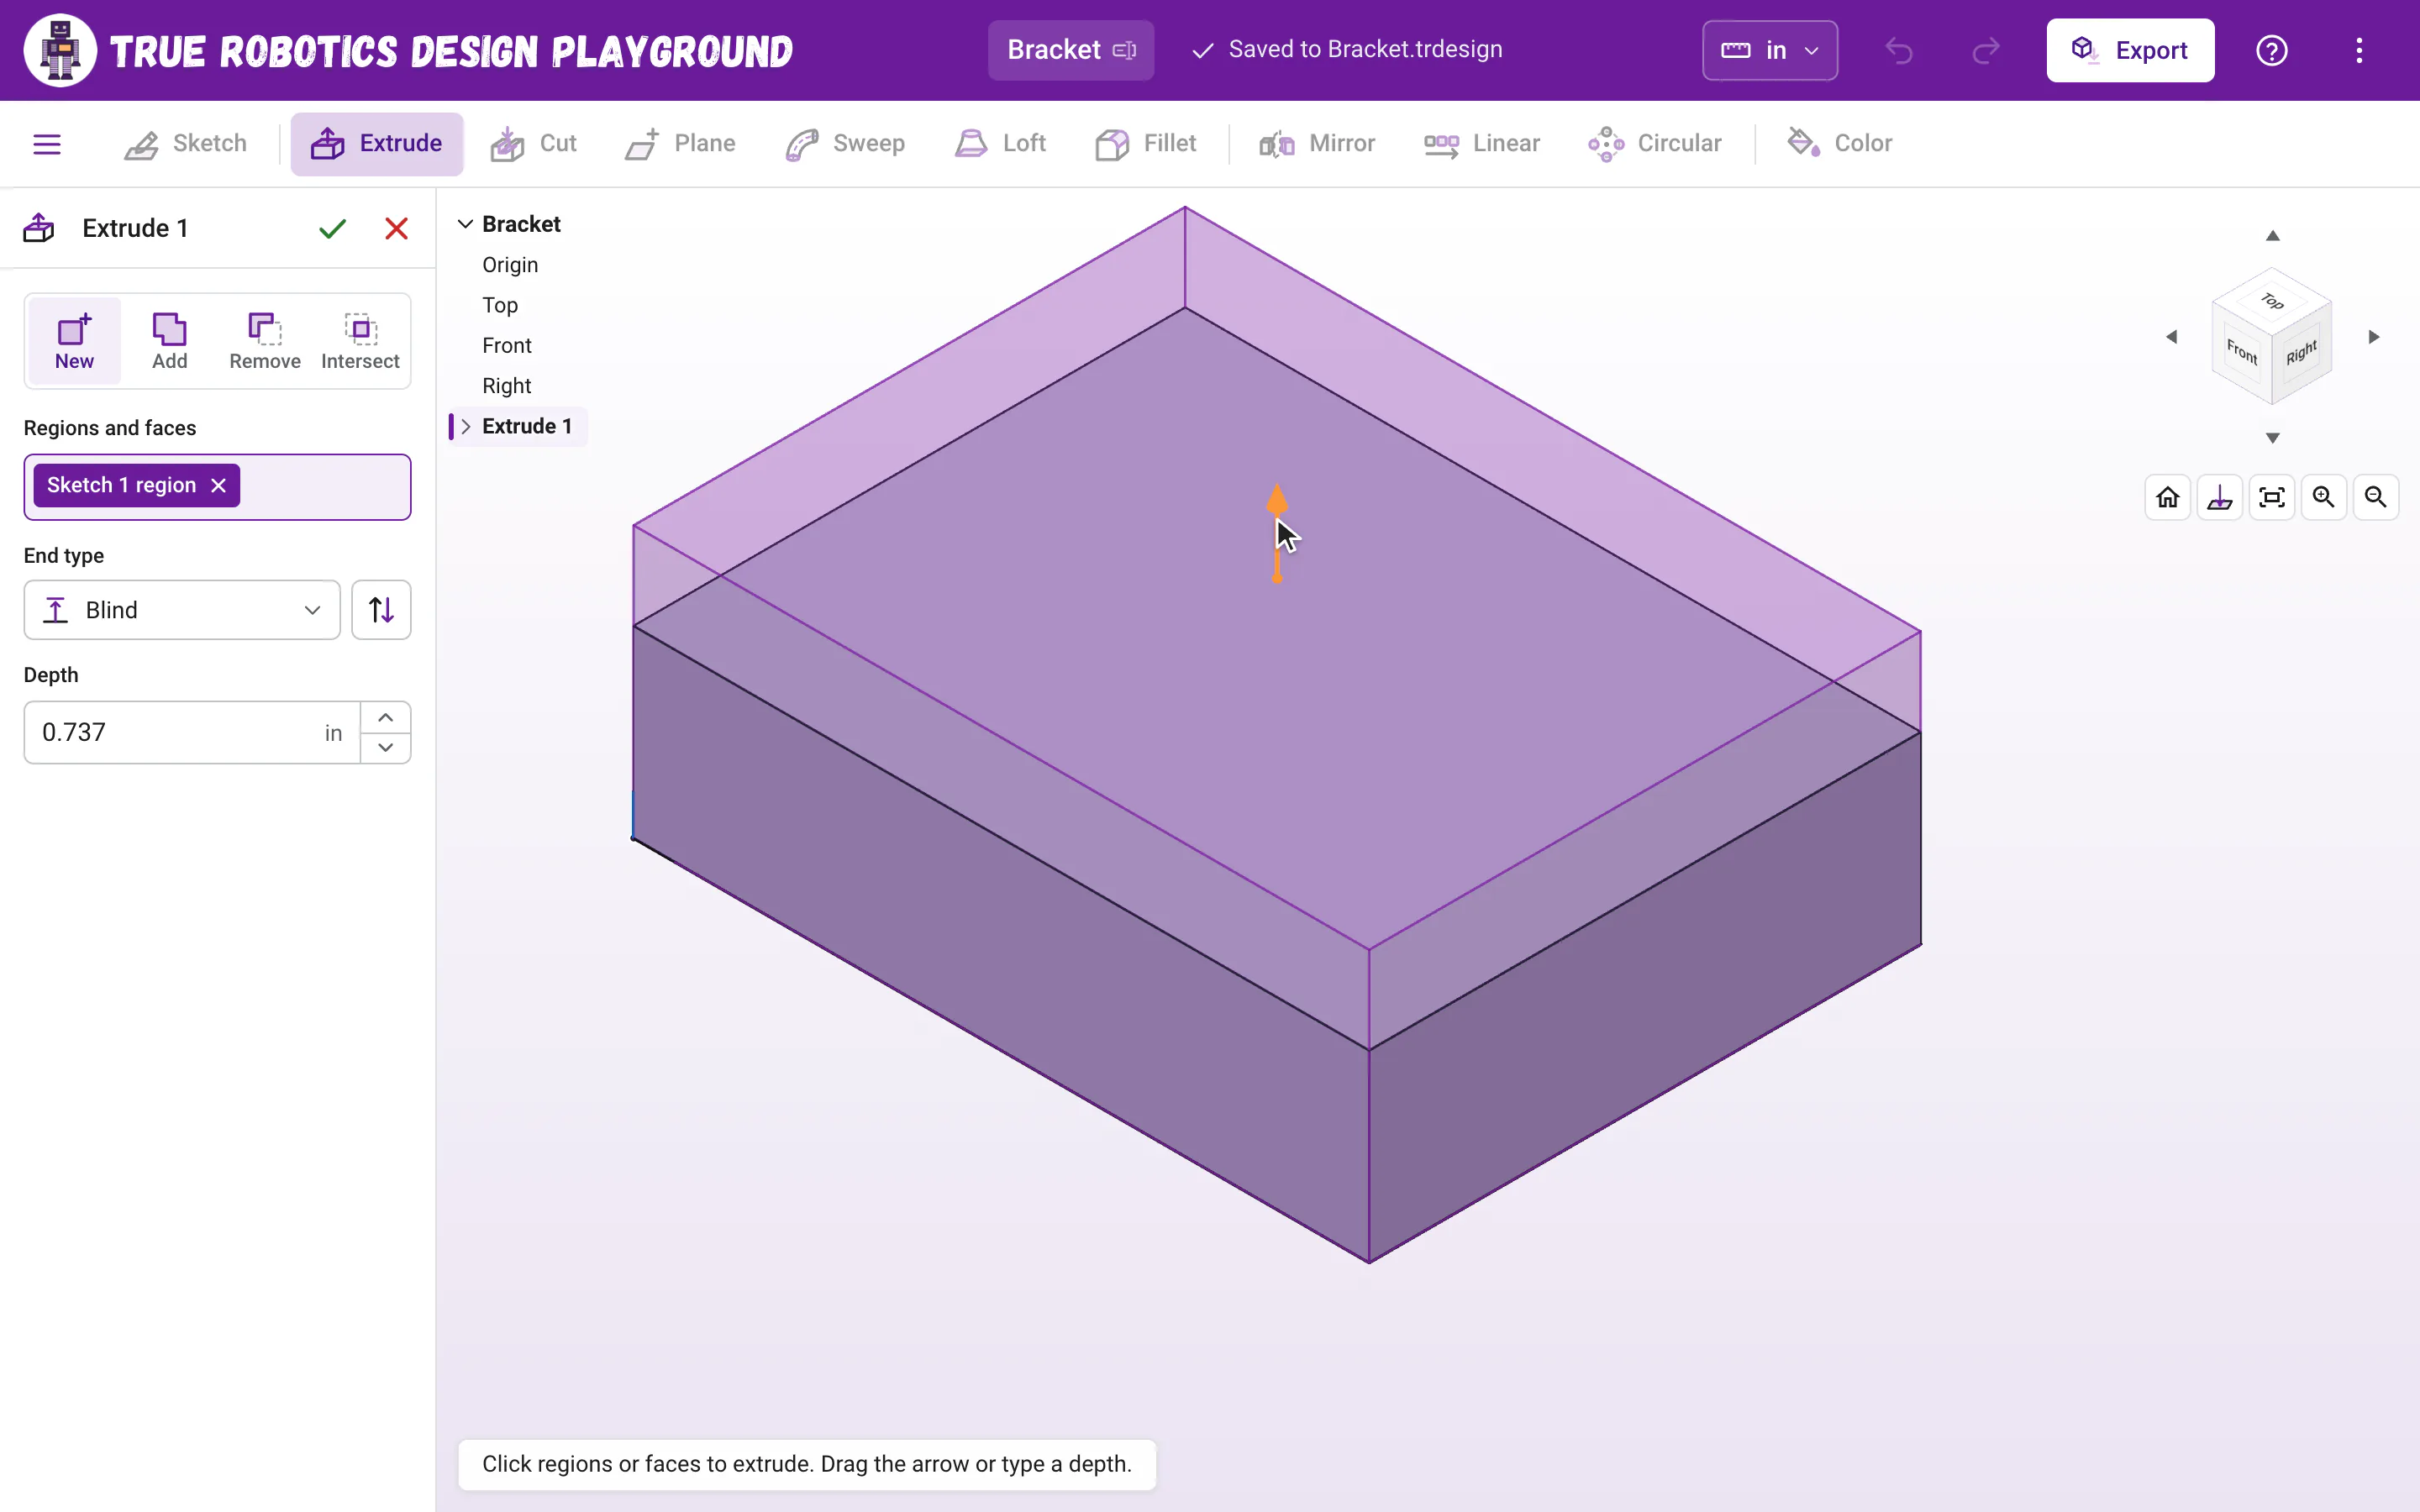
A purple arrow sits on your sketch while the dialog is open. Drag it to change the depth, and the Depth box follows. Drag it back past the sketch and the extrude flips to the other side.
How do I pick regions and faces?#
- While the dialog is open, click a region or a flat face in the view to add it, and click it again to take it back out.
- Each pick shows as a chip in Regions and faces, like
Sketch 1 regionorTop face of Extrude 1. Click the X on a chip to remove it. - Click a sketch in the feature list to add its regions at once. This works for hidden sketches too, so you can reuse a sketch you already extruded. A sketch that a feature already uses sits under that feature, so click the little arrow next to the feature to find it.
Can I extrude a face of a part?#
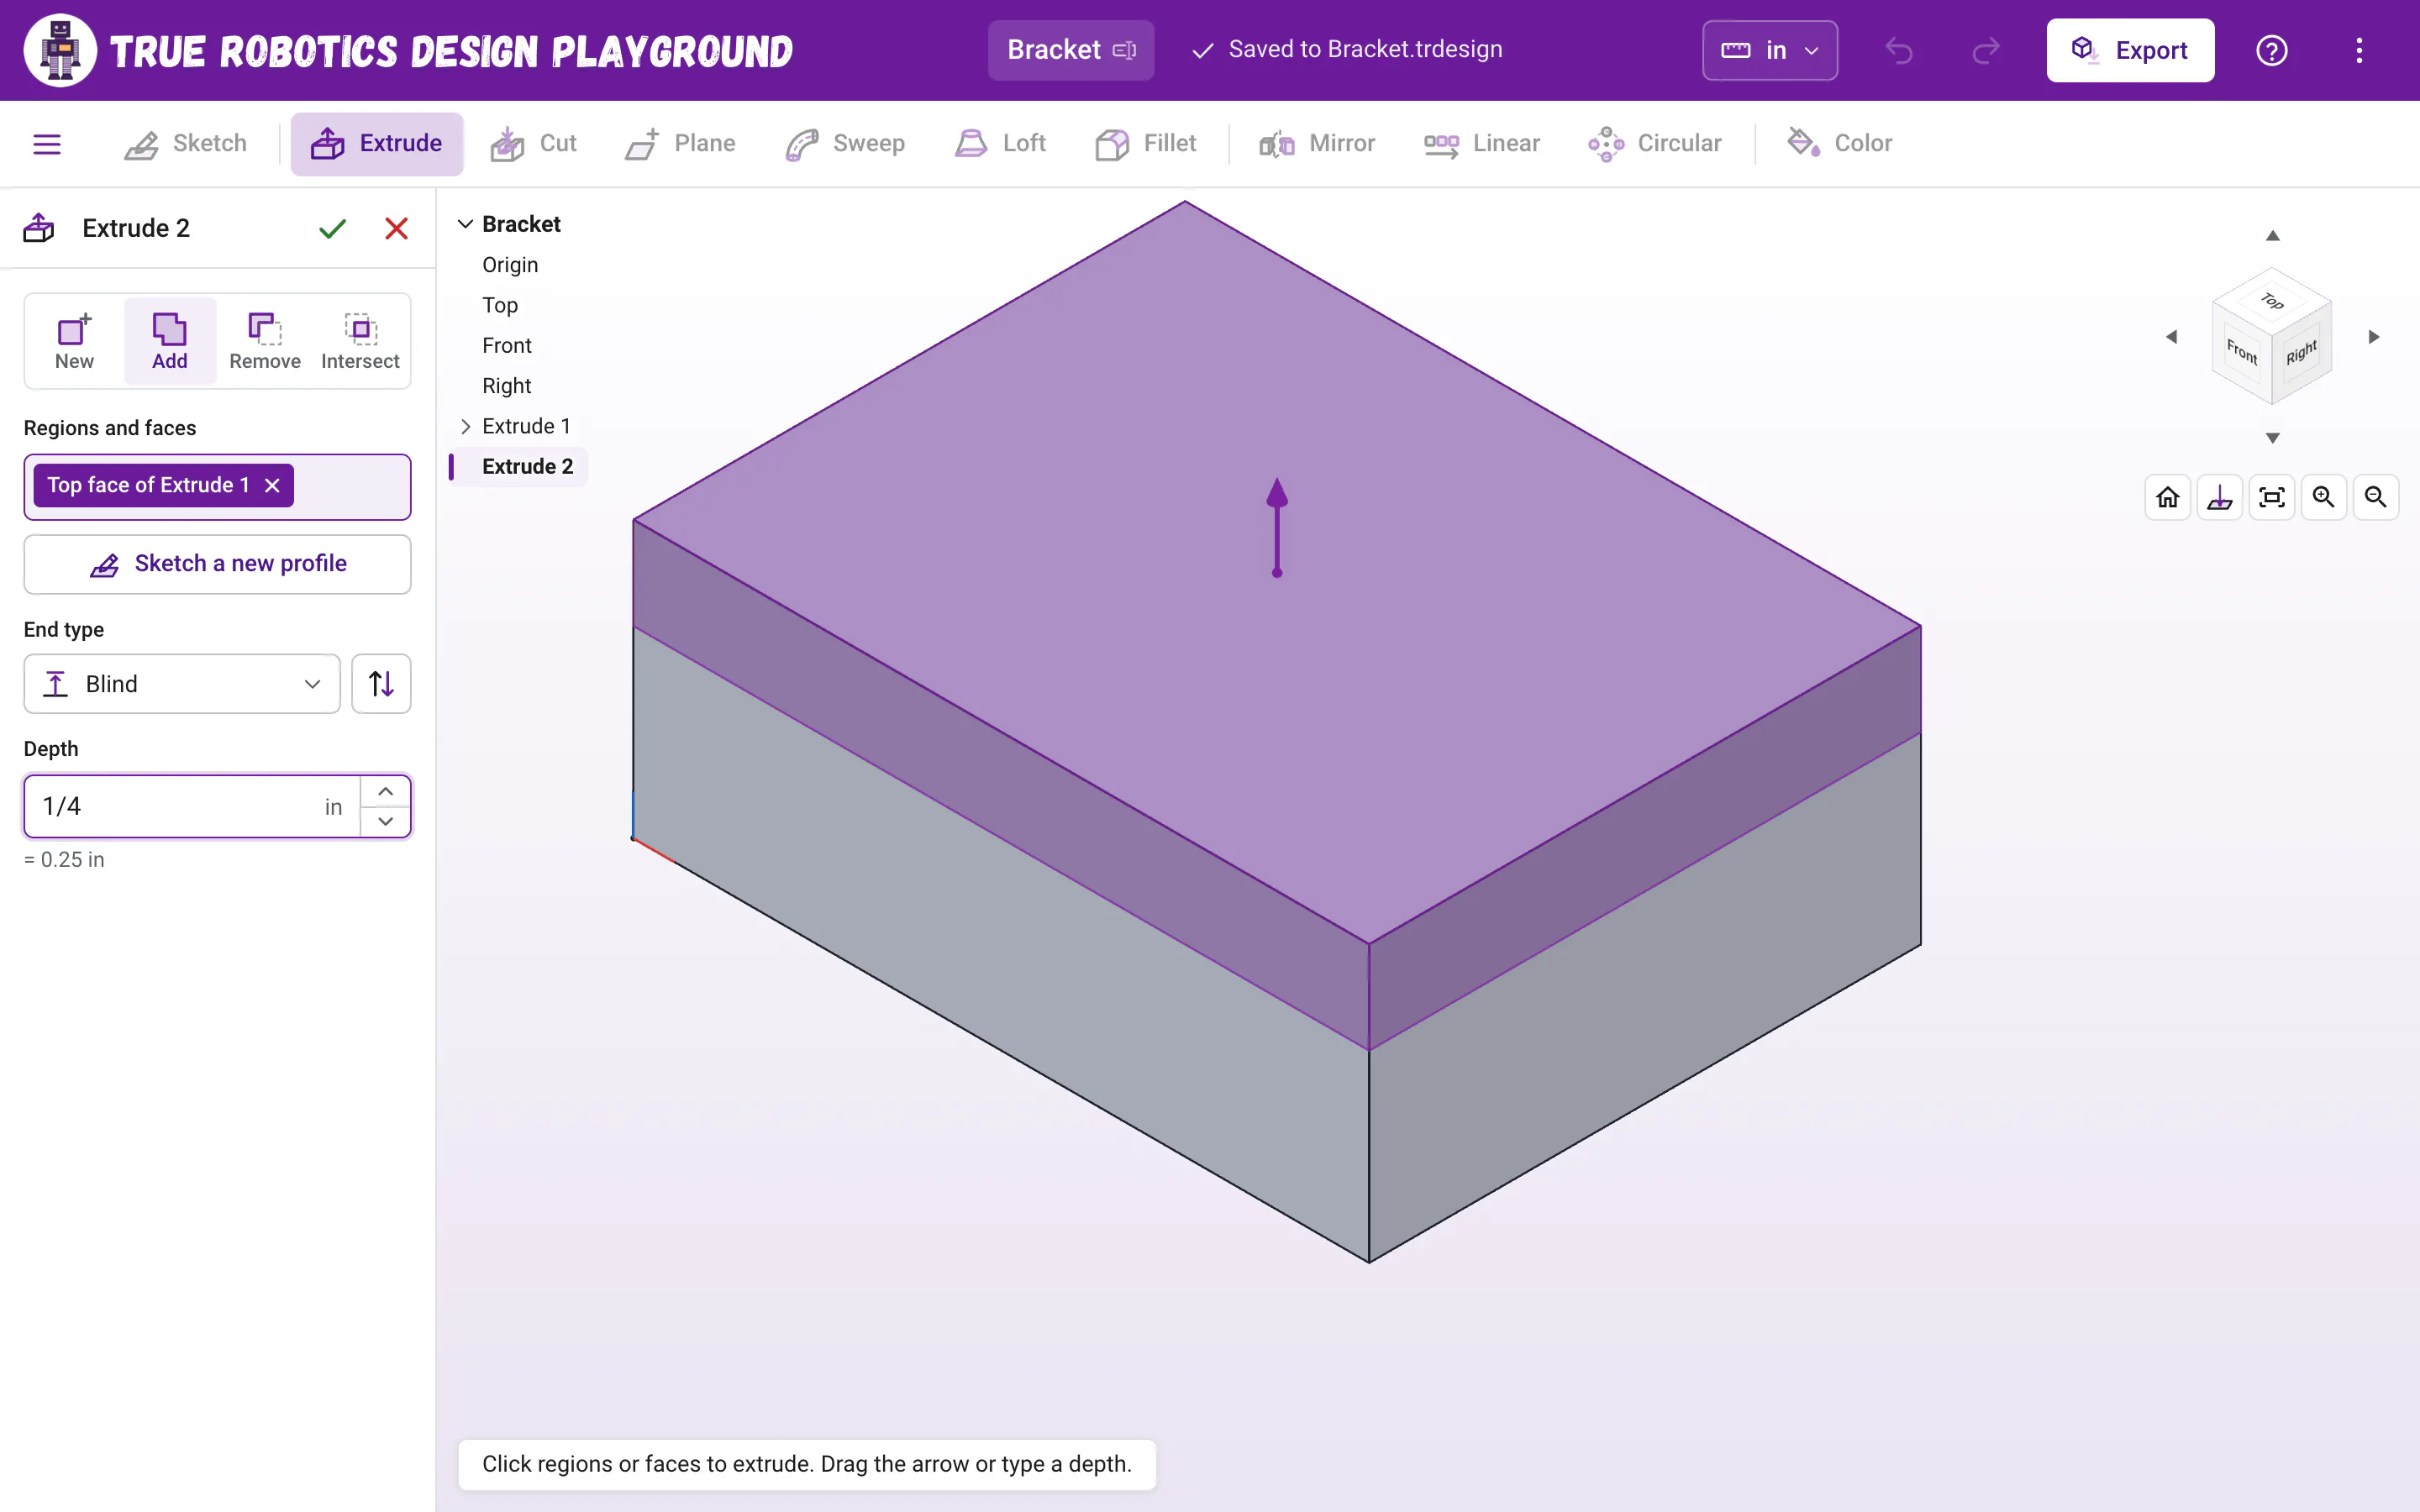
Yes. Click a flat face so it turns purple, then press Extrude. The face becomes the profile. Add pulls the face outward to make the part bigger, and Remove pushes it in. It is a quick way to make a block taller without a new sketch.
What is the Extrude-first workflow?#
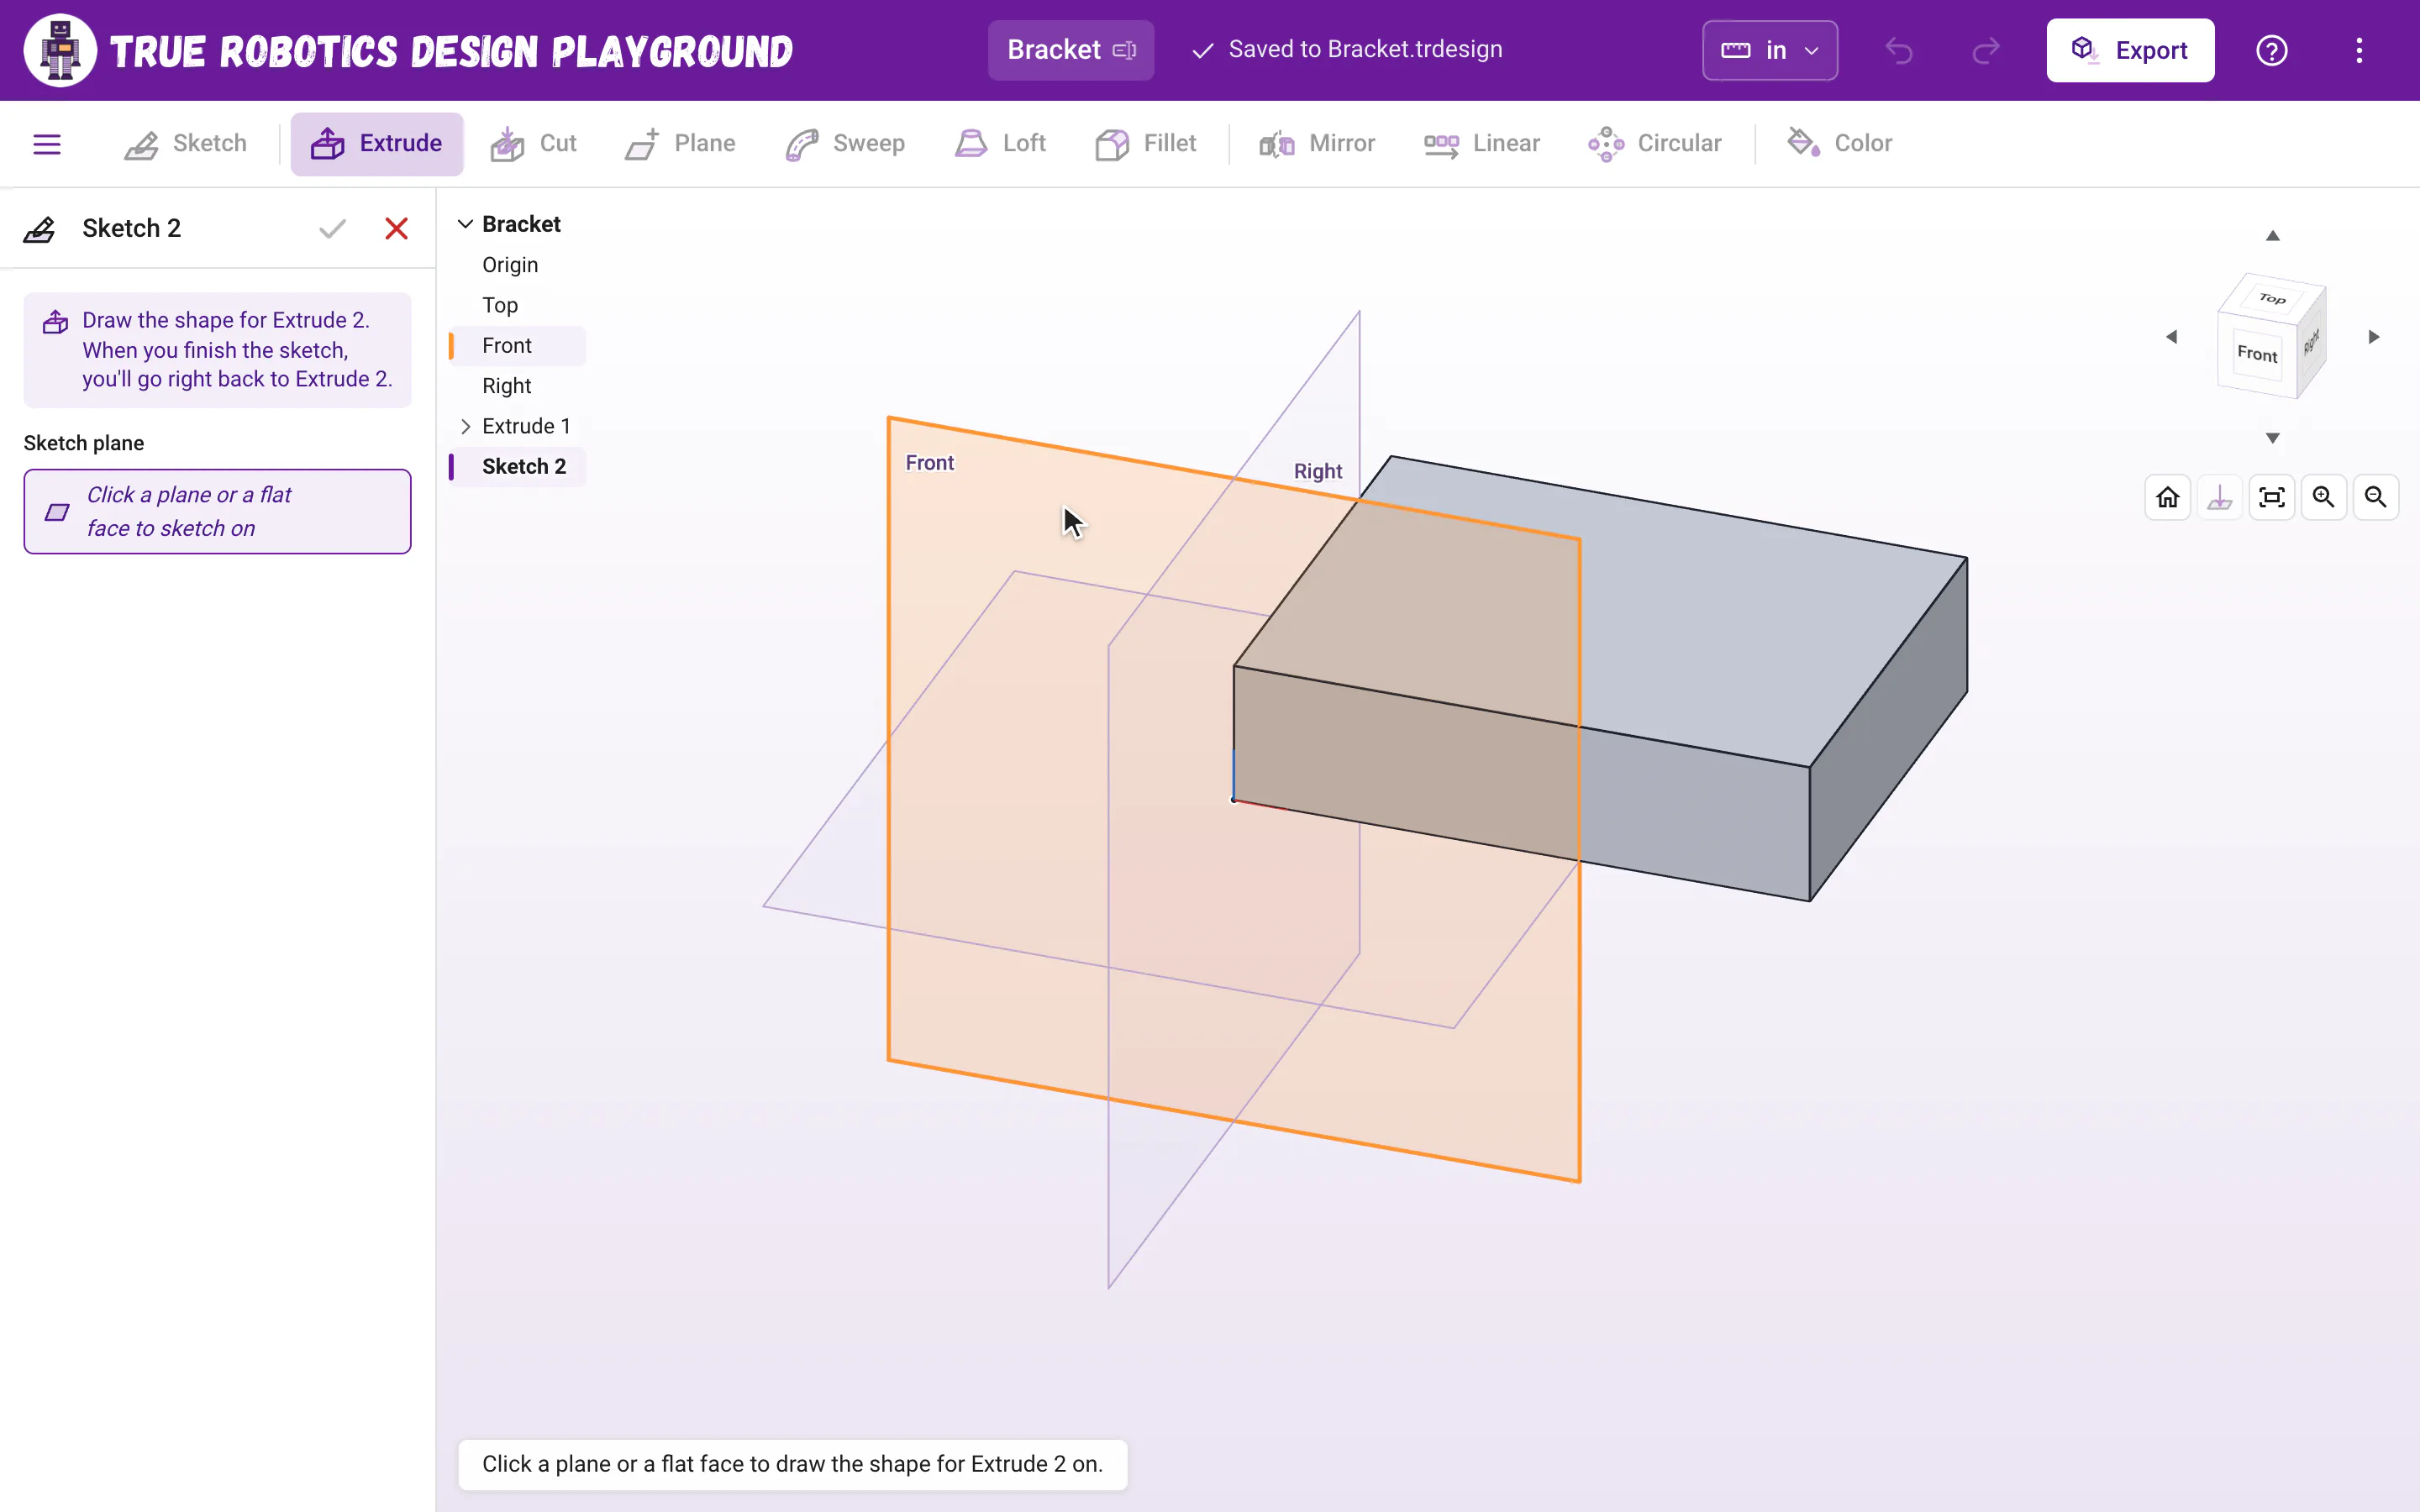
You can start with Extrude and sketch on the way. Press Extrude with nothing to extrude, and the app goes straight to Click a plane or a flat face to sketch on. The Top, Front and Right planes appear for the pick, even if they are hidden. Click one, or a flat face, and the view turns to look straight at it while the planes hide again. Draw your shape and press Enter. You land right back in Extrude with your new region picked and the depth ready to type.
Read what happens in this video
With nothing to extrude, pressing Extrude asks for a plane, so we click the Front plane. We draw a circle and type a 3/4 inch diameter, then press Enter to finish the sketch. The Extrude dialog comes right back with the new region picked and the depth ready, so we type 1/4 and press Enter.
The steps in the video:
- Click Extrude with nothing picked. It asks for a plane to sketch on.
- Click the Front plane beside the block.
- Press C, click to place the center, type 3/4 and press Enter.
- Press Enter to finish the sketch. Extrude comes right back.
- Type 1/4 for the depth and press Enter.
- Click Home under the view cube and press F to see both parts.
If your project already has sketches with regions you could use, Extrude waits for you to click them instead, and offers a Sketch a new profile button for when you would rather draw something new. If a plane or flat face is selected when you press Extrude, the new sketch starts on it right away.
How do I cut a hole with Cut?#
- CutShortcut: Shift+CAn extrude that starts on Remove and Through all, pointing into the part, ready to cut a hole or a slot.
Click the top face of your part, then press Sketch.
Draw a circle where the hole goes, and press Enter to finish the sketch.
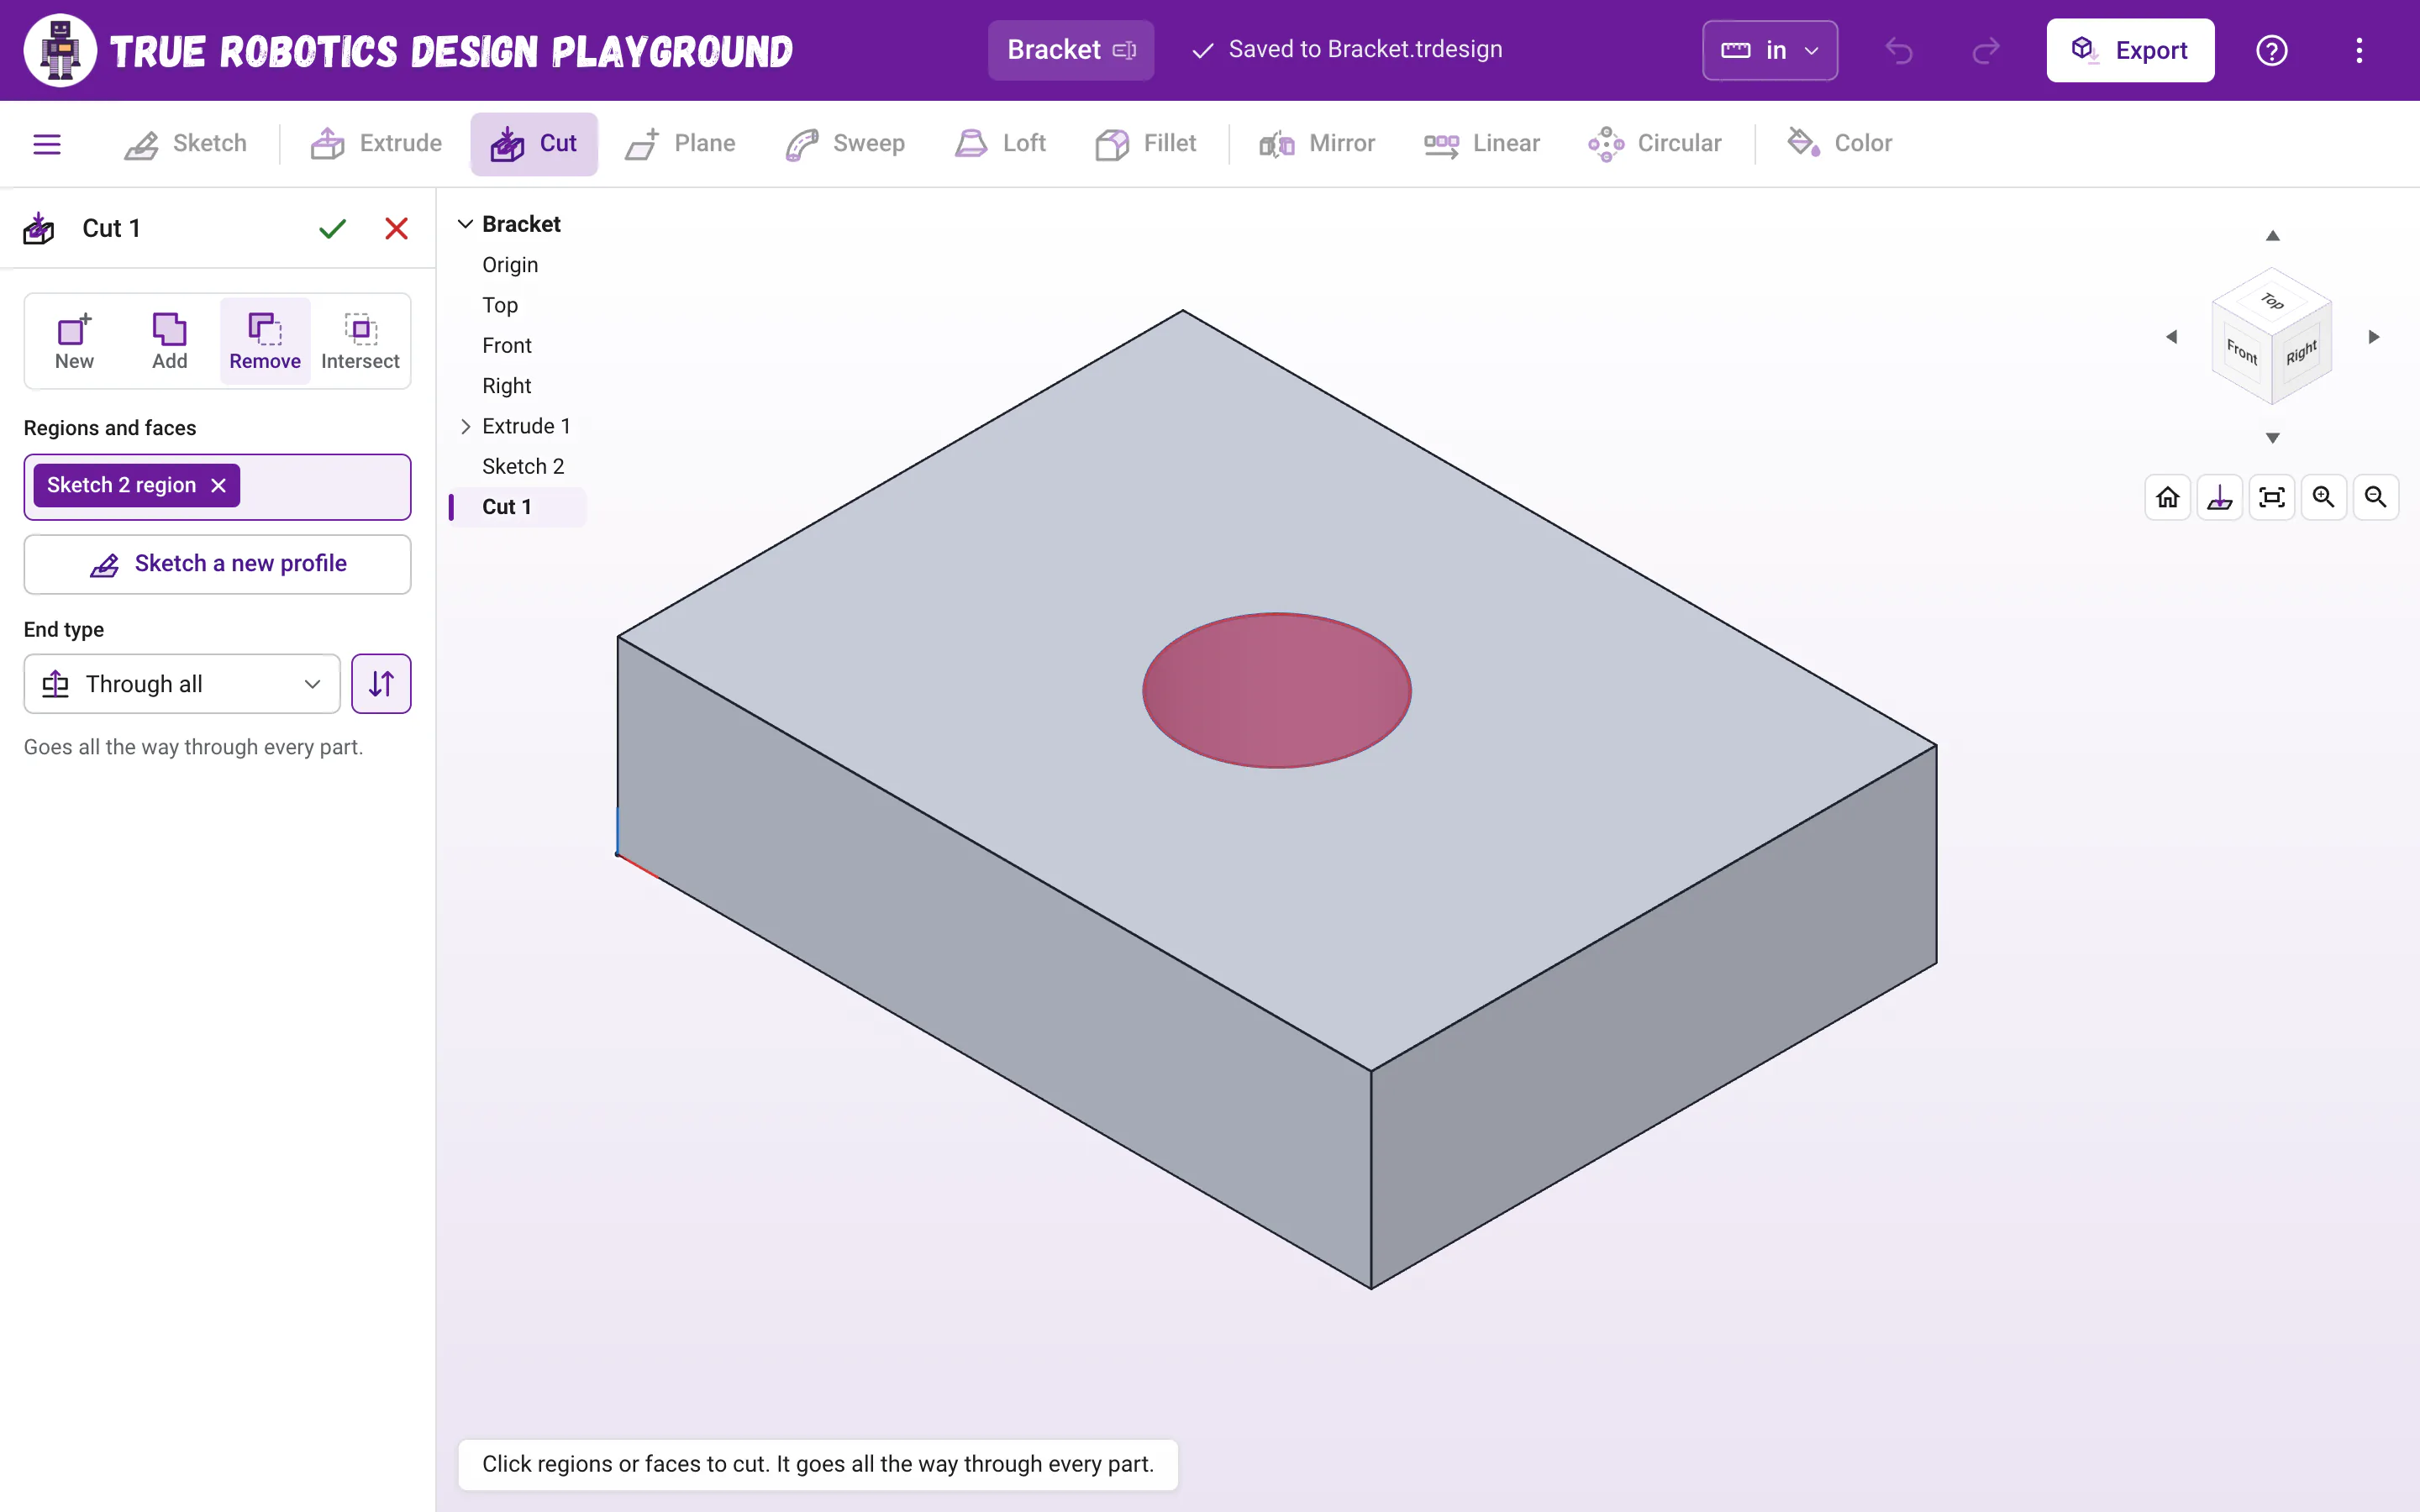
Click Cut in the toolbar, or press Shift+C. The dialog opens as Cut 1, already on Remove and Through all, with your circle picked, and a red preview shows the hole.
Press Enter. The hole goes all the way through.
Read what happens in this video
We click the top face of the block and press Sketch. A 1/2 inch circle marks the hole, and Enter finishes the sketch. Pressing Cut opens Cut 1, already set to Remove and Through all, and the red preview shows the hole. Pressing Enter makes the hole, which goes all the way through.
The steps in the video:
- Click the top face of the block, then click Sketch.
- Press C, click the middle of the face, type 1/2 and press Enter.
- Press Enter again to finish the sketch.
- Click Cut. It is already set to Remove and Through all.
- Press Enter to cut the hole.
- Drag on empty space with the left mouse button to tilt the block and look underneath.
- Want a pocket instead of a hole? Change the end type to Blind and type a depth, like
1/8. - A cut from a sketch on a face already points into the part. If it ever points away, click Flip direction.
- Cut is an Extrude underneath, so you can still switch it to Add, New or Intersect in the same dialog.
- In the feature tree, cuts get their own icon. Any extrude set to Remove shows that icon too, so you can spot every cut at a glance.
- Press Cut with nothing to cut, and it asks for a plane to sketch on first, just like the Extrude-first workflow above.
Good to know: Cutting a whole face
If a flat face is selected when you press Cut, the face itself is cut, all the way through the part. To cut a hole in a face, sketch the hole on the face first, then press Cut.
How do I change an extrude later?#
Double-click the extrude in the feature tree, or double-click a face it made. The panel opens with everything as you left it, including any math you typed. Change what you like and press Enter, and everything after it rebuilds. To change the shape itself, click the arrow next to the extrude and double-click the sketch tucked under it.
What do the extrude messages mean?#
| Message | What it means |
|---|---|
| Pick a region or a face to extrude. | The green check stays off until something is picked. |
| Pick a region or a face to cut. | The same for Cut: click the region or face to cut away. |
| Use a depth bigger than zero, or press the flip button. | Depths are positive. To go the other way, flip instead. |
| This cut didn't touch any part. | The Remove went the wrong way or missed. Try Flip direction. |
| This cut points away from your part, so it used its depth. Try the flip button. | Through all found no part in the direction the cut points. Click Flip direction. |
| There's nothing to go through yet, so this extrude used its depth. | Through all found no part in its direction. Flip it, or check that the part is there. |
| There's no part yet for this extrude to intersect with. | Intersect needs a part to overlap. Use New for your first part. |
| That face is part of this extrude's preview. Pick a face of a part that was already there. | You clicked the preview itself. Click a real part face instead. |
Extrude is where your design becomes real. Keep going with Sketching on faces to build parts up, layer by layer, try Sweep and Loft for curvier shapes, and copy a hole you cut with Mirror, Linear pattern or Circular pattern.
Questions and answers#
What is the difference between Cut and Extrude?
Cut is Extrude with a head start. It opens already set to Remove and Through all and pointing into the part, so a hole takes one click. You can change any of those settings in the same dialog.
Why is the green check gray in the Extrude panel?
Nothing is picked yet, or the depth is not a valid number. Click a region or a flat face in the view, and make sure the Depth box shows a positive size. The hint at the bottom of the view says what is missing.
Why did extruding hide my sketch?
Sketches hide themselves once an extrude uses them, so the view stays tidy, and they tuck in under the extrude in the feature list. Click the arrow next to the extrude to see the sketch, then click its eye to show it again.