
Building parts
Linear Pattern: Repeat Features in a Row
Linear pattern in the True Robotics Design Playground repeats features or whole parts in a straight row, like a line of mounting holes. Press Linear or Shift+R, pick what to copy, click a straight edge, sketch line or axis for the direction, then set Count and Spacing and click the green check. Turn on Second direction for a grid.
How do I make a linear pattern?#
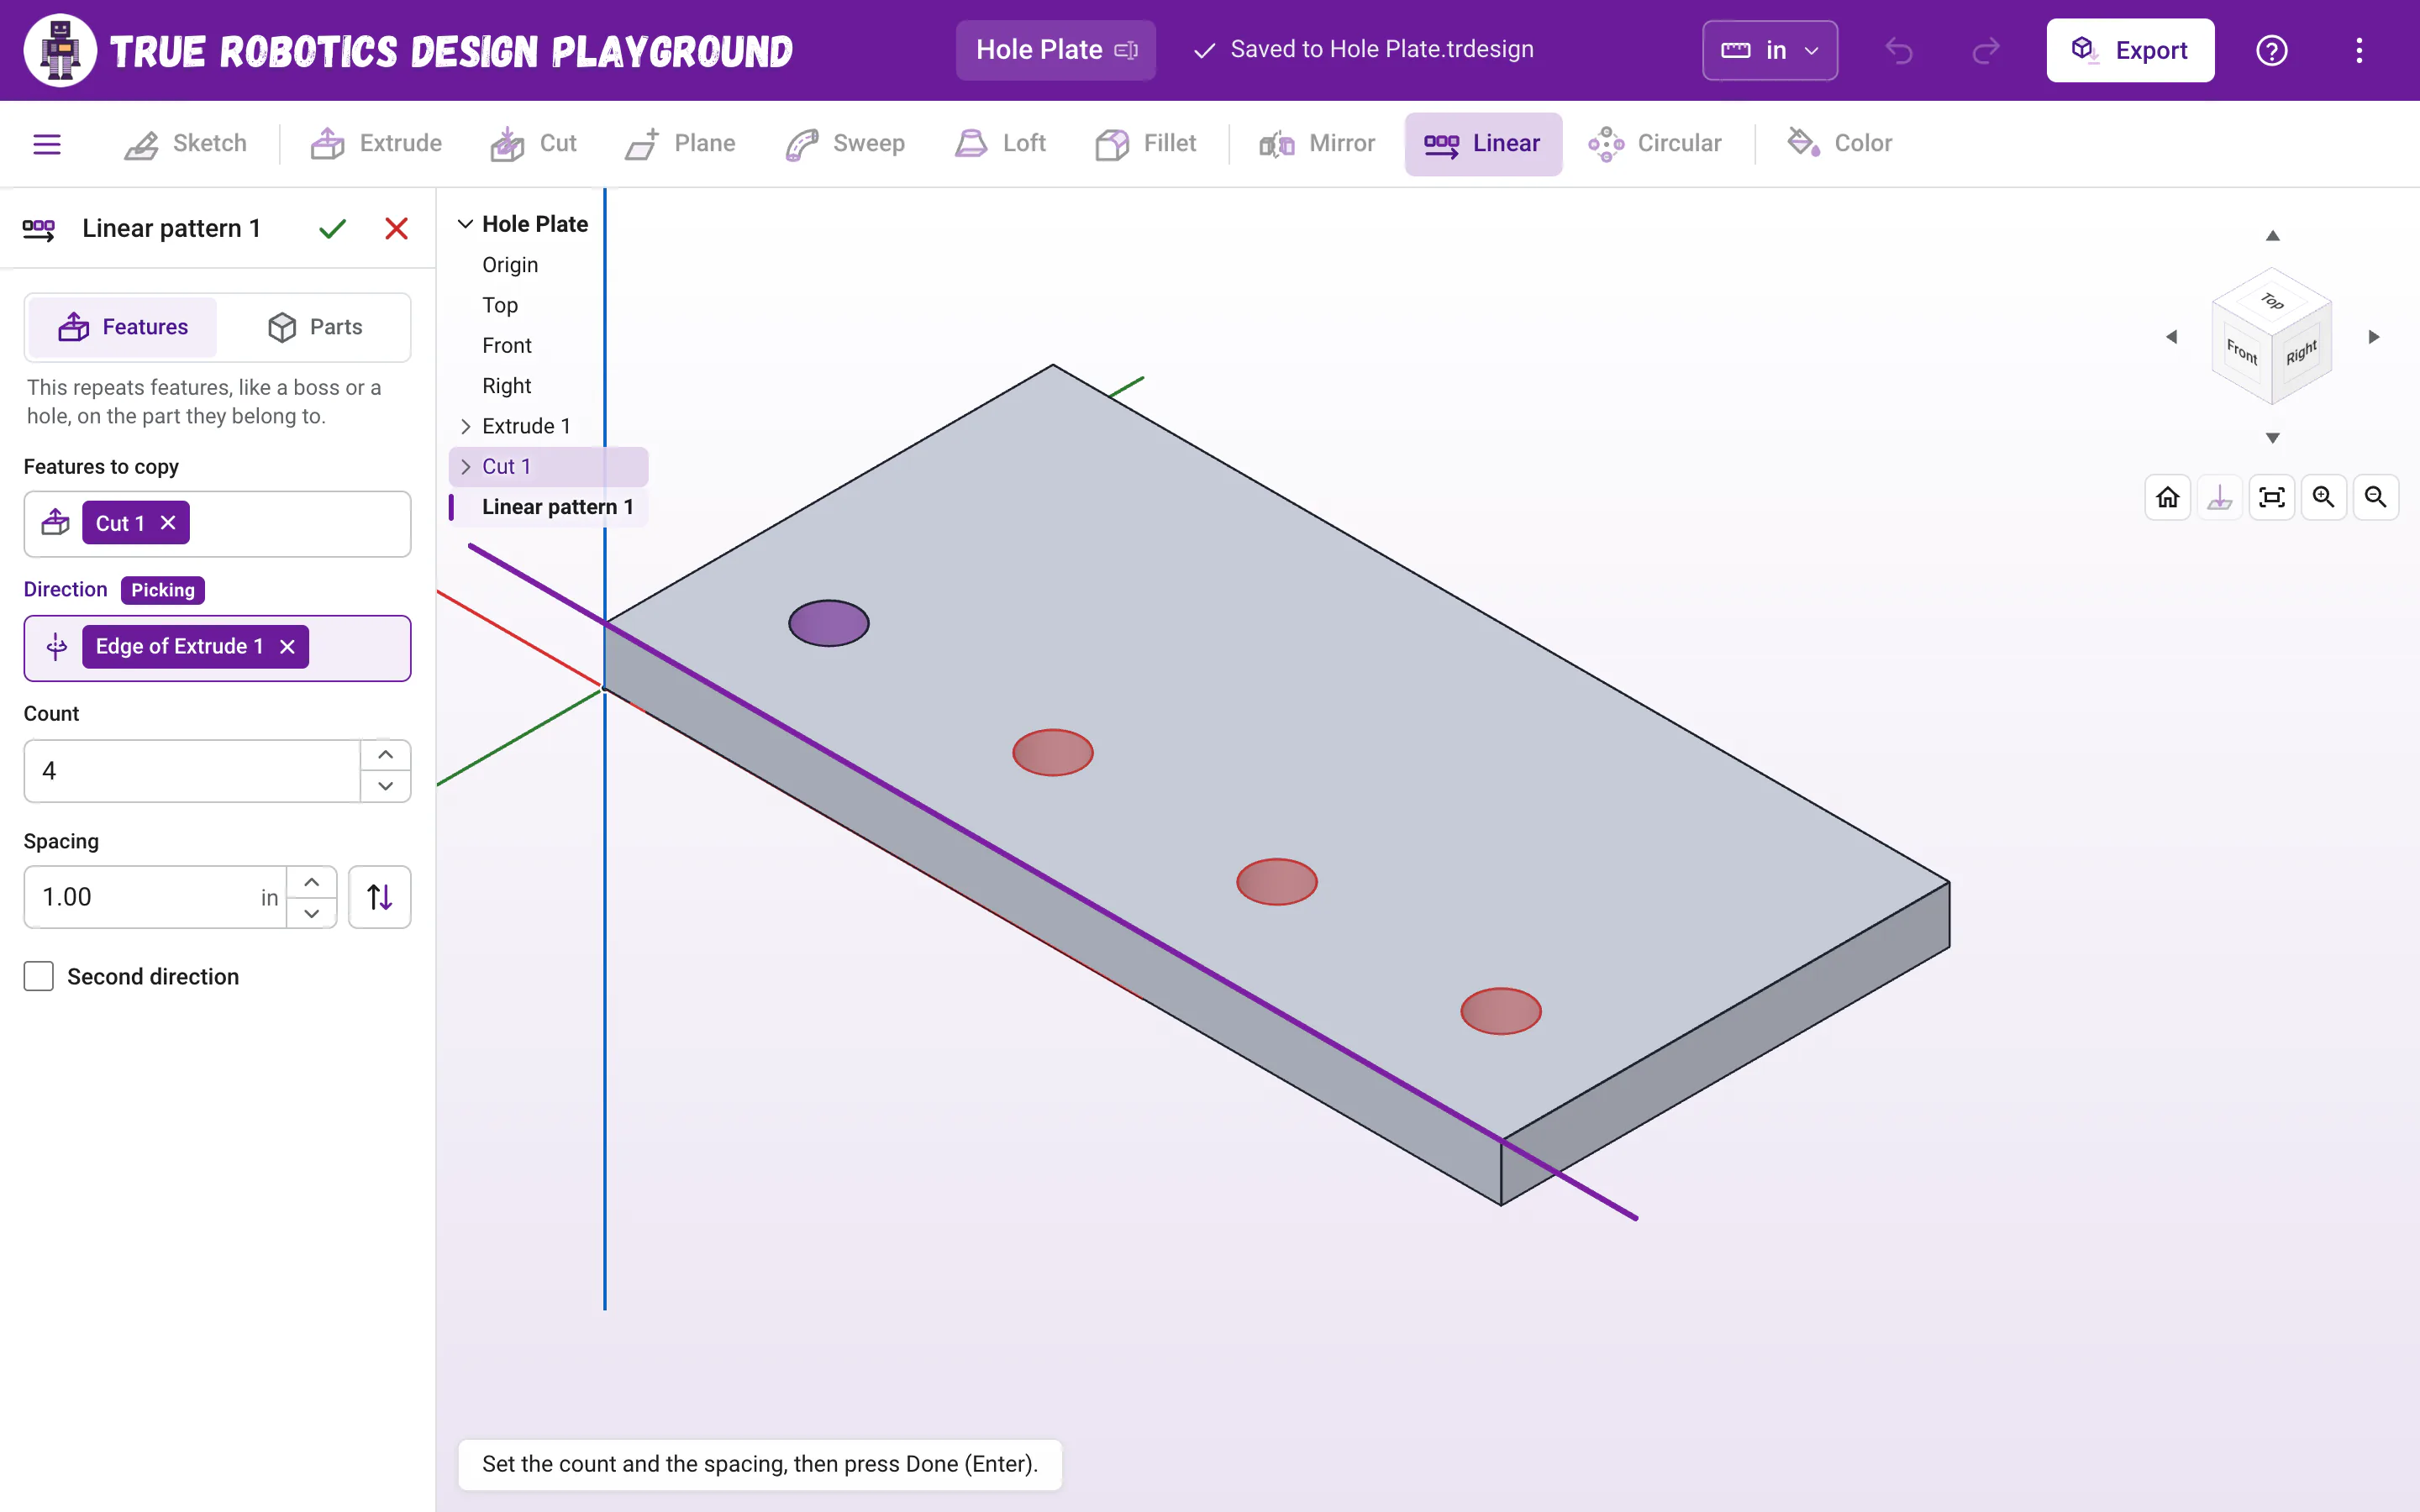
Start Linear pattern Click Linear in the toolbar, or press Shift+R (R for a row). The Linear pattern panel opens on the left.
Pick what to copy Click the feature to repeat, like the cut that made your first hole, in the feature list at the top left of the view or on the model. Pick more than one if you like.
Pick the direction Click the Direction box, then click a straight edge of your part. A sketch line works too, and so do an Axis you made and the red, green and blue origin axes that show up while the box waits. The red preview shows where the copies land.
Set the count and spacing Count is how many there are in all, the original included, so a count of 4 makes 3 copies. Spacing is the distance from one to the next. Type them, or click the little up and down arrows.
Finish Click the green check at the top of the panel. Linear pattern 1 joins the feature list.
Copies going the wrong way, right off the end of your part? Click the flip button next to Spacing (its tooltip says Run the other way), and the row runs the other direction from the original.
How do I make a grid of holes?#
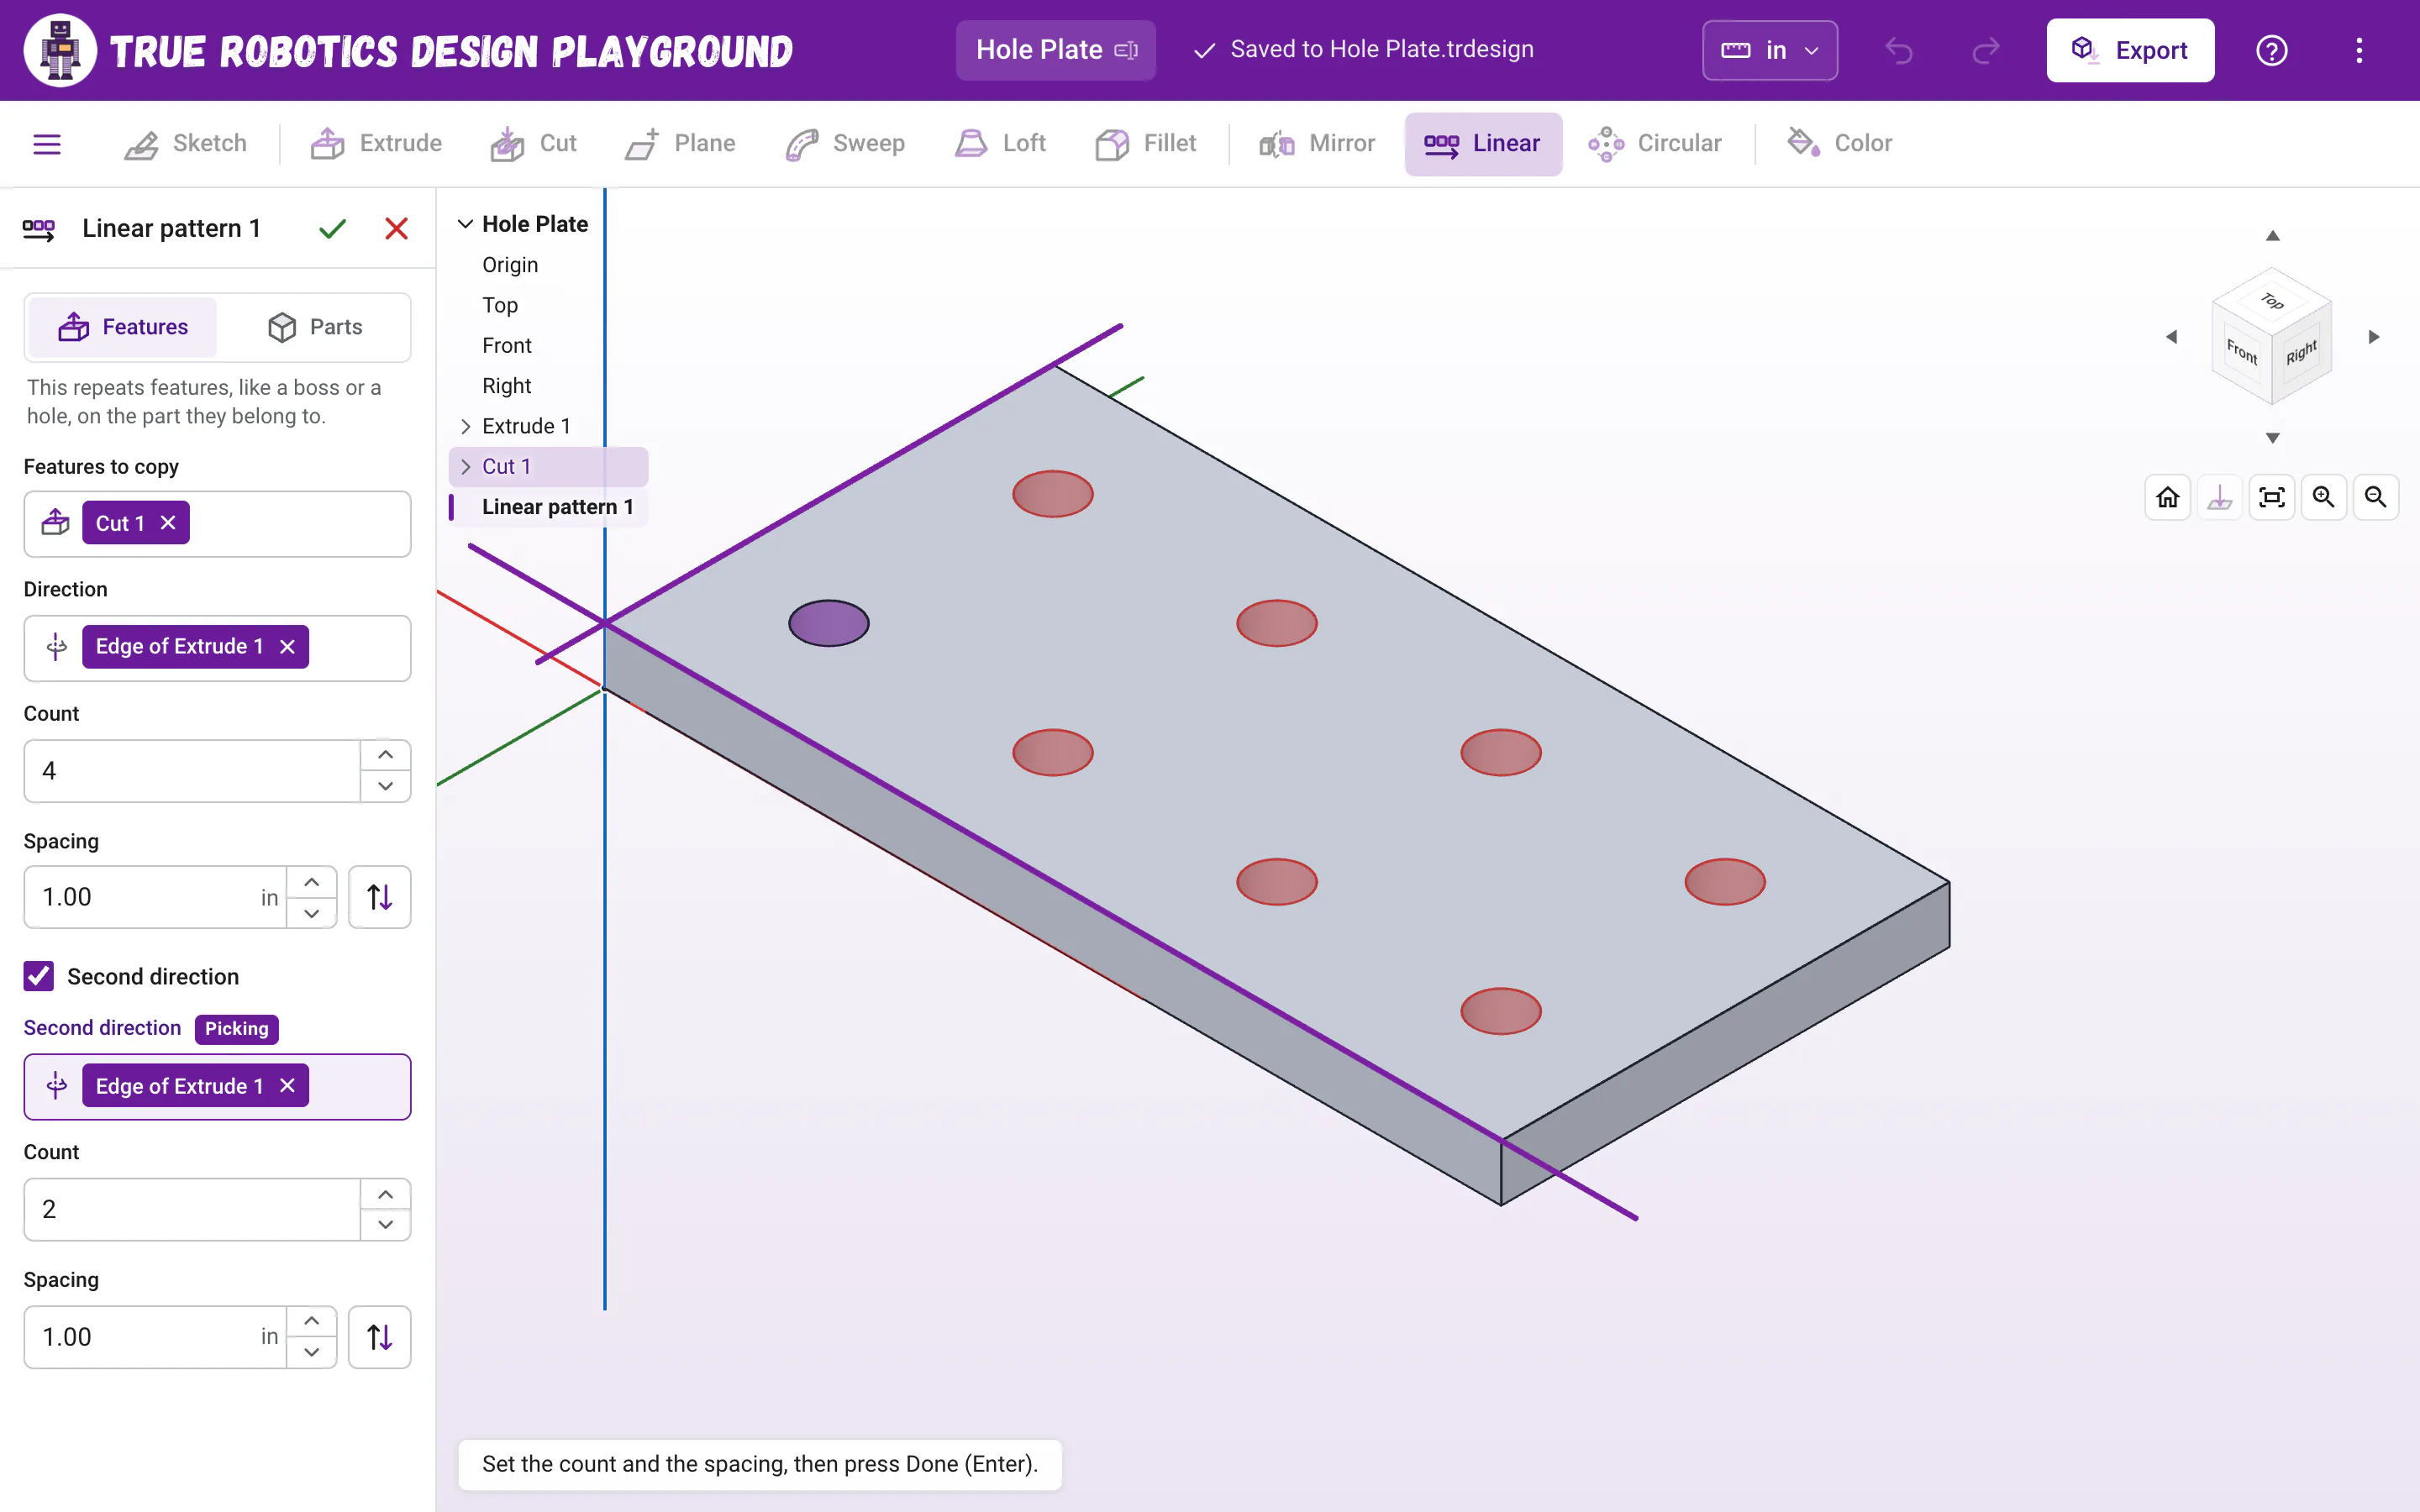
Check Second direction at the bottom of the panel. A second set of boxes appears: click its Second direction box and pick an edge that crosses the first one, like the short side of a plate, then set its own Count and Spacing. Four along and two across makes a grid of eight, perfect for a robot mounting plate.
What do Count and Spacing mean?#
| Box | What it means | Arrows step by |
|---|---|---|
| Count | How many in the row, counting the original. It goes from 2 up to 201. | 1 |
| Spacing | How far each copy sits from the one before it, in your project's units. It reads math, so 3/8 or 25 mm work. | 1 in (or 1 cm) |
Hold Shift while you click an arrow (or press Up and Down in the box) to step by 10, or Alt to step by a tenth. The preview updates on every step, so you can watch the row grow. A pattern makes at most 200 copies. Units and typing math has more about the boxes.
Features or Parts?#
With Features (the usual choice), each copy of a feature does what the original does: copies of a cut make more holes, copies of a boss add more bumps on the same part, and copies of a fillet or chamfer round or bevel the same edge on every copy. Copies of the feature that started a part, like a plate's first extrude, join that part where they touch it and become parts of their own where they don't. With Parts, whole parts are copied. A copy that touches a part joins it, and a copy that touches nothing becomes a new part, which is a quick way to make a set of matching spacers to print together.
Can I pattern a rounded or chamfered hole?#
Yes. Pick the cut and the fillet or chamfer on its rim, like Cut 1 and Chamfer 1, and every hole or slot in the row gets the same edge. The copies go in the order the features were made, so each copied hole is there before its rim is chamfered. A copy whose edge is not there, like one that lands past the end of the plate, is left out, and the panel says 1 copy of Chamfer 1 had no matching edge, so it was left out.
How do I change a pattern later?#
Double-click Linear pattern 1 in the feature list. The panel opens with everything as you left it, including any math you typed. Change the count, the spacing or the direction and click the green check, and everything after it rebuilds. Change the original hole, and every copy changes with it.
Good to know: Patterns in a sketch
Want a row of circles while you are still drawing? The sketch Linear pattern tool (W) repeats sketch geometry. The Linear pattern feature here repeats features that are already built.
What do the pattern messages mean?#
| Message | What to do |
|---|---|
| Pick a direction: a straight edge, a sketch line or an axis. | Click the Direction box, then a straight edge or an axis. |
| That axis is not straight. Pick a straight edge, a sketch line or an axis. | You clicked a curved edge. Pick a straight one. |
| Pick a straight edge of the face instead, a sketch line or an axis. | A flat face is not a direction. Click one of its edges. |
| The copies do not touch the part. | The row runs off the part. Flip the direction, or make the spacing smaller. |
| 1 copy of Fillet 1 had no matching edge, so it was left out. | A copied fillet landed where there is no edge like the one it rounds. Add the hole or boss it rounds to the pattern too, or change the spacing. |
| The second direction runs the same way as the first. Pick one that crosses it. | Pick an edge that goes across the first direction. |
| Pick the second direction, or turn the second direction off. | Click the Second direction box and pick an edge, or uncheck Second direction. |
| That makes more than 200 copies. Try a smaller count. | Lower one of the counts. |
| Use a whole number from 2 to 201. | Counts are whole numbers, starting at 2. |
| The spacing has to be more than zero. | Type a spacing bigger than zero. To go the other way, use the flip button. |
One hole, one pattern, and a whole row of perfectly spaced holes. Try Circular pattern next for holes around a wheel hub.
Questions and answers#
Does the count include the original?
Yes. Count is how many there are in all, so a count of 4 gives the original plus 3 copies.
How do I make a grid of holes?
Check Second direction in the Linear pattern panel, pick an edge that crosses the first direction, and set its count and spacing. Four along and two across makes eight holes.
Can I pattern a fillet or a chamfer?
Yes. In Features mode, pick the fillet or chamfer along with the hole or boss it rounds, and every copy in the row gets the same rounded or chamfered edge. A copy with no matching edge is left out, and the panel says so.
What can I use as the direction?
A straight edge of a part, a straight line in a sketch, or one of the origin axes, which show as red, green and blue lines while the Direction box waits.